| This page is under construction. Please excuse its informal appearance while it is being worked on. We hope to complete it as soon as possible! |
| Life's a hinch. |
|---|
PSST! While you're here...you can talk to me here! |
| Mario & Luigi: Sage Quest | |||
| Ratings |
Platform(s) | ||
 English logo. | |||
| Developer(s) | 
| ||
| Publisher(s) | |||
| Release Date(s) | |||
| Genre | Role-playing, Action-adventure | ||
| Mode(s) | Single-player | ||
| Media | |||
| Input | |||
Mario & Luigi: Sage Quest (also known as ![]() Mario & Luigi RPG 6!!! and
Mario & Luigi RPG 6!!! and ![]()
![]() Mario & Luigi + Sage Bros.) is a turn-based, role-playing video game developed by AlphaDream and published by Nintendo for the Nintendo 4DS in 2021. It is the eighth installment in the Mario & Luigi series, the sixth installment chronologically, and the fifth installment released for the Nintendo 3DS, succeeding Mario & Luigi: Bowser's Inside Story + Bowser Jr.'s Journey. While the first part of the game takes place in the Mushroom Kingdom, the rest of the game takes place in Moonshade Kingdom, where Mario and Luigi visit the now-corrupted kingdom which has been seized by its current queen; Eclipsa. Along their adventure, they will see old and familiar faces like Bowser, Kamek, and many others, while seeing new ones as well, some of which who join their quest to save the Moonshade Kingdom.
Mario & Luigi + Sage Bros.) is a turn-based, role-playing video game developed by AlphaDream and published by Nintendo for the Nintendo 4DS in 2021. It is the eighth installment in the Mario & Luigi series, the sixth installment chronologically, and the fifth installment released for the Nintendo 3DS, succeeding Mario & Luigi: Bowser's Inside Story + Bowser Jr.'s Journey. While the first part of the game takes place in the Mushroom Kingdom, the rest of the game takes place in Moonshade Kingdom, where Mario and Luigi visit the now-corrupted kingdom which has been seized by its current queen; Eclipsa. Along their adventure, they will see old and familiar faces like Bowser, Kamek, and many others, while seeing new ones as well, some of which who join their quest to save the Moonshade Kingdom.
The game has amiibo support just like previous Mario & Luigi titles, examples being Mario & Luigi: Paper Jam and Mario & Luigi: Superstar Saga + Bowser's Minions, with the amiibo from the Super Mario series being compatible. See the page's amiibo section to see all the compatible amiibo figures.
Story[]
Introduction[]
In another kingdom, called the Moonshade Kingdom, resides a race of half moon-headed species called "Moonars". This kingdom was ruled by King Neith, and most of the residents lived a peaceful life. That is until he mysteriously disappeared one day, leaving the kingdom without a ruler. His younger sister, Eclipsa was elected to be the next ruler, and under her rule, the kingdom had stricter rules and law. In no time, she went mad with power, and many residents eventually migrated to the Mushroom Kingdom.
Back at the Mushroom Kingdom, Mario and Luigi are inside their house, with Luigi cooking some breakfast and Mario waiting at the table. While he is doing this, there is a knock on the door. Luigi goes to answer it, and sees Mailtoad, who gives him a letter from Princess Peach. He gives the letter to Mario before going back to cooking. The letter says Mario and Luigi must come over to Peach's Castle for something she will explain when they get there. Luigi serves breakfast once Mario is done reading, and after eating, the two rush off to Peach's Castle.
Upon arriving the castle's throne room, where Princess Peach (and many others, like Toadsworth, Starlow, etc) is, she reveals that there is someone who wants help, which is why they wanted Mario and Luigi to come over. A red Moonar slowly walks from behind the princess, and introduces herself to the Mario Bros. as Rhea. Rhea explains what happened on the Moonshade Kingdom; with King Neith's disappearance, his younger sister Eclipsa was elected to be the new ruler, and many were not satisfied with the new laws, so they left the kingdom. She ended up at Peach's Castle while aimlessly roaming around the Mushroom Kingdom, and after she and her friend Tethys separated while travesing through a forest.
Meanwhile at Bowser's Castle, a badly beaten up Bowser is being tended by Kamek. While Bowser complains about his plans foiled by and losing to the Mario Bros. once again, Private Goomp, Corporal Paraplonk and Sergeant Guy tell him that there is a visitor, another Moonar, this time a cyan Moonar who happens to be named "Tethys". Tethys introduces himself to Bowser, and was looking for some shelter and a guardian after he separated from his friend Rhea. While annoyed that he just barged right in uninvited, Bowser takes Tethys as one of his minions, especially after knowing he can build and create all kinds of things.
Mario and Luigi agree in helping Rhea out so she can reunite with Tethys and bring peace to the Moonshade Kingdom. The bros, Rhea and Starlow head out of Peach's Castle and out of Toad Town, though before they go out further into Briskbreeze Fields, a Blue Toad gives them an Attack Piece for a Bros. Attack. They head out to Briskbreeze Fields, where there is a Big Tail Goomba in the fields that knocks over a huge rock, which halts their progression. Unable to trek on forward without Hammers to destroy the rock, they are forced to travel to another area north from the fields; Rabbit Village. During their time at the village, the quartet ask the villagers who can make Hammers. One rabbit tells them there is a blacksmith in the village that could make Hammers for them; Pikasmith. However, he is not here at the moment, as he is out in the eastern part of Briskbreeze Fields to get resources.
Mario and Luigi go to East Briskbreeze Fields to find Pikasmith, and when they do find him, he is being attacked by two Needlorbs. Unable to jump on them, Rhea steps in to assist them. Using her Lunarang, the trio are able to defeat the Needlorbs and save Pikasmith. As a reward for helping him, Pikasmith will make two Hammers for both Mario and Luigi once he gets back to his place in Rabbit Village for free. They return to the village, and Pikasmith makes the Hammers as he promised. With these Hammers, Mario and Luigi are able to destroy the rock, giving them access to the rest of Briskbreeze Fields. At the end, there is a Big Tail Goomba blocking next area, and they are forced to battle it. The trio manage to defeat the humongous Tail Goomba, and enter the next area; Treeway Woods.
Part 1[]
Mario, Luigi and Rhea are greeted to a friendly Stumpling as they enter the forest. Rhea mentions that this is where she and Tethys got separated, though she never went through this part of the forest, as she never saw any Stumplings. Before they could go any further, they are attacked by a swarm of Buzzaps, but they are able to defeat them and continue to move forward the forest. Deeper into the forest, they find Wiggler, who recently moved his garden to the woods. Rhea accidentally steps on Wiggler's flowers, which enrages him, starting a boss battle with him. After defeating him, Rhea apologizes for what she did, and promises to make up for it. They leave the woods and they end up in Sapphire Shore, which connects to the next major area, Craggy Desert.
As Mario and Luigi move through the desert, they enter a small town called Cragnelburg with cactus-like residents called "Cactaceonians", which is being raided by a Bandit gang, lead by an aqua-green Bandit. Before they can do anything about them, they immediately leave with all the loot they have in their possession. The bros follow them into the desert, where they scatter themselves all around the area. They are all caught eventually, and the loot they've stolen is recovered, before they face the aqua-green Bandit, Randal. After his defeat, he gives them back the loot he stole, but proclaims that "this is not the last of [him]" and scurries off, but not before leaving behind a pack of seeds.
After bringing in the pack that belongs to a cloaked figure in a certain district in the town, they tell them of a underground temple called "Craggy Catacombs" and that there is another piece of treasure they want, marks where the area is on their map, and tells them to dig under the sand to uncover the entrance. Before they leave, she gives them a pair of white socks; the Dash Socks, so they can find it quickly so they do not have to endure the heat, and explains how they work (press and hold ![]() to charge up and release to start dashing). Mario and Luigi eventually find where the temple is, and they start digging to uncover the entrance to the catacombs. Inside the area are lots of Phanto Masks, some are inanimate, some are animate.
to charge up and release to start dashing). Mario and Luigi eventually find where the temple is, and they start digging to uncover the entrance to the catacombs. Inside the area are lots of Phanto Masks, some are inanimate, some are animate.
Getting past the many enemies and the animate Phanto Masks, the bros eventually reach the very bottom of the catacombs, with the treasure the cloaked figure was talking about; a vase with fertile sand made out of red jewels. Luigi goes to get it, but Hisstocrat pops up from the sand, battling the Mario Bros. They come out triumphant, and they retrieve the treasure, giving back to the cloaked figure. They thank the bros for their hard work, and gives them Badges as "tokens of gratitude" and explains what they do (both in battle and on the pause menu screen).
In another district of Cragnelburg, two young Cactaceonian daredevils, Peroski and Schlumbert (nicknamed the "Glochildren"), are performing a Spin Jump to get over a large gap between two house roofs. Upon seeing the technique, Mario asks if they could teach him and Luigi the move they just performed, in which they agree in doing. After mastering the technique, they continue onward, passing over a large gap in the desert to reach another part of the area and they continue to the eastern part of Sapphire Shore. Stuck sleeping in the sand is a oyster, who Rhea inadvertently wakes up. While irritated that someone disturbed his sleep, he shrugs it off immediately, introducing himself as Quahoyster. He is an Oystearl and an outcast to other Oystearls in Whimsical Ocean. He travels with Mario and Luigi, looking for someone to be his friends, earning them a new Ally. Mario and Luigi move on to Plumdrop Rainforest, a poisonous lakeside/rainforest.
Part 2[]
At the eastern part of the rainforest, they find Slanito, a poisonous Toad who Mario and Luigi already encountered before. When Starlow asks if he is cause of this place being polluted, he responds by saying he is not the cause for the most part, telling them there was a gigantic Piranha Plant (Petey Piranha) ravaging the area when he came around. Slanito explains he "accidentally" poisoned him with one of his Poison Mushrooms, which he then later on created lots of poison which affected the whole forest. He also states still has a score to settle with the Piranha Plant, but if they were to interfere, they would not like it. Despite his warnings, they still continue on in the forest, and eventually encounter Slanito again. Fed up with them following him, Slanito battles Mario and Luigi, however he is easily beaten. Slanito calls a truce between the bros so they can defeat the large, poisonous Piranha Plant he was talking about, becoming a temporary Ally.
At the end of the eastern part of the rainforest is Petey Piranha (referred to as Polluted Petey Piranha), who has a different coloration and has the ability to spit out poisonous Goop. Right now, he is asleep, but Kamek appears to wake him up to hinder their progress. Mario and Luigi face off against him and defeat him, causing Kamek to retreat. Slanito thanks Mario and Luigi for finishing what he wanted to do so himself, and runs out of the rainforest. Continuing to the north-eastern part of Plumdrop Rainforest, the bros find a boneyard with Dry Bones roaming around, and a haunted mansion named the Conundrum Manor. Luigi explains that this all feels familiar to him prior to him and Mario entering the mansion (where the front door immediately locks behind them) to see that there are ghosts roaming about.
In multiple parts of the mansion, Toad spirits that are inside vases teach Mario and Luigi about the puzzles inside the mansion, and even teaches them about the Mini-Mario and Mole Mario techniques. At the a certain floor of the mansion, they meet up with King Boo, who is having tea with another Boo. He notices the Mario Bros., mostly Luigi, lamenting the previous times he trapped Mario in a painting, and the previous battles he had with the Luigi. He orders the Boo he was having tea with to attack the bros. Said Boo combines itself with many other Boos, turning it into a "Jumb-Boo" and attacks them, however it is defeated, and releases multiple Boos that disappear immediately. Up at the last floor, they meet King Boo once again, who transports them into the Paranormal Dimension and faces them. He is defeated, leaving behind three gems that are on his crown. After putting each one in their respective holes, the front door opens, allowing them to leave.
With their newly acquired techniques, they are able to leave Plumdrop Rainforest through the northern pathway, and enter in the northern part of Treeway Woods. Taking the southern west path leads them to the next part of Rabbit Village, and they leave the area to Briskbreeze Fields. A Green Toad comes up to Mario and Luigi to alert them that Toad Town and Peach's Castle was attacked by Bowser and his minions, and the princess has been kidnapped once again. He tells the bros that he last saw them going to a desert area. Mario and Luigi quickly go back to Craggy Desert, and visit the Glochildren again in a district of Cragnelburg, who are working on a new move, which they dub the "Spring Jump". They notice the bros and ask them if they want to learn their new move, as their faces tell them they want to. After mastering the Spring Jump, they reach a fortress, called "Fort Fossil", where Starlow thinks the princess might be held captive inside.
Deeper inside the fortress, the bros and company are thrown in a jail cell by the Elite Trio. Inside the cell are some other Toads, Cactaceonians, and Randal the Bandit, who was recently thrown in here for theft. Despite their past encounter, Randal offers to help Mario out of jail by joining their party, becoming the third permanent Ally. The bros manage to escape the prison and continue on through the fortress, finally confronting the Elite Trio once again. Private Goomp is a little stunned that they managed to escape, but he, Corporal Paraplonk and Sergeant Guy battle Mario and Luigi, but the trio are defeated. They reach to where "Princess Peach" is, but they quickly realize it is Kamek, who was just trying out the dress again, as he still loathes the blue robes. Kamek attacks Mario and Luigi, and despite his powerful magic, ends up defeated. He quickly flies out of the fortress and away from the bros.
Part 3[]
From the fort, Kamek can be see heading east. The bros chase after him, and end up in the western part of Sapphire Shore, where Kamek is seen near Sapphire Docks, where the S.S. Boletus is. Before it can head off the sail, however, Kamek uses his magic to summon Queen Calamaria from the water, who promptly knocks Kamek into the water as she emerges from the water, and attacks Mario and Luigi. She is quickly defeated, and the S.S. Boletus starts to sail across the sea. Bowser and Bowser Jr. suddenly appear, flying in their Koopa and Junior Clown Cars respectively, the former having Peach held in there. Next to them is Tethys, who is on a hover machine to which he calls a "Hovercopter". He uses it to fire a laserbeam at the S.S. Boletus, sinking it into the ocean. After it sinks, the bros have to swim underwater to chase after Bowser, though they meet up with Cloyster, who was trying to find Quahoyster. Seeing him travelling with Mario and Luigi, he wishes him good luck out there after Quahoyster tells him that he will be fine venturing with the bros. They manage to get out from underwater via a Yellow Warp Pipe that leads them to a snowy island called Bittercold Isle, which is near a recently active volcano, Grumbledome Volcano. While it was dormant before, fortunately, a barrier was created so most of the lava and magma would not reach the outer areas of the island. They do not know what caused the volcano to erupt recently, and nobody is brave enough to find out themselves. Mario and Luigi go and investigate, venturing up the mountain surrounding the volcano's crater, Mount Grumbledome. While they climb the mountain, Sergeant P. Beetle and his squadron of Para-Beetles can be seen through the mountain's telescope near the summit.
Once they reach up to the mountain's summit, the volcano can be seen, and Luigi climbs up to the top of it to investigate. The volcano starts to rumble, causing Luigi to lose balance, though he manages to correct himself. Unfortunately, Sergeant P. Beetle and his squadron accidentally fly by him very fast, causing him to fall into the volcano's crater (which he promptly apologizes for). Mario follows him down and enters Grumbledome Crater. As the bros slowly descend downwards into the volcano's crater, learning the Bros. Ball after they collect a scroll after playing a minigame from a Magma Mole, they find Draggadon, who ultimately the reason why the formerly dormant volcano recently erupted. Draggadon attacks the bros and is quickly beaten, causing it to sink into the lava. A friendly Miner Mole, who was awoken by the battle, offers them his cannon to get out of the volcano with no charge just for defeating Draggadon. Now that they are out of the volcano and are back on the island, Starlow suggests that they must get off the island. A Eski-toad in the village tells them that there is someone willing to sell a boat. A cyan Monty Mole in the village has a cyan-colored pet Dorrie called "Tundorrie", and he lets the bros ride it to where the princess is being held captive in. Mario and Luigi hop on her back and rides her across the ocean, all the way to another part of the Mushroom Kingdom to save Princess Peach, somewhere in Koopa Reef, which connects to Bowser's Castle.
As the bros venture through the area, Kamek warns Bowser that Mario and Luigi are coming to the castle, though this does not mean anything since Private Goomp, Corporal Paraplonk and Sergeant Guy are on entrance-guarding duty, and Tethys is on the job, creating whatever he can to stop them once they manage get in. Once they get to the castle entrance, Private and Corporal alert Sergeant Guy of their arrival, and he pushes his Banzai Bill Cannon where the entrance door is, and if they try to go inside, the cannon will fire at them. Unable to enter normally, Starlow suggests a different solution to get inside, or at least try to get around the cannon. They manage to get inside through the freezing room (in spite of the low, cold temperature). In the rooms, Tethys can be seen. He is surprised that the bros are here, but he says that this is a good time to show off his recently, newly created invention, the Mecha-Blooper. The mechanical created Blooper is quickly defeated, so Tethys has to finish them off himself. He is defeated, and starts to complain about losing to the bros, and they decide to help him out despite all the problems he has caused them, like destroying their ship. He forgives the two and joins them in their adventure, becoming the fourth permanent Ally.
Getting closer to the top, Mario and Luigi encounter Bowser Jr. and Kamek, who question how they managed to get up here, let alone get inside since Private Goomp, Corporal Paraplonk and Sergeant Guy were on guarding duty. They battle the bros, with Kamek using his magic to assist him and Bowser Jr., though they are still defeated nonetheless. They reach the throne room, where Bowser, who oddly has a raccoon tail, and Princess Peach (who is held captive) are. Bowser battles the bros, using an array of fire breathing attacks, tail swipes, and hammer throwing. "Bowser" is defeated, and explodes, leaving behind only a Tail Goomba which promptly escapes. They realized that the Bowser they fought was a disguise used by a Big Tail Goomba, and the real Bowser mocks them for their futile efforts (despite admitting that they did their best) at stopping him and rescuing the princess over the intercom. The Princess Peach that was held captive in the room was just a cardboard cutout. The bros looks out the window to see Bowser escaping with Princess Peach in his Koopa Clown Car, though using the Bill Cannons, they manage to shoot it down, causing it to crash down into Moonshade Kingdom.
Part 4[]
Mario and Luigi go back to where Tundorrie is and rides her to the Moonshade Kingdom, stopping at the docks. Before they can go out, they have to transfer their foreign coins into "Moonshade Coins". Since the kingdom is not affiliated with the Mushroom Kingdom, they cannot do this, so they have to give up their coins and go out to get "Moonshade Coins" in the kingdom until they decide to move back to the Mushroom Kingdom. They run into a village, which is in complete ruins, with Moondroids and Saturn IV Driones roaming about. Mario and Luigi battle their way through the onslaught of enemies in the village, and reach up with the mayor, who is hiding in the basement of his own house. He tells them that the village was recently attacked by Queen Eclipsa and her army, suspecting there were any Half-Moon Resistance members, bringing any suspects to prison in Eclipsa Castle. Mario and Luigi trek forward in Ganymede Plains, eventually finding the castle the mayor was talking, but they cannot get inside because the entrance door is locked. They go to western part of the plains, eventually finding a ground hatch shelter. A Moonar with facial paint opens the hatch, revealing himself as Antheny, a member of the Half-Moon Resistance, and he and the rest of the group are hiding from Ecplisa's forces in the shelter. Before he can let the bros in, however, they must tell him if they are not here to cause trouble, and have nobody following them. After telling him their true intentions, they are allowed inside.
Inside the shelter, there are multiple Moonars, most of them having facial paint on them and the Half-Moon Resistance insignia on their own clothes. They tell them all about Moonshade Kingdom prior to Eclipsa's takeover. Mario and Luigi eventually find a Moonar who has a pale, dark-spotted Chain Chomp who he calls a "Moon Chomp". He had some playing cards left in what is left of his house in Umbriel Village, but he is afraid going out in the open with Ecplisa's forces out there. Mario and Luigi go back to the village and grab the playing cards, and go back to Resistance Moonshetler to give the cards to the Moonar. As a reward, they let them take care of his Moon Chomp, giving them their fifth permanent Ally. Deeper in the shelter, they find two Moonars working on an Umbriel Cannon, but they are missing a "Moonanball". They say that there is someone selling them in "Pallene Outskirts", but they cannot go outside with lots of enemies wandering around. Mario and Luigi go out to the outskirts to purchase a Moonanball. While there, they meet up with Bowser. Starlow asks where the princess is, and he says that he has no idea where she is, as she somehow managed to get out of his Koopa Clown Car. He prepares to face Mario and Luigi for foiling his plans, though he is defeated, allowing them to move on to where the Moonanball shop is. They pay for the cannonball for 500 Moonshade Coins, they obtain the Moonanball and go back to shelter to give the two Moonars so they can load up their cannon. They give them the cannon, and then they push it near the entrance door of Ecplisa Castle, busting it open.
Many Half-Moon Resistance members hear the loud noise and come out inside and storm into the castle to save their imprisoned fellows from having their "lunar energy" being used to power the castle. Mario and Luigi trek inside the castle as well, eventually coming into a room where there is lots of Moondroids and Half-Moon Resistance members. They engage themselves in a short war after some banter from each side. Mario and Luigi are dragged into the war, and have to hammer themselves out of the situation to reach the door on the Moondroid's side. The bros continue their trek through the castle, eventually finding the prison room where most Moonars are kept captive in. Mario and Luigi must find the keys for the prison cells to let them out. After beating some Moondroids with the keys, they open the prison cells, freeing the captive Moonars who promptly leave the castle. Mario and Luigi reach a certain room where a Moonar named "Callisto" speaks over the intercom, telling the bros that, while impressed they managed to reach this far into the castle, they will not get any farther, and sends out a huge, mechanical robot that he lovingly calls "Titan". Mario and Luigi manage to dismantle Titan, and trek forward through the castle, but not before Callisto threatening the bros that he will deal with them later.
Higher up in the castle, Callisto speaks to the bros over the intercom again. He asks the bros how the area looks at the moment before saying that this will be the last sight they will see of the castle. He drops them into the castle sewers underground, telling them since they are plumbers, they should be cleaning dirty pipes in the sewers for the rest of the time they are down there. Mario and Luigi start fixing up pipes to find a way to get out of the sewers, but they hear bubbling from the sewage water. Luigi and Starlow check it out, and a rusty, robotic claw grabs Starlow and brings her into the sewage, startling Luigi. Without Starlow, Mario and Luigi must continue on, finally opening the exit to the sewers. Before they can leave, a robotic crab jumps from the sewage with Starlow, and immediately attacks Mario and Luigi. The bros emerge victorious and the robot shuts down, saving Starlow. They exit the sewers and continue higher in the castle.
Part 5[]
In another room, they find Callisto, who is complaining about a certain someone who stole one of the keys he has. He notices Mario and Luigi behind, completely shocked they managed to get out of the sewer. Callisto decides to battle the two, with a Nova Clock in the background, giving him benefits in a continuous cycle; raising stats, recovering HP, covering him in a moon shield, etc. Despite the assistance, Mario and Luigi are still able to defeat Callisto, though he manages to escape through the window using his Hovercopter, though he leaves behind a key. However, he accidentally bumps into Bowser Jr. in his Junior Clown Car with Kamek by his side. The two get into an argument with while Kamek tries to calm down the young Koopa. Callisto shoots down the Junior Clown Car with a beam of lunar energy, causing him to eject out of the car and hangs onto the Callisto's Hovercopter to damage it with a hammer, causing it to spiral to the ground, with Kamek following them. Starlow questions what happened, but shrugs it off, and suggests Mario and Luigi should grab the key and trek on.
Mario and Luigi continue on until they reach a door which leads to the throne room, which is locked. They think the key Callisto had dropped would open the door, but it is too big for the lock. They hear faintly crying for help in the basement and go down into it after unlocking it with the key they have. It is very dark down there, though Starlow lights the way. The bros see a chest with a crescent-shaped lock on it. The person trapped inside the chest reveals himself to be the former king of Moonshade Kingdom, Neith, and two of his guards are inside with him. He tells them that Eclipsa trapped him inside a chest and threw it in the basement, hoping nobody would find him in there. He said that there is a key for the lock, but he does not know where it is, though a good guess would be that either Callisto or Eclipsa has the key. A Nabbit can be found hiding in some part of the basement, with the key. He notices the bros, and immediately runs off, dropping the key to the chest he had, with Starlow calling that a convenience. Mario grabs the key, and uses it to open the chest. Neith thanks the bros for their help, and says they must go and teach his wretched sister a lesson. Starlow says the door leading to the throne room is locked, so Neith has to unlock, or in this case, destroy it hismelf. However, without most of his power, it will take longer than expected to destroy it. The lock is finally destroyed after a while, though it weakens him. Using the last fraction of his power, he fully heals the party's HP and BP/SP, and tells them to go onward while he and his guards hide in the basement in the meantime.
Mario and Luigi enter the throne room, with Eclipsa sitting on her throne with four Moondroids near the throne, and Princess Peach, who is caged inside a barrier nearby. She is proud that the bros managed to make it this far, and said she has heard about them via Callisto, though she never caught their names. Starlow introduces the bros to her, saying their names are "Mario" and "Luigi" and tells her to release Princess Peach or else they will pummel her. Eclipsa laughs it off, telling Starlow and Mario Bros. that, even if they made it past most of her underlings, including Callisto, they have no idea what or who they are dealing with. She sends out the Moondroids, though Mario and Luigi easily destroy them. With nothing left to throw at the bros, she decides to face them herself. Using her staff turned scepter, she is able to cast multiple lunar energy-based attacks at Mario and Luigi. Eclipsa is still beaten, though she will not accept defeat from the bros. Suddenly, Bowser in his badly-damaged Koopa Clown Car blasts through the wall using a cannonball. Bowser jumps right in, saying he was looking high and low for Princess Peach, until he saw her in the castle through the window, and had to come in here to snatch her. Eclipsa immediately blasts Bowser with her staff, though he somehow absorbs the magic, transforming himself into a powered-up form which he dubs "Lunar Bowser". He immediately punches Eclipsa away, who accidentally presses a button which activates the platform they were standing on, which flies high above the castle. Now in the skies, Bowser promises to destroy Mario and Luigi and rule over the Mushroom Kingdom with this new power.
Mario and Luigi manage to weaken and slowly expel the lunar energy from Bowser, though before he could deal the final blow with what last of the energy he has, Eclipsa stops him by ensnaring him in place. Using his hammer, Mario and Luigi send Bowser flying back to the Mushroom Kingdom and into Bowser's Castle, where he expels the last of the lunar energy. The platform the bros and Eclipsa were standing on falls back to the ground. Eclipsa tells them to free Princess Peach and leave, telling them to apologize to her brother and the rest of the kingdom for what she has done, and also tell them that they do not have to worry about her ever again before finally collapsing on the ground, unconscious and presumably dead. Mario hits a button which removes the barrier the princess was held captive in. Princess Peach thanks Mario and Luigi for saving her, though she does feel bad for Eclipsa's death, though it turns out she is still alive, barely clinging on to life. She mocks them for thinking she is dead, before weakly coughing.
Ending[]
With peace restored to the Moonshade Kingdom, King Neith thanks the Mario Bros. and their partners for saving his beloved kingdom. The bros prepare to leave the kingdom with Princess Peach, while Rhea, Tethys and Moon Chomp stay behind. Before Mario and Luigi and the rest ride back to the Mushroom Kingdom, Rhea stops them, thanking them for everything, not only for saving the kingdom, but for taking her along this adventure and helping her reunite with her best friend. She tells Mario and Luigi that she could go to the Mushroom Kingdom for a vacation someday before hugging Mario while Tethys gives Luigi a handshake and Moon Chomp licks him. Princess Peach gives her farewells to the Moonars before she, Mario, Luigi, and the rest of their partners that are not staying behind ride back to the Mushroom Kingdom on their boat.
During the end credits sequence, we see pictures of Mario and Luigi returning to the Mushroom Kingdom with the princess and with the rest of their party, while Rhea and Tethys play with the Moon Chomp back in Moonshade Kingdom, in the Umbriel Village which has been rebuilt, Quahoyster goes back into the Sapphire Oceanbed hoping to make friends with his species, and Randal goes back to his hideout where his gang of Bandits are, telling them that he retires from being a bandit, giving his leadership to another Bandit named "Scandal". Mario and Luigi return to Toad Town with Princess Peach, where it is completely rebuilt after Bowser's attack. The Toads rejoice over the princess's return. Toadsworth hears the commotion and is completely delighted that Princess Peach returned safely. The elderly Toad thanks Mario and Luigi for saving the princess before carrying her back into the castle. Back in Bowser's Castle, Bowser is being tended to once again by Kamek, with Private Goomp, Corporal Paraplonk, Sergeant Guy and Bowser Jr. helping out as well. Bowser thanks them for the company, but still resents his plans being foiled once again. Back at the Moonshade Kingdom, it is shown that Eclipsa and Callisto are locked in the castle jail for their actions.
Gameplay[]
The core gameplay of Mario & Luigi: Sage Quest remains unchanged from past Mario & Luigi games; in the overworld, the player takes control of both Mario and Luigi. By using the ![]() or the
or the ![]() , the player can move the bros around the field. Pressing
, the player can move the bros around the field. Pressing ![]() will cause Mario to perform the action currently selected (ex. Mario will jump when the Jump action is selected), and the same goes for Luigi by pressing
will cause Mario to perform the action currently selected (ex. Mario will jump when the Jump action is selected), and the same goes for Luigi by pressing ![]() and the current ally in their party will follow them. The
and the current ally in their party will follow them. The ![]() button causes everyone to jump together when pressed. These actions can be changed with the
button causes everyone to jump together when pressed. These actions can be changed with the ![]() and
and ![]() buttons or with the icons Touch Screen. Also by using the Touch Screen, the player can switch between the Allies they currently have in their party, and by selecting their icon again while they are in the overworld, or by pressing
buttons or with the icons Touch Screen. Also by using the Touch Screen, the player can switch between the Allies they currently have in their party, and by selecting their icon again while they are in the overworld, or by pressing ![]() , they will use their own overworld ability.
, they will use their own overworld ability.
Scattered around the overworld field are, for the most part, blocks that can be hit from underneath with a simple Jump, enemies that the bros. can enter a battle with (either by touching them or performing a First Strike), coins, switches, and other field features (beanholes, etc). The top screen shows the field while the Touch Screen shows a zoomable mini-map (a spinning blue crystal arrow shows where the Mario Bros. are currently standing), the option to pause and save manually, icons for the current Allies they have in their party, icons for their overworld moves, and, should the player choose to do so, any pinpoints they have placed in an area.
By pressing ![]() or by selecting the pause icon on the Touch Screen, the game will be paused and the player will be greeted with a menu where they can see the amount of coins, items, gear and badges the player has collected, the Bros. Attacks learned (where the player can practice up on them or watch a "demo" of the move when not in combat), info on Mario and Luigi's stats, how much Experience Points they have (and how much more to another level up) and their current Rank, the current play time, the map of the areas the player has visited at least once (otherwise they are seen as a grey silhouette until visited), and the Badge Meter when it becomes available. Sometimes when the player pauses, the game will remind them to take a break when needed.
or by selecting the pause icon on the Touch Screen, the game will be paused and the player will be greeted with a menu where they can see the amount of coins, items, gear and badges the player has collected, the Bros. Attacks learned (where the player can practice up on them or watch a "demo" of the move when not in combat), info on Mario and Luigi's stats, how much Experience Points they have (and how much more to another level up) and their current Rank, the current play time, the map of the areas the player has visited at least once (otherwise they are seen as a grey silhouette until visited), and the Badge Meter when it becomes available. Sometimes when the player pauses, the game will remind them to take a break when needed.
Lastly, pressing ![]() , Starlow will appear while everything freezes around them. She will comment on the current location the bros are in, or on the current situation at hand. The player cannot use this when there is a cutscene playing, when they are playing a minigame, or when Crabot takes her in Eclipsa Castle Sewers.
, Starlow will appear while everything freezes around them. She will comment on the current location the bros are in, or on the current situation at hand. The player cannot use this when there is a cutscene playing, when they are playing a minigame, or when Crabot takes her in Eclipsa Castle Sewers.
Overworld moves[]
A list of actions Mario and Luigi can perform in the overworld of Mario & Luigi: Sage Quest, either taught or achieved by the bros during their journey. To switch to/select a certain action, the player must use the ![]() and
and ![]() buttons or by using the Touch Screen.
buttons or by using the Touch Screen.
| Move | Description | Location unlocked |
|---|---|---|
Jump |
Mario and Luigi can jump to reach high places, stomp on enemies for a First Strike (unless they stomp on a spiny or fire enemy without the Iron Boots (DX) or Frost Boots (DX), as they will take damage once the battle starts), and hit Blocks from below. As the ally is programmed to follow Mario and Luigi, they will jump automatically to reach higher places that Mario and Luigi are already on. | Initial |
Hammer |
Mario swings his hammer down to the ground. He can use his hammer to press switches, break rocks blocking the path, and hit enemies for a First Strike (potentially inflicting them with Dizzy), which is best suited for spiny or fire enemies since Mario and Luigi cannot stomp on them without the Iron Boots (DX) or Frost Boots (DX) equipped. | Rabbit Village (given by Pikasmith) |
Spin Jump |
Mario jumps on top of Luigi, and the two can twirl in the air to cross over large gaps they normally cannot cross over by pressing |
Cragnelburg (taught by the Glochildren) |
Mini-Mario |
Luigi hits Mario over the head with his hammer on a hard surface, causing him to become small enough to fit inside and go through small gaps easily. If Mario passes through these gaps in which Luigi cannot follow, they will be separated from each other. Pressing |
Conundrum Manor (taught by Shroom Spirits) |
Mole Mario |
Luigi hits Mario over the head with his hammer on dirt or sand, causing him to tunnel and move underground (indicated by a hovering glove cursor pointing to the ground where Mario is), allowing him to pass under obstacles like gates. If Mario passes under an obstacle in which Luigi cannot follow, they will be separated from each other. Pressing |
Conundrum Manor (taught by Shroom Spirits) |
Spring Jump |
Luigi jumps on top of Mario. Pressing |
Cragnelburg (taught by the Glochildren) |
Ball Bros. Ball Roll / Dash |
Luigi and Mario both turn into a ball and start rolling around the ground, allowing them to go under walls/obstacles in the game and move faster. The player can change their direction while they are rolling around by using |
Grumbledome Crater (learned from the Grumbledome Scroll) |
Battle system[]
Mario & Luigi: Sage Quest's battle system is also left unchanged, and is very similar to past installments for the most part. To initiate a battle with an enemy in the overworld, Mario and Luigi must either simply touch an enemy (beware not to get hit by an enemy from behind, or else the bro will Trip once the battle starts) or by stomping on them with a Jump or hitting them with a Hammer, which will deal some damage (and potentially inflict Dizzy on the enemies when First Striking them with a Hammer) once the battle begins (unless the enemy is a spiked/fire enemy and the bro stomps on them without the Iron Boots/Frost Boots equipped, as they will take damage once the battle starts).
In a battle, the game acts like a turn-based role-playing game, where the bros and enemies take turns attacking, and their Speed determines who attacks first. On the bros' turn, they will have an array of Command Blocks they can strike to choose the move they want to do. When attacking enemies with Jumps, Hammers and/or Bros. Attacks, all Action Commands are evaluated based on how well they are performed by pressing ![]() (for Mario) and/or
(for Mario) and/or ![]() (for Luigi). There are five evaluation levels; ranging from the worst to the best, these levels are: "Nothing", "OK", "Good!", "Great!", and "Excellent!". These determine how strong the move will be.
(for Luigi). There are five evaluation levels; ranging from the worst to the best, these levels are: "Nothing", "OK", "Good!", "Great!", and "Excellent!". These determine how strong the move will be.
On the enemies' turn, they will try to attack either Mario or Luigi, or even both of them at the same time. When the enemies try to attack, Mario and Luigi can either jump over or hammer them to avoid damage, and in addition, counterattack them...or use an Emergency Block/Guard to defend certain attacks to take less damage by pressing ![]() when defending if players are having trouble performing the series' normal counter moves in a particular situation. While defending against an enemy attack that requires both Jump and Hammer defense, the player can switch between those defensive methods using
when defending if players are having trouble performing the series' normal counter moves in a particular situation. While defending against an enemy attack that requires both Jump and Hammer defense, the player can switch between those defensive methods using ![]() and/or
and/or ![]() .
.
When a bro faints after hitting zero HP, the other bro is not only unable to perform Bros. Attacks, but will have to carry the fainted bro on their back while defending, which decreases their reaction time and slows them down, making it hard for them to dodge attacks. When the Ally faints, the bros will not carry them, though they can be swapped out of if a bro is active. After all party members faint (or just both bros if the Ally is not called in), the battle is over and the player will receive a Game Over. They will then be given the option to either to try again, return to the last Save Block they have last saved their game progress, or return to the Title Screen.
Command Blocks[]
 Jump: Mario or Luigi will attack by stomping on the enemies to deal damage. A well-timed Action Command (a well-timed or press) has the bro doing another jump (and performing a fancy spin) on the enemy for more damage. This does not work on spiked/fire enemies, as this will damage the bro who attempts to stomp on them unless they have the Iron/Frost Boots (DX) on.
- Hammer: Mario or Luigi will hit the enemy over the head with their Hammers, which has a chance of inflicting the Dizzy status effect on them. A well-timed Action Command (a well-timed or press) has the bro doing a powerful hammer smash that deals more damage depending on when they press the appropriate button. Flying or floating enemies cannot be reached with the hammer, however.
- Strike: The Ally will strike an enemy with the weapon they have equipped. Well-timed Action Commands (a well-timed press) makes the attack deal more damage, or cause them to attack again.
- Bros. Attack: Mario or Luigi will perform one of the ten Bros. Attacks they have acquired during the course of the game. These attacks cost BP (Bros. Points), and can only be used if both bros. are active in battle or if they have enough BP to perform a certain Bros. Attack.
- Special Attack: The Ally can use their Special Attacks they have learned during the course of the game. These attacks use up SP (Special Points), and can only be used if the Ally has enough SP to perform a certain Special Attack.
- Items: Mario, Luigi or the Allies can use any usable items they have obtained throughout their adventure in battle. These items can help them in many ways; recovering HP/BP (Mushrooms, Syrup Jars and Candies), removing negative status ailments (Refreshing Herbs), boosting stats (Peppers), etc.
- Flee: If the player thinks they cannot win a battle (or does not want to fight an enemy), striking this block will cause Mario, Luigi and the currently ally to run away from the battle, losing coins as they do so (though the Ally will leave immediately). Mashing or will cause them to run away faster, though they will occasionally trip and fall, losing even more coins, when fighting weak enemies and having high SPEED stats makes fleeing quicker so the player will not lose that much coins. This can be cancelled by pressing . Mario and Luigi cannot flee from some battles or from boss battles.
- During Circus Battle Waves in the Bittercold Tent, the bros can forfeit the battle by simply choosing this option, though they will not lose any coins and the game will ask the player if they really want to forfeit.
Stats[]
- HP (abbreviation of Heart Points) is the amount of health Mario, Luigi and the Allies have. When an enemy hits either of them, they lose HP, though this can be recovered by using Mushrooms and/or other items. When a bro's HP reaches zero, they will faint and they must be carried when defending, making it a slight liability with the battling brother, but they can be revived with 1-Up items. If the Ally's HP hits zero, they will faint as well, though the bros will not carry them. If all characters hit zero HP, it means Game Over. Enemies have HP too, and when they hit zero HP, they will explode and leave behind coins and drop an Item Gift that contains an item. This stat can be permanently upgraded by 1/3 points by using Health Beans or Health Beaniespressos.
- BP (abbreviation of Bros. Points and) is used for Mario and Luigi to use powerful moves known as Bros. Attacks when they obtain them via Attack Pieces. Each Bros. Attack consumes a certain amount of BP, draining the total, and if they do not have a certain amount of BP, they cannot use that Bros. Attack. BP can be restored by using Syrup Jars and/or other items. This stat can be permanently upgraded by 1/3 points by using Bros. Beans or Bros. Beaniespressos.
- SP (abbreviation of Special Points) is used by the Allies to perform their powerful moves known simply as Special Attacks, similar to the bros's BP. SP can be restored by using Syrup Jars and/or other items, and can be permanently upgraded by 1/3 points by using Special Beans or Special Beaniespressos, similar to BP.
- POW (abbreviation of Power) shows how strong either Mario, Luigi, the Allies and the enemies are. The higher their POW stats are, the more damage they will perform. This stat can be boosted temporarily in battle with Red Peppers, and permanently upgraded by 1/3 points by using Power Beans or Power Beaniespressos.
- DEF (abbreviation of Defense) shows how much damage either Mario, Luigi, the Allies and the enemies can take from opposing attacks. The higher their DEF stats are, the less damage they will take. This stat can be boosted temporarily in battle with Green Peppers, and permanently upgraded by 1/3 points by using Defense Beans or Defense Beaniespressos.
- SPEED shows how fast Mario, Luigi, the Allies and the enemies are. If an enemy has greater speed they will attack first, and if Mario and/or Luigi have greater speed they will attack first. SPEED also helps the bros in fleeing from battles faster depending how weak an enemy is. This stat can be boosted temporarily in battle with Blue Peppers, and permanently upgraded by 1/3 points by using Speed Beans or Speed Beaniespressos.
- STACHE (short for Mustache) is Mario and Luigi's most unique stat. The higher a bro's STACHE stat is, the greater the chances of that bro landing a Lucky Hit, which doubles the power of attacks, and also the greater the chances of enemies dropping items after being defeated by said bro. Also, the player will be more likely to get hits on Scratch Cards with more STACHE. This stat can be permanently upgraded by 1/3 points by using Flex Beans or Flex Beaniespressos.
- FLUKE is the Ally's unique stat, which is similar to the effects of STACHE in battle. FLUKE can be permanently upgraded by 1/3 points by using Flex Beans or Flex Beaniespressos, similar to STACHE.
Status ailments[]
A list of status ailments that can be inflicted on Mario, Luigi, the Ally and enemies. Some of them can hinder the party in a way, though over a period of time, or by using Refreshing Herb, these effects wear off.
| Status | Type | Effect | Carriers |
|---|---|---|---|
| no image |
Negative | The affected character will be set on fire and unable to (counter)attack and will take damage each turn. The affected enemy will have the same effect, though they are still able to attack, and the effect lasts for one turn. A more fatal version of this ailment is "Char", which deals more damage to the affected. If the Ally is inflicted with Burn, the bros cannot switch out to another Ally. | Fire Flower, King Boo, Kamek, Pyro Guy, Fire Bro., Draggadon, Bowser Jr., Bowser, Titan, Callisto, Lunar Bowser, Dry Bowser, Shadow Bros., Skelletodactyl |
| no image |
Negative | The affected character/enemy will have their Defense stat decreased, making them take more damage. | Green Magikoopa, Eclipsa, Shadow Bros., Skelletodactyl |
| no image |
Positive | The affected character/enemy will have their Defense stat increased, making them take less damage. | Green Pepper, Red Magikoopa |
| Negative | The affected character/enemy will become dazed and are unable to (counter)attack. If the Ally is inflicted with Dizzy, the bros cannot switch out to another Ally. | Hammer First Strikes, Solo Hammer strikes, Jumb-Boo, Stone Spike, Monty Mole, Hammer Bro., Bowser?, Titan, Crabot, Callisto, Eclipsa, Lunar Bowser, Madame Broode, Shadow Bros., Skelletodactyl | |
Down |
Negative | If a character reaches zero HP, they will faint and will not be able to do anything until they are revived with a 1-Up item. If all characters reach zero HP, they will receive a Game Over. If any enemy's HP reaches zero, they will explode into stars and may leave behind some coins and an Item Gift with an item inside. | |
| no image Freeze |
Negative | The affected enemy will freeze in place inside a chunk of ice, unable to attack. They will have their Defense increased while they are in the ice chunk, though after a few turns or after attacking the ice chunk enough, it will break. | Frost Boots (DX), Frost Hammer (DX) |
| Negative | The affected character/enemy will turn purple and will take damage each turn. A more fatal version of this ailment is "Max Poison", which deals more damage to the affected. | Buzzap, Poison Blooper, Slanito, Polluted Petey Piranha, Spewart, Skelletodactyl | |
| no image |
Negative | The affected character/enemy will have their Power stat decreased, making them deal less damage. | Green Magikoopa, Eclipsa, Shadow Bros., Skelletodactyl |
| no image |
Positive | The affected character/enemy will have their Power stat increased, making them deal more damage. | Red Pepper, Broozer, Red Magikoopa |
Sick |
Negative | The affected character will turn blue and have a runny nose, and will lose a chunk of HP every turn by sneezing loudly, ranging from 15, 30, 45 and even 60 HP. Their Power and Speed stats are also lowered significantly. | Ice Bro., Mr. Blizzard, Skelletodactyl |
| no image |
Negative | The affected character/enemy will have their Speed stat decreased, making it less likely that they will attack before others. | Green Magikoopa, Eclipsa, Skelletodactyl |
| no image |
Positive | The affected character/enemy will have their Speed stat increased, making it more likely that they will attack before others. | Blue Pepper, Red Magikoopa |
| Negative | The affected character will trip over and flail around, making them unable to (counter)attack until it is their turn or they are hit. If the Ally trips, the bros cannot switch out to another Ally. | Enemy First Strikes, Wiggler, Cataquack, Dry Bones, Boo, Boo Guy, Boomerang Bro., Chargin' Chuck, Tanoomba, Moonba, Sewer Rodent, Lunar Bowser | |
Badges[]
Badges reappear in Mario & Luigi: Sage Quest, acting similar to the Badges in Mario & Luigi: Bowser's Inside Story and Mario & Luigi: Dream Team. Mario and Luigi obtain a pair of badges, the Starter and Mush Badge, from a cloaked Cactaceonian in Cragnelburg for free once they retrieve the Jewel Vase from Craggy Catacombs and bring it back to her, and later on in the game, she will have more badges to sell for a fairly expensive price. During battle, a Badge Meter on the bottom screen will fill up as the Mario Bros. attack successfully, with a better rating attacks filling up the meter faster. When the two badges meet at any point on the meter, one of the circles on the bottom screen will show an icon, and tapping it on the Touch Screen will yield a helpful effect that can help the party. If all slot icons are taken up, future badge icons will be stored which can be swapped in and out, though only up to five can be stored at once. The bros can change the badge combination as well, though this immediately resets the Badge Meter.
Here are a list of badges the brothers can buy, and the list of badge combination effects:
| Badge | Cost | Badge | |
|---|---|---|---|
| Starter Badge "A badge for starters." |
Free | Free | Mush Badge "A badge that recovers HP." |
| Rookie Badge "A badge for rookies." |
250 coins | 200 coins | Bro. Badge "A badge that recovers BP/SP." |
| Veteran Badge "A badge for veterans." |
500 coins | 400 coins | Strike Badge "A badge that deals damage to enemies." |
| Master Badge "A badge for masters." |
750 coins | 600 coins | Guard Badge "A badge that guards characters from damage." |
| Superstar Badge "A badge for superstars." |
1200 coins | 800 coins | Risk Badge "A badge that yields risky effects." |
| 1000 coins | Bonus Badge "A badge that gives Coin and EXP bonuses after battles." | ||
Mario's badges are listed with a red background and Luigi's badges are listed with a green background.
| Badges | Starter Badge | Rookie Badge | Veteran Badge | Master Badge | Superstar Badge | Badges |
|---|---|---|---|---|---|---|
| Mush Badge | Restores 20% of each character's HP. | Restores 45% of each character's HP. | Restores 60% of each character's HP and removes all negative status effects. | Restores 80% of each character's HP, revives a fallen character and removes all negative status effects. | Restores all of each characters' HP, instantly revives a character if they fall and protects them from negative status effects. | Mush Badge |
| Bro. Badge | Restores 20% of each character's BP/SP. | Restores 45% of each character's BP/SP. | Restores 60% of each character's BP/SP. | Restores 80% of each character's BP/SP. | Restores all of each character's BP/SP. | Bro. Badge |
| Strike Badge | Hits one random enemy for 40 damage. | Hits one random enemy for 80 damage. | Hits one random enemy for 160 damage. | Hits all enemies for 70 damage. | Hits all enemies for 140 damage. | Strike Badge |
| Guard Badge | Forms a barrier that reduces damage to zero for 1 attack. | Forms a barrier that reduces damage to zero for 2 attacks. | Forms a barrier that reduces damage to zero for 4 attacks. | For a turn, prevents HP from hitting zero, making it impossible to be KOed. | For 3 turns, prevents HP from hitting zero, making it impossible to be KOed. | Guard Badge |
| Risk Badge | Gives everyone a random status effect. | Either fully recovers each character's HP or drops them to 1. | Either fully charges the Badge Meter or resets it. | Gives everyone a 50% chance of taking enough damage to drop to 0 HP. | Temporarily increases everyone's POW, but damages everyone each turn. | Risk Badge |
| Bonus Badge | Increases coins and EXP gained from defeated enemies by 1.2x. | Increases coins and EXP gained from defeated enemies by 1.4x. | Increases coins and EXP gained from defeated enemies by 1.6x. | Increases coins and EXP gained from defeated enemies by 1.8x. | Increases coins and EXP gained from defeated enemies by 2.0x. | Bonus Badge |
| Badges | Starter Badge | Rookie Badge | Veteran Badge | Master Badge | Superstar Badge | Badges |
Mario's badges are listed across with a red background and Luigi's badges are listed downwards with a green background.
Allies[]
New to the battle system is the "Ally" system, introduced in Mario & Luigi: Sage Quest. The current ally out will spectate the battle in the background, either cheering for Mario and Luigi, looking shocked when Mario and Luigi take damage/are KOed, etc. Mario and Luigi can select the call in/switch of from the current ally at any time, but this will waste a turn (unless either bro are wearing the "Quickswitch Token"). When called in, the ally can attack with their own weapons and from a list of Special Attacks (that have been unlocked), can use items for Mario and Luigi, can go back into the background. They are also vulnerable to being attacked, though they can dodge attacks if ![]() is pressed before they attack, and even counterattack if button is pressed right before an enemy makes contact with them. The first two Special Attacks an Ally has are unlocked initially (with the exception of Moon Chomp; he has the first three unlocked from the start), which will get stronger each time the bros level up, but at a certain rank, they will earn a new Special Attack.
is pressed before they attack, and even counterattack if button is pressed right before an enemy makes contact with them. The first two Special Attacks an Ally has are unlocked initially (with the exception of Moon Chomp; he has the first three unlocked from the start), which will get stronger each time the bros level up, but at a certain rank, they will earn a new Special Attack.
| Character | Description | ||||||||||||||||||
|---|---|---|---|---|---|---|---|---|---|---|---|---|---|---|---|---|---|---|---|
| no image Rhea Joins at Briskbreeze Fields. |
A Moonar who formerly lived in Moonshade Kingdom, being Tethys's best friend. She joins the Mario Bros., hoping she can reunite with her friend during their journey. Rhea attacks using her Moon Cutlass and her lunar energy, which gets stronger as the journey goes on. Starting level: 2 | ||||||||||||||||||
| |||||||||||||||||||
| |||||||||||||||||||
| no image Quahoyster Joins at East Sapphire Shore. |
A violet-colored Oystearl who was an outcast to other Oystearls like him in Sapphire Oceanbed. He is found sleeping in the sands of Sapphire Shore, and is awoken by Rhea. Quahoyster is a defensive-type Ally; defending Mario and Luigi from harm at the cost of taking damage himself. Starting level: 7 | ||||||||||||||||||
| |||||||||||||||||||
| |||||||||||||||||||
| no image Randal the Bandit Joins at Fort Fossil. |
An aqua-green Bandit who was the former leader of a gang of Bandits in Craggy Desert. While fought early on in the game, he was recently thrown in Fort Fossil's prison cell for theft. He offers to help Mario and Luigi escape the prison, so he joins them, and overtime has more respect for them. Randal can steal items from enemies and can defend the party from damage with his cardboard cutout and smoke bombs. Starting level: 15 | ||||||||||||||||||
| |||||||||||||||||||
| |||||||||||||||||||
| no image Tethys Joins at Bowser's Castle. |
Tethys is a cyan Moonar who is Rhea's best friend. He recently joined the Koopa Troop once he migrated to the Mushroom Kingdom, and is a well-known builder in the Moonshade Kingdom. Prior to joining Mario and Luigi, he fights them with his Mecha-Blooper. Tethys uses weapons he created in his spare time to damage enemies. Starting level: 23 | ||||||||||||||||||
| |||||||||||||||||||
| |||||||||||||||||||
| no image Moon Chomp Joins at Resistance Moonshelter. |
A moon-like Chain Chomp that belonged to a Moonar in Resistance Moonshelter. After bringing back his playing cards, he gives his Moon Chomp to Mario and Luigi. Moon Chomp is a powerhouse/tank character; can deal lots of damage to enemies but can tank in lots of damage from enemies. Moon Chomp, however, is very slow. Starting level: 25 | ||||||||||||||||||
| |||||||||||||||||||
| |||||||||||||||||||
Ranks[]
After all enemies are defeated in a battle, provided that either character in the party are still standing, they will earn Experience Points, which, should they reach a certain amount of, allows them to level up, which increases their stat attributes, making them stronger. They will also be able to increase their stats even more using a roulette provided by a Fishin' Lakitu (Fishin' Boo when the bros level up in the Conundrum Manor). Once a bro/an ally reaches a certain level (a level that is a multiple of eight for the bros, and a level that is a multiple of twelve for the Allies), they will go up in "Ranks" (Rank Up), which functions similarly to Mario & Luigi: Dream Team and Mario & Luigi: Paper Jam; the player can choose a Rank-Up Bonus to give to Mario or Luigi upon reaching a new rank. Upon reaching Rainbow Rank for the bros, the player can choose two Rank-Up Bonuses, and upon reaching Sidekick Rank, the ally will earn a special weapon/armor alongside being able to pick two Rank-Up Bonuses. Only six ranks are in the game for the bros, one less than Mario & Luigi: Paper Jam, and allies have four ranks. At a certain rank, the bros can shop at rank-specific shops in the Shroom Mall and an ally will earn a new Special Attack.
The max level cap for the bros is level 99, while the max level cap for the Allies is level 40.
|
|
The Rank-Up Bonuses are the following:
| Bonus | Description | First Availability | Notes |
|---|---|---|---|
| Gear Slot +1 | Gives you 1 extra gear slot, letting you use more gear! | Shell Rank | Can be chosen twice. The player can give a character another extra gear slot if they have already chosen Gear Slot +1 before. |
| Badge Stock +1 | Adds an additional effect stock for your badges! | Shell Rank | Only one character can pick this bonus. |
| HP Up+ | Gives you an additional +2 HP every time you level up! | Shell Rank | Only one character can pick this bonus. |
| BP Up+ | Gives you an additional +1 BP every time you level up! | Shell Rank | Only either Mario or Luigi can pick this bonus. |
| SP Up+ | Gives you an additional +1 SP every time you level up! | Shell Rank | Only one Ally can pick this bonus. |
| POW Up+ | Gives you an additional +1 POW every time you level up! | Flower Rank | Only one character can pick this bonus. |
| DEF Up+ | Gives you an additional +1 DEF every time you level up! | Flower Rank | Only one character can pick this bonus. |
| SPEED Up+ | Gives you an additional +1 SPEED every time you level up! | Flower Rank | Only one character can pick this bonus. |
| STACHE Up+ | Gives you an additional +1 STACHE every time you level up! | Flower Rank | Only either Mario and Luigi can pick this bonus. |
| FLUKE Up+ | Gives you an additional +1 FLUKE every time you level up! | Flower Rank | Only one Ally can pick this bonus. |
| Jump Man | Boosts your Jump attack power by 25%! | Leaf Rank | Only either Mario or Luigi can pick this bonus. |
| Hammerhead | Boosts your Hammer attack power by 25%! | Leaf Rank | Only either Mario or Luigi can pick this bonus. |
| Heavy Hitter | Boosts your Strike attack power by 25%! | Leaf Rank | Only the Allies can pick this bonus. |
| Counterer | Boosts your counterattack power by 200%! | Leaf Rank | |
| Superguard | Boosts your Emergency Guard power by 200%! | Leaf Rank | |
| Iron Body | Reduces damage you receive from enemies by 25%! | Leaf Rank | |
| Big Lucky | Doubles the damage of lucky hits! | Star Rank | |
| Quick Healer | Doubles the effect of restoration items in battle! | Star Rank | |
| Mushroom EXP | Receive bonus EXP every time you eat a mushroom! | Star Rank | More bonus EXP is gained based on what kind of Mushroom the bros eat (ex. eating a Super Mushroom yields more EXP). |
| Effective Badge | Increase the effects of badges by 25%! | Star Rank | |
Audience[]
While participating in Circus Battle Waves inside the Bittercold Tent, there will be a crowd of Ice Bros., Ice Snifits, Ninjis, Mr. Blizzards and Snow Spikes in the background spectating the match, acting like the audience. They function similar to the Audience in Paper Mario: The Thousand Year Door; they can either be allies or enemies during the battles; filling up the Badge Meter, giving them items, or hindering them by throwing objects at the bros that can damage them when they mess up on Action Commands. After at least twenty five waves of enemies are defeated, the audience stage will upgrade, though after each battle the stage will reset back to its normal state for the next. If all audience members leave, the match will end prematurely.
| Audience | Description | |
|---|---|---|
| Ice Bros. | Ice Bros. fill a decent chunk of the Badge Meter whenever characters perform amazingly during matches. | Ice Bros. may give Syrup Jars whenever characters perform amazingly during matches. |
| Ice Bros. may throw iceballs that can inflict Sick at characters whenever they perform poorly during matches. | ||
| Ice Snifits | Ice Snifits fill a small chunk of the Badge Meter whenever characters perform amazingly during matches. | Ice Snifits may give Mushrooms whenever characters perform amazingly during matches. |
| Ice Snifits may shoot snowballs from their nozzle at characters whenever they perform poorly during matches. | ||
| Ninjis | Ninjis fill a small chunk of the Badge Meter whenever characters perform amazingly during matches. | Ninjis may give Peppers whenever characters perform amazingly during matches. |
| Ninjis may throw paper ninja stars at characters whenever they perform poorly during matches. | ||
| Mr. Blizzards | Mr. Blizzards fill a decent chunk of the Badge Meter whenever characters perform amazingly during matches. | Mr. Blizzards may give Candies whenever characters perform amazingly during matches. |
| Mr. Blizzards may throw snowballs at characters whenever they perform poorly during matches. | ||
| Snow Spikes | Snow Spikes fill a decent chunk of the Badge Meter whenever characters perform amazingly during matches. | Snow Spikes may give miscellaneous items whenever characters perform amazingly during matches. |
| Snow Spikes may throw snowballs at characters whenever they perform poorly during matches. | ||
Locations[]
A list of locations Mario and Luigi visit in Mario & Luigi: Sage Quest.
| Mushroom Kingdom | ||||
|---|---|---|---|---|
| Locations | Description | Enemies | ||
| Peach's Castle | The starting point of the game. Peach's Castle is the castle of Princess Peach, hence the name, which contains an Item Shop and Gear Shop which adds even more items and gear every time the player beats a certain boss. There is also a Battle Ring that is only accessible when the player gains the Spring Jump move and they venture through the basement. | N/A | ||
| Peach's Castle Cellar | The cellar of Peach's Castle, which is obviously located beneath the castle and can be visited once the bros gain the Spin Jump move. Gloombas, Piranha Pots and Sewer Cheeps can be found here. | Gloomba, Piranha Pot, Sewer Cheep | ||
| Toad Town | The capital city of the Mushroom Kingdom located near the doorstep of Peach's Castle. Toad Town contains many friendly Toad NPCs that the Mario Bros. can talk to. It also has an inn where the party can sleep at to fully restore HP and BP/SP for a few coins (unless they have a Shroom Coupon, in which they let the bros to sleep for one night for free). There is also a bank called Toad Town Bank that the player can visit to store coins and items inside, and bring them over to the new "New Game +" file (though some will fail to carry over). | N/A | ||
| Shroom Mall | Toad Town's shopping mall that is found on the west side of the town. There are rank-specific shops in there, like the Flower Shop, Star Shop and Rainbow Shop, and a coffee-cafe shop called the Shroombucks Cafe owned by Shroombucks Corporation, where Mario and Luigi can brew beans they have collected for the cafe to create Beaniespressos for them to drink. | N/A | ||
| Trial Abyss | In the tunnels of Toad Town that the Mario Bros visit, the Trial Abyss resides, which is similar to the three Pits of 100 Trials, one seen in Paper Mario: The Thousand Year and two separate trials seen in Super Paper Mario. It is hosted by "Trial Toad", and the Mario Bros cannot leave the abyss until they beat the trials, though if they get a Game Over while inside the abyss, they will restart from the start of the abyss. They can only enter the abyss if the brothers are at Level 8. |
| ||
| Briskbreeze Fields | Briskbreeze Fields is a generic grassy area connecting from Toad Town and to Treeway Woods. North-west from the area is Rabbit Village, and there are many Goombas and (Para-)Biddybuds roaming about. A Big Tail Goomba can be found in the area. | Goomba, Biddybud, Para-Biddybud, Needlorb, Big Tail Goomba (boss) | ||
| Rabbit Village | A village filled with friendly rabbits, with an Item and Gear Shop located there where the bros can purchase items and clothing respectively. This area is where the Mario Bros. obtain their Hammers after saving Pikasmith. There is also a flower shop owned and ran by a female rabbit with a straw, bug net hat located in the north-western part of the village. | N/A | ||
| Treeway Woods | A forest location with Stumplings inhabiting the southern part of it, Buzzaps that swarm many parts of the area, and a Wiggler that has his garden planted here in the north-eastern part. It connects to the northern part of Rabbit Village. | Biddybud, Para-Biddybud, Needlorb, Buzzap, Wiggler (boss) | ||
| Sapphire Shore | A tropical beach area with Spinies, Cheep Cheeps, Huckit Crabs and Fuzzies. At the western part of the area is Sapphire Docks, where the S.S. Boletus is located. A monstrous Blooper-like squid called Queen Calamaria is summoned by Kamek and attacks the ship at one point, and after it is defeated and the ship sails across the sea, it is sunken by Tethys (who at the time was working for Bowser). | Cheep Cheep, Spiny, Huckit Crab, Cataquack, Queen Calamaria (boss) | ||
| Cragnelburg | An urban town that, when first visited, was raided by a gang of Bandits and is the starting point of Craggy Desert. The town residents are cactus-like creatures called "Cactaceonians". It has an Item and Gear Shop, but there is not much in those shops until the stolen loot is recovered and brought back. A cloaked figure in a certain district sells Badges to the bros, and the Glochildren are found in a certain district as well, who teach the bros new techniques (the Spin Jump and the Spring Jump) at certain points in the game. | N/A | ||
| Craggy Desert | A desert area that has Spinies, Genie Guys, Pokeys and Sandmaarghs scattered around the place. Randal the Bandit and his gang are also scattered around the area, and Tostarenans can be seen here. | Spiny, Bandit, Genie Guy, Pokey, Sandmaargh, Randal the Bandit (mini-boss; assisted by Bandits) | ||
| Craggy Catacombs | An underground temple catacomb found in a certain part of Craggy Desert, with Pokeys, Sandmaarghs, Spikes and Phanto Masks inside. Hisstocrat is the boss of this area, who guards the Jewel Vase. | Pokey, Sandmaargh, Spike, Phanto, Hisstocrat (boss; assisted by Slithervants) | ||
| Plumdrop Rainforest | A lakeside/rainforest area that has recently been poisoned by Polluted Petey Piranha, courtesy of Slanito P. Toad's Poison Mushrooms. Poison Bloopers, Snifits, Scuttlebugs, Fuzzies and Spear Guys can be seen roaming around the area. | Poison Blooper, Snifit, Scuttlebug, Fuzzy, Spear Guy, Slanito (mini-boss), Polluted Petey Piranha (boss) | ||
| Bonedry Graveyard | A graveyard filled with undead skeletal enemies, like Dry Bones and Bony Beetles. This area connects from Plumdrop Rainforest and to Conundrum Manor. | Dry Bones, Parabones, Bony Beetle, Chincho | ||
| Conundrum Manor | A mansion that is connected to Bonedry Graveyard, is inhabited by ghost-like enemies like Boos, Broozers, Boo Guys and Snufits, and has many portraits referencing other ghost enemies from other games (mostly Luigi's Mansion and its sequel, Luigi's Mansion: Dark Moon). When the bros first visit the mansion, the entrance door closes behind them, and cannot leave the area until King Boo is defeated and they put the gems on his crown in the right switchholes to unlock the door. In here, they are taught the Mole and Mini-Mario techniques by Shroom Spirits inhabiting vases in certain rooms. Interestingly, there is a friendly Boo that runs a secret Item Shop in the manor. | Boo, Broozer, Boo Guy, Snufit, Jumb-Boo (mini-boss), King Boo (boss) | ||
| Fort Fossil | A fortress located in Craggy Desert, which the Koopa Troop seize control of to hold Princess Peach hostage later in the game. There is a jail cell with some Toads, Cactaceonians and Tostarenans, though Randal the Bandit is inside, where he joins the party as the third Ally once they get thrown in there by the Elite Trio. | Ant Trooper, Hammer Bro., Boomerang Bro., Chargin' Chuck, Elite Trio (mini-boss; assisted by Sergeant Guy Cannons and Goombas), Kamek (boss) | ||
| Sapphire Oceanbed | An underwater passage way surrounding Mushroom Kingdom, Bittercold Isle, and Moonshade Kingdom. It is filled with Oystearls, Spiny Cheep Cheeps, Urchins and Goomdivers. Mario and Luigi venture through here after Tethys destroys the S.S. Boletus they were cruising on. | Spiny Cheep Cheep, Urchin, Goomdiver | ||
| Bittercold Isle | A snowy island that is inhabited by Eski-toads and other creatures. Located on the island is Grumbledome Volcano, a recently active volcano which erupted suddenly after the island's inhabitants thought it was inactive. There is also a circus tent on this island, called the Bittercold Tent, owned by Emcee Guy. | Snow Spike, Ice Snifit, Ice Bro., Mr. Blizzard, Ninji | ||
| Bittercold Tent | A circus tent hosted by Emcee Guy, with multiple Ice Bros., Ice Snifits, Mr. Blizzards, Snow Spikes and Ninjis as spectators. When Mario and Luigi enter, he forces them to join the circus, seeing great potential in them. After participating in a single battle endurance round, they can leave or continue playing in the circus. The player can partake in a battle endurance mode (Circus Battle Wave), a Bros. Attack endurance mode (Circus Skillathon), and a timed obstacle course minigame (Circus Dexterity Course). | Jester Guy, Juggling Bro., Lion Chomp, Ringmaster Bro. | ||
| Mount Grumbledome | A mountain that surrounds Grumbledome Volcano, which the Bittercold Isle inhabitants dub "Mount Grumbledome". Mario and Luigi climb the mountain in order to check out what is causing the volcano to erupt suddenly. | Pyro Guy, Tanoomba, Bully, Stone Spike, Monty Mole, Rex | ||
| Grumbledome Crater | Grumbledome Crater is the inside of Grumbledome Volcano, which Luigi accidentally falls in while checking out the volcano. At the bottom of the volcano is Draggadon, and a Monty Mole who sells a cannon to get them out of the volcano once Draggadon is defeated. | Pyro Guy, Bully, Fire Bro., Draggadon (boss) | ||
| Koopa Reef | An area that connects to Bowser's Castle, which has many Koopatrols, Shy Guys with Chain Chomps and in mini-airships, Mecha-Chomps and Splorchs that jump out of the lava. This area is only accessible by riding through Sapphire Ocean. The bros reach this area after they get a ride from a cyan Monty Mole's pet Tundorrie after being washed up in Bittercold Isle, to get into Bowser's Castle and rescue Princess Peach. | Splorch, Koopatrol, Shy Guy, Chain Chomp, Mecha-Chomp, Shy Guy Airtub | ||
| Bowser's Castle | Bowser's Castle is the domicile of Bowser and the base stronghold of all of his operations. The entrance door is blocked by the Sergeant Guy Cannon, so Mario and Luigi must enter through the freezing room, and after that they can roam around the entire area. This is the final area of Mushroom Kingdom the bros visit. | Koopatrol, Shy Guy, Chain Chomp, Magikoopa, Mecha-Chomp, Mecha-Blooper and Tethys (mini-boss), Bowser Jr. and Kamek (mini-boss), Fake Bowser/Bowser? (boss) | ||
| Moonshade Kingdom | ||
|---|---|---|
| Locations | Description | Enemies |
| Moonshade Docks | The starting point of Moonshade Kingdom. Moonshade Docks is, hence the name, the docks of Moonshade Kingdom, where Mario and Luigi visit using Tundorrie. It is here where their Mushroom Coins are stored and they must get Moonshade Coins to buy stuff in the Moonshade Kingdom. | N/A |
| Umbriel Village | Umbriel Village is a somewhat small urban town with Moonars roaming around that was recently destroyed by Eclispa's Moondroids and Saturn IV Driones. Most Half-Moon Resistance members are in this area, though most left to shelter. | Moondroid, Saturn IV Drione |
| Resistance Moonshetler | A base shelter for most Half-Moon Resistance to hide in, which Mario and Luigi can visit if they tell them that they are on their side. This is the location where Moon Chomp joins their party, being the fifth Ally to join the adventure. | N/A |
| Ganymede Plains | The main outskirts of Umbriel Village, which has Moonbas, Youefo Guys and Saturn IV Driones roaming about. | Saturn IV Drione, Moonba, Youefo Guy |
| Pallene Outskirts | The secondary outskirts of Umbriel Village, where there is a shop for Moonanballs and Umbriel Cannons. | Moonba, Youefo Guy, Saturn IV Drione, Bowser (boss) |
| Eclipsa Castle | The former castle of Neith in Moonshade Kingdom, which was seized and reshaped into the image of Eclipsa, and powered by Moonar's lunar energy (alongside Callisto's creations). Multiple Moondroids, Saturn IV Driones and Craterovers reside here. | Moondroid, Saturn IV Drione, Craterover, Titan (mini-boss), Callisto (mini-boss), Eclipsa (boss), Lunar Bowser (final boss) |
| Eclipsa Castle Sewer | The sewers of Eclipsa Castle, in which the Mario Bros were dropped down to by Callisto. Roaming around the place is Crabot, a robotic crab, and other creatures like Moonflies, Sewer Rodents and Sewage Bubbles. | Moonfly, Sewer Rodent, Sewage Bubble/Sewage Sludger, Crabot (boss) |
Characters[]
Playable Characters[]
| Mario Bros. | ||
|---|---|---|
| Character | Description | |
 Mario |
Mario is the well-known hero of the Mushroom Kingdom and the older brother of the Mario Bros., constantly saving the kingdom, and even the world sometimes from danger. Sometimes he does it alone, though on this adventure he gets help from his younger brother, Luigi, and other allies. Mario is controlled with the | |
| ||
| Mario can perform the Hammer, Spin Jump and Ball Bros. moves. Click here to see Mario's Bros. Attacks. | ||
 Luigi |
Luigi is the younger, taller, and not-so-popular brother of the Mario Bros., often left out of adventures and is a bit of a coward, but sometimes he can join in his older brother's spotlight and conquer his fears, or even go on adventures alone in some sort of haunted mansion with a vacuum cleaner. Luigi is controlled with the | |
| ||
| Luigi can perform the Mini-/Mole Mario, Spring Jump and Ball Bros. moves. Click here to see Luigi's Bros. Attacks. | ||
| Allies | |||
|---|---|---|---|
| Character | Description | ||
| no image Rhea |
Rhea is a former inhabitant of the Moonshade Kingdom, living a peaceful life with her friend Tethys until Eclipsa reigned supreme. She and many other Moonars left the kingdom to the Mushroom Kingdom, and while she was travelling with Tethys, they were separated and she ended up in Peach's Castle. Now travelling with the Mario Bros., Rhea hopes to meet up with her friend again. She uses her Lunarang in the overworld to hit distant objects like blocks or switches. | ||
| Look at the Allies section of the article to see Rhea's stats and Special Attacks. | |||
| no image Quahoyster |
Quahoyster is a violet-colored Oystearl who lived most of his life in Sapphire Oceanbed, who surfaces himself on Sapphire Shore, feeling like an outcast to the rest of his species. Looking for someone to make friends with and eager for travelling to other places, he joins Mario and Luigi on their journey. Using his pearl that is kept inside him, Quahoyster can kick it forward to launch it up platforms as it bounces in an upwards arc. | ||
| Look at the Allies section of the article to see Quahoyster's stats and Special Attacks. | |||
| no image Randal the Bandit |
Randal is an aqua-colored Bandit with a crack in his mask who he implies to live somewhere in Craggy Desert, and being the leader of a gang of Bandits. Initially, he does not join Mario and Luigi's party, but after being thrown in jail inside Fort Fossil, he helps out Mario and Luigi to escape jail, hoping he can make up for his actions. While still disrespectful and mischievous at times, over time he has more respect to the bros. Randal can confuse enemies by throwing a smoke bomb on the ground in the overworld, allowing the bros to escape from enemy sight, though this can only be used once until the smokescreen clears (after about five real-world seconds). | ||
| Look at the Allies section of the article to see Randal the Bandit's stats and Special Attacks. | |||
| no image Tethys |
Tethys is Rhea's friend and a former resident of the Moonshade Kingdom. When the two reached the Mushroom Kingdom, they were separated and Tethys ended up in Bowser's Castle, and joins the Koopa Troop after showing that he was a mechanical builder. Tethys is battled in Bowser's Castle after Mecha-Blooper is defeated, but after the battle he joins Mario and Luigi after they accepted his forgiveness. Tethys uses a visor that signals where a hidden groundhollow or block is, and will run towards where it is if he is close enough to it. He can also scan enemies in the overworld if they get close enough, informing the bros on what they are and adding them to the Bestiary Log without entering a battle with them. | ||
| Look at the Allies section of the article to see Tethys's stats and Special Attacks. | |||
| no image Moon Chomp |
Moon Chomp is a spotted Chain Chomp seen in the Moonshade Kingdom, apparently being a Chain Chomp who somehow got to the kingdom one day, and adopted by a Moonar. Given to said Moonar after bringing his playing cards back to him in the Resistance Moonshelter from the devastated Umbriel Village, Moon Chomp becomes the fifth permanent Ally. Mario and Luigi can use Moon Chomp as a grappling hook to latch onto certain objects to swing over them in the overworld by pressing | ||
| Look at the Allies section of the article to see Moon Chomp's stats and Special Attacks. | |||
Non-Playable Characters[]
| Character | Description |
|---|---|
 Peach |
Princess Peach is the kind-hearted princess of the Mushroom Kingdom, always ending up being kidnapped by some evil of the sort, mostly by Bowser, which happens again in this game after the bros come back to Briskbreeze Fields, with a Toad informing them that she was last seen taken to Fort Fossil in Craggy Desert. In reality, she was taken by Bowser to his castle, though when the bros get to the throne room, Bowser is seen escaping with her in his Koopa Clown Car. She then landed in Eclipsa's Castle, where she was held hostage in throne room, mainly because the castle prison cells were filled to the brim with Moonars. She is saved in the end, and goes back to the Mushroom Kingdom with Mario and Luigi. |
 Toadsworth |
Toadsworth is an elderly, sixty year old Toad and Princess Peach's longtime steward and attaché. Toadsworth is constantly worrying about her when she has been kidnapped by Bowser or any other evil or when she is out on her own, to the point where he can even suffer shroomshock, a type of shock that only Toads can get, and always stays behind to protect the princess from danger and/or offer advice to Mario and Luigi. Toadsworth's role is smaller than his roles in previous Mario & Luigi games. |
 Starlow |
Starlow is a Star Sprite who excels in assisting and guiding Mario and Luigi on their adventures by giving hints, teaching combat techniques to them during battles and holding items, Clothings, and other resources in the Star Menu (or just the "menu"). She reprises this role in this game. She is also known for her catchphrase, "HELLO YELLO!", which she says as a way to greet herself to others. |
 Bowser |
The King of the Koopas himself, Bowser is notorious for kidnapping princesses and instilling terror across the Mushroom Kingdom...and also being defeated by the Mario Bros. every time. Despite this, he never gives up, as he knows one day he will succeed. Bowser is the secondary antagonist of the game, first kidnapping Peach while Mario and Luigi were out on an adventure, though Mario and Luigi manage to defeat him, which causes him to crash in some part in Moonshade Kingdom, and is fought in Pallene Outskirts. Later on, he reappears at Eclipsa Castle, inadvertently turned into Lunar Bowser by Eclipsa, becoming the true final boss of the game. In the end, though, he is defeated by Mario and Luigi, and sent all the way back to Bowser's Castle. |
 Bowser Jr. |
Bowser Jr. is Bowser's only son, and serves as the heir to his throne. Bowser Jr. is one of the few antagonists in the game, being a bold and energetic troublemaker who helps his father in kidnapping Princess Peach. He is briefly seen with Bowser and Tethys when Mario and Luigi back when they are on the S.S. Boletus, though he is not fought until Mario and Luigi visit Bowser's Castle, where he is fought alongside Kamek. He reappears in Moonshade Kingdom at Eclipsa's Castle, having a brief argument with Callisto. |
 Kamek |
Kamek was Bowser's old, yet powerful Magikoopa caretaker back when the King of the Koopas was young Koopa, acting like his parental figure. Even in the present day, he still looks after Bowser, being his advisor. He is a high ranking member of the Koopa Troop who specializes in the use of lots of magic using his scepter. He is fought in Fort Fossil for the first time, and once again alongside Bowser Jr. in Bowser's Castle. He briefly reappears in Moonshade Kingdom with the young Koopa at his side. He then reappears in the ending, where he takes care of a beaten-up Bowser alongside the Elite Trio. |
 Elite Trio Private Goomp, Corporal Paraplonk and Sergeant Guy |
Private Goomp, Corporal Paraplonk and Sergeant Guy, called the Elite Trio after their promotion, are members of the Koopa Troop, being a group of three enemies consisting of a Goomba who wears blue pajamas, a Paratroopa wearing green shoes and a red bucket, and a green robed Shy Guy with a silver pipe and a Magikoopa's wand. The three fight the Mario Bros. in Fort Fossil, though they are defeated. They retreat back to Bowser's Castle, where they are on castle entrance guarding duty. Upon seeing the bros, Sergeant Guy uses his Banzai Bill Cannon to block the entrance while Corporal Paraplonk and Private Goomp look out. They are not seen for the rest of the game until at ending, where they take care of a beaten-up Bowser alongside Kamek. |
| no image Callisto |
Callisto is Tethys's older brother, who works for Queen Eclipsa and acts as the secondary antagonist of the game. He is heard many times in Eclipsa Castle over the intercom, creating robots like Craterovers, Saturn IV Driones, Moondroids and many more for his mistress' army. After facing off against Titan and Crabot in the castle sewers, Mario and Luigi fight him near the top floor of the castle (with the Moon Clock assisting him), though he is defeated, leaving behind a key before escaping, though he gets into a brief argument with Bowser Jr., who is with Kamek. At the end of the game, he is thrown in the castle's prison alongside Eclipsa for their crimes. |
| no image Queen Eclipsa |
Queen Eclipsa is the current ruler of the Moonshade Kingdom and the younger sister of King Neith. After King Neith's "mysterious" disappearance (in reality she just kidnapped him and trapped himself inside a chest and hid it inside the castle's basement one night). After becoming the new ruler, many residents left the kingdom while others stayed behind to dethrone her. She is the main antagonist of the game, though she is not fought throughout the majority of the game until the player reaches Moonshade Kingdom, where she is fought in Eclipsa Castle. At the end of the game, she is thrown in the castle's prison alongside Callisto for their crimes. |
| no image King Neith |
King Neith was the ruler of the Moonshade Kingdom and the older brother of Eclipsa. One night he was kidnapped by his younger sister and trapped inside a chest which she hid in the castle's basement, though nobody knows this, and they thought he mysterious disappeared. While he is absent for majority of the game, he appears in Eclipsa Castle, late in the game. King Neith is freed by the Mario Bros. with a key that Nabbit stole from Callisto, and opens the door leading to the throne room. After Eclipsa's at to a greater extent, Lunar Bowser's defeat, he claims back his throne, becoming the ruler of the Moonshade Kingdom once again. |
 Toadette |
Toadette is a notable female Toad who appears frequently as Toad's partner (though it is debated that she is his love interest or the two are siblings). Toadette appears in Toad Town in her own Toad House designed after her mushroom cap and having miniature versions of the Papercrafts from Mario & Luigi: Paper Jam inside. When talked to, Toadette references the events of the aforementioned game and mentions her time as an archivist in the Toad Brigade. She looks at the bros's records in this game, awarding items based on their progress with Blocks, Beans, the number of battles won, the number of enemies defeated, the number of Excellent attacks done and the number of battles fled from. She also gives the bros an "amiiboard" so the player can scan their amiibos. |
| no image Slanito |
Slanito is a Poison Toad, fed up with a lot of things in the past. He is found in Plumdrop Rainforest, having "a score to settle with" Polluted Petey Piranha. Slanito makes a truce with Mario and Luigi after battling them so the they can fry a bigger fish in the forest. After Polluted Petey Piranha is defeat, Slanito thanks the bros and leaves, never to be seen again, not even in the ending sequence. Though Slanito joins the bros's adventure temporarily, he does not count as an Ally, as he does not have any overworld abilities or any battle moves. |
| no image Pikasmith |
Pikasmith is, as his name implies, a rabbit blacksmith who resides in Rabbit Village. When Mario and Luigi visit the village the first time to obtain some Hammers, the rabbit villagers tell them that he is off to the eastern part of Briskbreeze Fields to get more resources, though when they meet up with him he is attacked by two Needlorbs. After saving him, Pikasmith creates two Hammers for Mario and Luigi once they go to his house in Rabbit Village. His name is a portmanteau of Pika and blacksmith. |
| no image The Glochildren Peroski and Schlumbert |
The Glochildren, Peroski and Schlumbert, are two young Cactaceonian daredevils who live in a town district of Cragnelburg. Visiting said district before Hisstocrat is defeated, they will be absent from the area, though after beating Hisstocrat, they will be there. They teach Mario and Luigi the Spin Jump early in the game, and later on teach them the Spring Jump once they revisit Craggy Desert to go to Fort Fossil. Their name are a portmanteau of "glochid"; the hair-like spines or short prickles, generally barbed, found on the areoles of the Opuntioideae cacti sub-family, and "children". Peroski's name comes from the genus of cacti Pereskiopsis and Schlumbert's name comes from the small genus of cacti Schlumbergera and the word "bert" (short form of the name "Albert"), derived from the Germanic element "beraht", which means "bright". |
| no image Sergeant P. Beetle |
Sergeant P. Beetle is a gray-shelled Para-Beetle that wears goggles and commands a squadron of red-shelled Para-Beetles in Bittercold Isle. Once Mario and Luigi reach the top of Mount Grumbledome during their first visit, he and his Para-Beetle squad can be seen through the mountain's telescope near the summit. He appears once again when the bros reach the summit of the mountain, where he and his squadron fly by Luigi, who is looking inside the volcano's crater, knocking him into the crater. He reappears when the bros revisit the mountain, where he and his troops help Mario and company ascend the mountain (either to other sections or to the very summit), similar to Sergeant Flutter's role in Super Mario RPG: Legend of the Seven Stars. |
Species[]
- Beanish - A bean-like humanoid species with huge mouths that are occupants of the Beanbean Kingdom. They are mainly found at Bittercold Isle, donning eskimo clothing to keep out the cold.
- Hoohooligans - Upright bean-like species that have a body structure very comparable to a cactus and inhabit Hoohoo Village back in the Beanbean Kingdom, though two Hoohooligans can be found in Cragnelburg.
- Boos - A ghost-like species that inhabit haunted areas, mostly Ghost Houses/mansions. They mainly do not like being looked at. Boos only appear in Conundrum Manor in this game. King Boo and Jumb-Boo are notable members of the Boo species, and the Broozers, Boo Guys and Snufits are derived members of the species.
- Cactaceonians - A cactus-like species that inhabit the town of Cragnelburg in the Mushroom Kingdom. The Glochildren and the cloaked figure are notable members of this species.
- Moonars - A crescent moon-like species that inhabit the Moonshade Kingdom, ruled by King Neith before the events of the game. King Neith, Queen Eclipsa, Rhea, Tethys, Callisto and Antheny are notable members of the Moonar species.
- Stumplings - A species of tree stump-like creatures that inhabit Treeway Woods, which is swarmed with many Buzzaps. They are known for speaking grammatically incorrect English. One notable Stumpling named "Trunkpleasant" is an example of this, and his speech is quite similar to that of Fawful's, minus the food metaphors and whatnot. "M. Bark", an elderly Stumpling, speaks with correct grammar though, so not all members of the species speaks with incorrect English grammar (though M. Bark claims to have learned the "language of walking tree-humans", so it is assumed that he was taught how to speak properly).
- Toads - A species of mushroom-like humanoids that inhabit the Mushroom Kingdom, residing in many towns and cities throughout the entire kingdom. Most of them are found in Toad Town, but others are found in many other locations. Mailtoad, Monstoad, Toadette, Banktoad and Trial Toad are notable members of this species.
- Eski-toads - Toads that don eskimo parkas to keep out the cold, mainly found in Bittercold Isle.
- Poison Toads - A Toad sub-species based on the Poison Mushrooms. Only one (notable) Poison Toad appears in the game, that one being Slanito.
- Shroom Spirits - Deceased Toads that presumably passed away in Conundrum Manor, found in vases throughout the area, giving vital hints to the bros. Two Shroom Spirits in particular teach Mario and Luigi the Mole and Mini-Mario techniques.
- Yoshis - A sentient species of omnivorous dinosaurs that appear in various locations in the Mushroom Kingdom, though they are native to Yoshi's Island.
Items, Objects & other features[]
A list of collectible items and objects that Mario and Luigi can obtain in Mario & Luigi: Sage Quest.
Blocks[]
A list of blocks that Mario and Luigi can strike with a Jump from below in Mario & Luigi: Sage Quest. Blocks count towards 100% completion, including Hidden Blocks, so every single one must be struck (with the exception of ? Blocks created from collecting eight Red Coins, Save, Recovery, Roulette and Warp Blocks).
| Block | Rarity | Description |
|---|---|---|
! Block |
Uncommon | These blocks have various functions, and, when struck, can activate certain events in the area. |
? Block |
Common | When struck, the block gives coins and/or an item to the bros before turning into an Empty Block. Rectangular ? Blocks can give coins and items at the same time. |
Attack Piece Block |
Common | When struck, the block gives Mario and Luigi an Attack Piece. Ten Attack Piece Blocks are scattered around a certain area, and hitting all ten will give the bros a new Bros. Attack for a specific bro. |
Bros. Block |
Common | Moves in the direction of the arrow and change to the opposite bro's color when struck initially. When struck by that bro, it will move back to where it was and change again. Each time it is hit, the bros will receive coins. However, if they are too slow on their jumping, less coins will be earned. |
Empty Block |
Common* | After striking a block that gives coins or items like the ?, M or L Blocks, gives Attack Pieces like the Attack Piece Block, or activates events like the ! or Simu-Blocks, they turn into Empty Blocks. Empty Blocks do nothing when struck. |
Hidden Block |
Uncommon | When Tethys joins the party, he can reveal any Hidden Blocks in the overworld if the bros enter a certain area. Prior to this, the only indication the bros can have to known a Hidden Block is in the area is a distinctive shine over them every once in a while, making them slightly easier to find. It acts similar to a regular ? Block when struck, though they contain rare Items/Clothing. |
L Block |
Common | These blocks serve the same function as ? Blocks, but these blocks can only be struck by Luigi. |
M Block |
Common | These blocks serve the same function as ? Blocks, but these blocks can only be struck by Mario. |
Recovery Block |
Common | When struck for the first time, it fully recovers HP and BP/SP for all characters for free, though when struck other times after the first time, it will cost the bros a small fee for the full recover benefit, indicated above the block, with the amount of coins required increasing each time the player hits it. |
| no image Roulette Block |
Uncommon | These blocks contain items that scroll in a roulette. When struck, the item that the block displays is what item the bro will gain from it. It can scroll between 10 Gold Coins, Mushrooms, Syrups, Nuts, Candies, and Peppers; the last two items listed appear uncommonly. |
Save Block |
Common | When struck, the game opens up the save screen, where the player is allowed to save their game progress so far, so when the player receives a Game Over, they can restart at the last save point if they choose to do so. |
Simu-Block |
Uncommon | A pair of blocks that must be struck simultaneously by Mario and Luigi to be activated. They act similar to ! Blocks, as they have various functions and can activate certain events in the area. |
| no image Warp Block |
Uncommon | When struck, the block will create Fast-Travel Pipes that allow Mario and Luigi to travel back to previously activated pipes in other locations. |
Coins[]
A list of the coin types Mario and Luigi can collect in this game.
| Coin | Rarity | Description |
|---|---|---|
Coin |
Common | A regular coin that adds one coin to the total coin amount. |
5 Gold Coin |
Semi-Common | A slightly larger coin that adds five coins to the total coin amount. |
10 Gold Coin |
Semi-Common | A slightly larger coin that adds ten coins to the total coin amount. These can be also found in Roulette Blocks. |
50 Gold Coin |
Uncommon | A large coin that adds fifty coins to the total coin amount. |
Giant Coin |
Rare | A very large coin that adds a whopping one-hundred coins to the total coin amount. |
Red Coin |
Uncommon | Created by a Red Ring; reveals a ? Block when all eight are collected. |
Blue Coin |
Rare | May be dropped by defeated enemies when the brother who wears the Platinum Wear defeats them; worth five times more than a regular Coin. |
Key Items[]
Key Items are items that are carried by the bros and cannot be used in any form. They are usually given by friendly non-playable characters, or acquired by other means.
| Item | Description | Location obtained |
|---|---|---|
| no image Daredevil Pendant |
"A pendant that activates Hard Mode. You cannot remove this." | Toad Town |
| no image amiiboard |
"A board given by Toadette so you can scan your amiibos." | Toad Town |
Attack Piece |
"An Attack Piece collected in [name location]." | Toad Town, Briskbreeze Fields, Sapphire Shore, Craggy Desert, Plumdrop Rainforest, Conundrum Manor, Bittercold Isle, Grumbledome Crater, Bowser's Castle |
Hammers |
"Two hammers made by Pikasmith; great for bonking foes, breaking rocks and activating switches." | Rabbit Village |
Shroom Coupon |
"A coupon that allows you to stay one free night at an inn." | Various locations |
| no image Flower Bouquet |
"A bouquet of beautiful flowers." | Toad Town, Rabbit Village, Cragnelburg, Bittercold Isle |
| no image Seed Pack |
"A pack of seeds that germinate inside fertile sand." | Craggy Desert |
| no image Dash Socks |
"A pair of white socks, great for dashing in." | Cragnelburg |
| no image Jewel Vase |
"A vase made out of jewels, which has some sand, which is somewhat fertile." | Craggy Catacombs |
Badges |
"A pair of powerful equipment that can cause strange effects on the battlefield." | Cragnelburg |
| no image Crown Gems |
"Three gems from King Boo's crown; one red, one blue and one green." | Conundrum Manor |
Grumbledome Scroll |
"A scroll inscribed with two-man ball-rolling techniques." | Grumbledome Crater |
| no image Moonshade Map |
"A map of the Moonshade Kingdom." | Moonshade Docks |
| no image Umbriel Cannon |
"A cannon used by the Half-Moon Resistance, which they let you have for the time being." | Resistance Moonshelter |
Usable Items[]
Usable Items are items that can be used by Mario and Luigi, either during battle and/or out of battle. They can be purchased and sold at shops with coins.
| Mushroom | Description | Buy / Sell Price | Dropped by |
|---|---|---|---|
Mushroom |
Recovers 25 HP to a single character. | 15 / 7 coins | Goomba |
Super Mushroom |
Recovers 50 HP to a single character. | 35 / 17 coins | Cheep Cheep, Spike |
Ultra Mushroom |
Recovers 100 HP to a single character. | 90 / 45 coins | Hammer Bro., Private Goomp, Bully, Moonfly |
Max Mushroom |
Recovers 160 HP to a single character. | 175 / 87 coins | Shy Guy Airtub |
1-Up Mushroom |
Revives a fallen character with half of their HP. | 50 / 25 coins | Goomba, Big Tail Goomba, Genie Guy, Spiny Cheep Cheep |
Double 1-Up Mushroom |
Revives two fallen characters with quarter of their HP. | 150 / 75 coins | N/A |
1-Up Deluxe |
Revives a fallen character with all of their HP. | 300 / 150 coins | (Horned) Ant Trooper, Bully, Chain Chomp, Craterover |
Golden Mushroom |
Recovers all HP and cures all status effects to a single character. | 650 / 325 coins | Shy Guy Airtub, Moonfly |
| Syrup Jar | Description | Buy / Sell Price | Dropped by |
|---|---|---|---|
Syrup Jar |
Recovers 15 BP/SP to a single character. | 20 / 10 coins | Biddybud, Buzzap |
Supersyrup Jar |
Recovers 30 BP/SP to a single character. | 55 / 27 coins | Snifit |
Ultrasyrup Jar |
Recovers 60 BP/SP to a single character. | 85 / 42 coins | Boomerang Bro., Stone Spike, Magikoopa, Sewage Bubble |
Max Syrup Jar |
Recovers 75 BP/SP to a single character. | 150 / 75 coins | Saturn IV Drione, Craterover |
| Nut | Description | Buy / Sell Price | Dropped by |
|---|---|---|---|
Nut |
Recovers 15 HP to all characters. | 25 / 12 coins | Para-Biddybud, Needlorb, Genie Guy |
Super Nut |
Recovers 30 HP to all characters. | 45 / 22 coins | Gloomba, Poison Blooper, (Horned) Ant Trooper, Stone Spike, Goomdiver |
Ultra Nut |
Recovers 60 HP to all characters. | 200 / 100 coins | Mecha-Chomp, Sewer Rodent |
Max Nut |
Recovers 100 HP to all characters. | 475 / 237 coins | Saturn IV Drione |
| Candy | Description | Buy / Sell Price | Dropped by |
|---|---|---|---|
Candy |
Recovers 15% of a single character's HP and BP/SP. | 62 / 31 coins | Pokey, Sandmaargh, Gloomba |
Super Candy |
Recovers 30% of a single character's HP and BP/SP. | 140 / 70 coins | Boo, Urchin, Splorch |
Ultra Candy |
Recovers 50% of a single character's HP and BP/SP. | 210 / 105 coins | Bully, Shy Guy, Sewage Sludger |
Max Candy |
Recovers 75% of a single character's HP and BP/SP. | 540 / 270 coins | Moondroid |
| Pepper | Description | Buy / Sell Price | Dropped by |
|---|---|---|---|
Red Pepper |
Increases POW to all characters for a few turns. | 100 / 50 coins | Red Cataquack, Broozer, Boo Guy, Pyro Guy, Fire Bro. |
Green Pepper |
Increases DEF to all characters for a few turns. | 100 / 50 coins | Snifit, Dry Bones, Parabones, Bony Beetle, Monty Mole |
Blue Pepper |
Increases SPEED to all characters for a few turns. | 100 / 50 coins | Blue Cataquack, Scuttlebug, Rex, Sewer Rodent |
| Bean | Description | Buy / Sell Price | Dropped by |
|---|---|---|---|
Health Bean |
Adds 1 point to a character's total HP. | N/A / 10 coins | N/A |
Special Bean |
Adds 1 point to a character's total BP/SP. | N/A / 10 coins | N/A |
Power Bean |
Adds 1 point to a character's total Power. | N/A / 10 coins | N/A |
Defense Bean Defence Bean (PAL) |
Adds 1 point to a character's total Defense. | N/A / 10 coins | N/A |
Speed Bean |
Adds 1 point to a character's total Speed. | N/A / 10 coins | N/A |
Flex Bean |
Adds 1 point to a character's total Stache/Fluke. | N/A / 10 coins | N/A |
Golden Bean |
Adds 1 point to all of a character's stats. | N/A / 30 coins | N/A |
| Beaniespresso | Description | Buy / Sell Price | Dropped by |
|---|---|---|---|
Health Beaniespresso |
Adds 1 point to each characters' total HP. | N/A / 20 coins | N/A |
Special Beaniespresso |
Adds 1 point to each characters' total BP/SP. | N/A / 20 coins | N/A |
Power Beaniespresso |
Adds 1 point to each characters' total Power. | N/A / 20 coins | N/A |
Defense Beaniespresso Defence Beaniespresso (PAL) |
Adds 1 point to each characters' total Defense. | N/A / 20 coins | N/A |
Speed Beaniespresso |
Adds 1 point to each characters' total Speed. | N/A / 20 coins | N/A |
Flex Beaniespresso |
Adds 1 point to each characters' total Stache/Fluke. | N/A / 20 coins | N/A |
Golden Beaniespresso |
Adds 1 point to all of each characters' stats. | N/A / 40 coins | N/A |
| Misc. | |||
|---|---|---|---|
| Item | Description | Buy / Sell Price | Dropped by |
Refreshing Herb |
Cures negative status ailments from a character. | 30 / 15 coins | Goomba, Biddybud, Poison Blooper, Spear Guy |
Boo Biscuit |
Grants damage immunity to all characters for one turn, though they will not be able to damage enemies while in this state. | 5 / 2 coins | Spiny, Bandit, Pokey, Boo, Broozer, Boo Guy, Snufit, Tanoomba |
Secret Box |
Inflicts a random effect on the party, the enemies, or everyone in the battlefield; either healing the party, causing damage on enemies, giving everyone on the battlefield a random status effect, or even KO all or some fighters in the battlefield at once. | 150 / 75 coins | Phanto, Ninji |
Flash Bomb |
Has a chance of inflicting Dizzy on all on-screen enemies (this depends on how strong or weak the enemy is) and instantly destroys all Ghost enemies, though does nothing to most bosses and does set damage (200 damage) to Ghost bosses (Jumb-Boo and King Boo). | 50 / 25 coins | Phanto |
| no image Freeze Bomb |
Deals ice damage and has a chance of Freezing weak enemies. | 150 / 75 coins | TBA |
NOTE: Beans and Beaniespressos cannot be used in battle. Also, Beaniespressos are made by grinding five of a certain Bean type at the Shroombucks Cafe.
Objects[]
A list of objects that Mario and Luigi can interact with in this game.
| Object | Description |
|---|---|
| + Clocks | + Clocks (or Plus Clocks) are clocks that give Mario and Luigi extra time to complete minigames, with cyan ones giving three seconds and green ones giving five. They are only found in Circus Dexterity Courses. |
| Groundhollows | Groundhollows can be found in the ground, and when Mario comes out from underground beneath these hollows when doing the Mole Mario technique, the bros will acquire some 50 Gold Coins, 100 Gold Coins, Beans, and, in the case of ? Block-shaped groundhollows, Items and Clothing. |
| Rings | Yellow Rings create a line of 10 Coins that appear for a set amount of time before disappearing completely. Red Rings create eight Red Coins in an area, and after collecting all of them will reveal invisible ? Blocks. |
| Spine Coaster | Spine Coasters are rideable creatures made of bone, taking their design from Super Mario 3D Land. They only appear in Bowser's Castle, used to pass through lava pits. When they reach the end of the track, they fall in the lava, and Mario and Luigi must use the Spin Jump to reach across to the other side. |
| Switches | Many switches can be found in the game, usually activated by hitting them with a hammer, though some can be activated by stepping on them, like P Switches. Switches have lots of functions; some of them open doors leading to other rooms, activate certain objects that are found deactivated at first, etc. |
| Signs | Many signs can be found in the game, and the Mario Bros can read them, often giving them directions to other locations they can go, giving them hints on what they must do, etc. |
| Warp Pipes | Green Warp Pipes take Mario and Luigi to another area/location when entered. Yellow Warp Pipes can transport the bros to underwater or underground areas and vice versa. Red Warp Pipes take Mario and Luigi to a corresponding pipe in the area. Finally, golden Warp Pipes called Fast-Travel Pipes can be created by hitting Pipe Blocks, which connect to different parts of the Mushroom Kingdom and the Moonshade Kingdom. |
| Whirlwinds | Whirlwinds are objects that, if Mario and Luigi Spin Jump into them, they will be sucked into it and will be launched high up in the air before slowly descending, though in the case of whirlwinds in the air, they can be launched sideways, farther than they could normally go. |
Obstacles[]
A list of obstacles Mario and Luigi must overcome in this game.
| Obstacle | Description |
|---|---|
| Fire Bar | Fire Bars are are rotating rods made of fireballs, mainly found in Grumbledome Crater and Bowser's Castle, though they appear in other locations. If Mario and Luigi touch them, they will be sent to the last platform they were on. |
| Lava | Lava is an obstacle that can be seen in Grumbledome Crater (though it is impossible to fall in it) and Bowser's Castle. If Mario and Luigi fall in it, they will be sent to the last platform they were on. |
| Poisoned Water | Poisoned Water is an obstacle that only can be seen in Plumdrop Rainforest. If Mario and Luigi fall in it, they will be sent to the last platform they were on. |
| Quicksand | Quicksand is an obstacle that only can be seen in Craggy Catacombs. If Mario and Luigi fall in it, they will sink into the quicksand and will be sent to the last platform they were on. |
| Spiked Ball | Spiked Balls are black metal balls with spikes that are mainly thrown by Spikes, though they appear in other locations, rolling across the ground. If Mario and Luigi touch them, they will be sent to the last platform they were on. |
| Spike Traps | Spiked Traps are harmful obstacles that can be stationary or retractable. Spike Traps can be seen in pits or on platforms. If Mario and Luigi touch them, they will be sent to the last platform they were on. |
| Spinners | Spiked Balls are black metal balls, mainly found in Craggy Catacombs, Bowser's Castle and Eclipsa Castle. They make pendulum movements, similar to how they did in Super Mario 3D Land. If Mario and Luigi touch them, they will be sent to the last platform they were on. Large Spinners can be found as well. |
| Tweesters | Tweesters are Tornado-like enemies that follows Mario and Luigi while they traverse through Craggy Desert. When they touch the bros, they will be sent to another location. Sometimes, touching them is a poor choice, though in other situations, they will be sent onto a platform with a Bandit, and on a platform with a ? Block. |
Clothing[]
A list of clothing gear that Mario, Luigi and the Allies can equip themselves with in Mario & Luigi: Sage Quest. Most equipment can be bought from Gear Shops from certain locations. Mario and Luigi can be equipped with Boots, Hammers, Wear and Gloves, Allies can be equipped with Weapons and Armor, and both the bros and Allies can be equipped with Accessories.
| Boots | Description | Buy / Sell Price | Location(s) | Drop(s) |
|---|---|---|---|---|
Run-Down Boots |
-- | 20 / 10 coins | Starting equipment. | N/A |
So-So Boots |
-- | 45 / 22 coins | N/A | Biddybud, Para-Biddybud |
Discount Boots |
-- | 100 / 50 coins | N/A | N/A |
Picnic Boots Sandwich Boots (PAL) |
-- | 190 / 95 coins | N/A | N/A |
Bare Boots |
-- | N/A / 145 coins | N/A | N/A |
Steady Boots Trusty Boots (PAL) |
-- | 225 / 112 coins | N/A | Cheep Cheep |
Flower Boots |
-- | N/A / 155 coins | N/A | Wiggler |
Iron Boots |
Deals 50% damage to enemies with thorns, spikes or other pointy bits instead of harming the wearer. | 390 / 195 coins | Shroom Mall (visit Craggy Desert), Cragnelburg | Spiny |
Iron Boots DX |
Deals 100% damage to enemies with thorns, spikes or other pointy bits instead of harming the wearer. | 500 / 250 coins | Shroom Mall (visit Plumdrop Rainforest), Cragnelburg (visit Plumdrop Rainforest) | N/A |
Iron-Ball Boots |
Occasionally drops a massive iron ball on a damaged enemy for more damage! | 260 / 130 coins | Cragnelburg (visit Craggy Catacombs) | Spike |
Iron-Ball Boots DX |
Occasionally drops a massive iron ball on a damaged enemy for more damage! | 350 / 175 coins | Cragnelburg (visit Craggy Catacombs) | Spike |
Super Boots Trusty Boots (PAL) |
-- | N/A / 300 coins | Peach's Castle Cellar | Gloomba |
Anti-Air Boots |
Deals 150% damage to flying enemies. | 900 / 450 coins | Shroom Mall (visit Plumdrop Rainforest), Cragnelburg (visit Plumdrop Rainforest) | N/A |
Anti-Air Boots DX |
Deals 150% damage to flying enemies. | 1800 / 900 coins | Shroom Mall (Flower Shop) | N/A |
Bros. Boots |
Restores some BP whenever you deal damage. | N/A / 500 coins | N/A | N/A |
Elite Boots |
-- | N/A / 525 coins | Boss Drop | Sergeant Guy |
Frost Boots |
Deals 150% damage to flaming creatures, and possibly will inflict Freeze on struck enemies. | 1140 / 570 coins | Shroom Mall (visit Bittercold Isle), Cragnelburg (visit Bittercold Isle), Bittercold Isle | N/A |
Frost Boots DX |
Deals 150% damage to flaming creatures, and possibly will inflict Freeze on struck enemies. | 2400 / 1200 coins | Shroom Mall (Star Shop) | N/A |
Dark Boots |
Hurts you when you attack foes. | N/A / 625 coins | Bowser's Castle, Enemy Drop | Magikoopa |
Moonbounce Boots |
Slows down the speed of solo jump attacks. | N/A / 1500 coins | Boss Drop | Tethys |
Clown Boots |
-- | N/A / 1 coin | Reach Wave 25 in Circus Battle Waves | N/A |
Supasprint Boots Mach-01 Boots (PAL) |
-- | N/A / 1 coin | Beat Koopa the Quick five times in his races | N/A |
Birthday Boots DoB Boots (PAL) |
Increases your striking power by 400% on your day of birth. Happy birthday! | 1500 / 750 coins | Shroom Mall (Flower Shop) | N/A |
Vengeance Boots |
Jump attacks deal more damage to enemies the more you take damage. | 2400 / 1200 coins | Shroom Mall (Flower Shop) | N/A |
Multistomp Boots |
Stomp on an enemy three times with a solo Jump command. | 2600 / 1300 coins | Shroom Mall (Flower Shop) | N/A |
Loot Boots |
Gives out coins from the enemy each time you stomp on them. | 4600 / 2300 coins | Shroom Mall (Star Shop) | N/A |
Farmer Boots Wellington Boots (PAL) |
Makes defeated enemies occasionally drop beans instead of coins. | 5250 / 2625 coins | Shroom Mall (Rainbow Shop) | N/A |
Challenger Boots Expert Boots (PAL) |
Increases your striking power based on your Expert Challenge success rate. | -- | Expert Challenges (100 points) | N/A |
| Hammer | Description | Buy / Sell Price | Location(s) | Drop(s) |
|---|---|---|---|---|
Run-Down Hammer |
-- | N/A / 22 coins | N/A | Starting equipment. |
Discount Hammer |
-- | 90 / 45 coins | N/A | N/A |
Picnic Hammer Sandwich Hammer (PAL) |
-- | 140 / 70 coins | Shroom Mall | Needlorb |
Bark Hammer |
-- | 180 / 90 coins | Shroom Mall | TBA |
Steady Hammer Trusty Hammer (PAL) |
-- | 225 / 112 coins | N/A | N/A |
Iron-Ball Hammer |
Occasionally drops a massive iron ball on a damaged foe for extra damage! | 270 / 135 coins | Shroom Mall (visit Craggy Desert), Cragnelburg (visit Craggy Catacombs) | N/A |
Iron-Ball Hammer DX |
Occasionally drops a massive iron ball on a damaged foe for extra damage! | 480 / 240 coins | N/A | N/A |
Frost Hammer |
Deals 150% damage to flaming creatures, and possibly will inflict Freeze on struck enemies. | 500 / 250 coins | Shroom Mall (visit Bittercold Isle), Cragnelburg (visit Bittercold Isle), Bittercold Isle | Ice Bro. |
Frost Hammer DX |
Deals 200% damage to flaming creatures, and possibly will inflict Freeze on struck enemies. | 900 / 450 coins | Shroom Mall (Flower Shop) | N/A |
Blaze Hammer |
Deals 150% damage to icy creatures, and possibly will inflict Burn on struck enemies. | 650 / 325 coins | Shroom Mall (visit Grumbledome Crater), Cragnelburg (visit Grumbledome Crater), Bittercold Isle (visit Grumbledome Crater) | Pyro Guy |
Blaze Hammer DX |
Deals 200% damage to icy creatures, and possibly will inflict Burn on struck enemies. | 650 / 325 coins | N/A | N/A |
Dark Hammer |
Hurts you when you attack foes with solo hammer attacks. | N/A / 625 coins | Bowser's Castle | N/A |
Birthday Hammer DoB Hammer (PAL) |
Increases your striking power by 400% on your day of birth. Happy birthday! | 1500 / 750 coins | Shroom Mall (Flower Shop) | N/A |
Vengeance Hammer |
Solo hammer attacks deal more damage to enemies the more you take damage. | 2000 / 1000 coins | Shroom Mall (Flower Shop) | N/A |
Master Hammer |
Lets you swing twice with the solo-hammer attack. | 2800 / 1400 coins | Shroom Mall (Flower Shop) | N/A |
Golden Hammer |
Increases your striking power based on the number of coins you have. | -- | Expert Challenges (200 points) | N/A |
| Wear | Description | Buy / Sell Price | Location(s) | Drop(s) |
|---|---|---|---|---|
Thin Wear |
-- | N/A / 15 coins | Starting equipment. | N/A |
Picnic Wear Sandwich Wear (PAL) |
-- | 50 / 25 coins | Shroom Mall, Rabbit Village, Briskbreeze Fields | N/A |
Cozy Wear |
-- | 90 / 45 coins | Shroom Mall, Rabbit Village, Treeway Woods, Enemy Drop | Huckit Crab |
Warm Wear |
-- | 140 / 70 coins | Shroom Mall, Rabbit Village, Sapphire Shore | N/A |
So-So Wear |
-- | 270 / 135 coins | Sapphire Shore, Craggy Desert | N/A |
Bouquet Wear |
-- | N/A / 320 coins | Treeway Woods (complete the Wiggler Garden quest) | N/A |
Guard Wear |
Increases DEF while blocking attacks. | 350 / 175 coins | N/A | N/A |
Guard Wear DX |
Increases DEF while blocking attacks. | N/A / 490 coins | N/A | Jumb-Boo |
Toxic Wear |
Take 150% less damage from poison-based attacks and increases the chances of avoiding the Poison status by 25%. | N/A / 275 coins | Boss Drop | Slanito, Polluted Petey Piranha |
Octo Wear Octopus Wear (PAL) |
-- | N/A / 420 coins | Boss Drop | Queen Calamaria |
Immunity Wear |
Increases the chances of avoiding the Sick status by 25%. | 340 / 170 coins | Bittercold Isle | N/A |
Stonecold Wear |
Increases the chances of avoiding the Freeze status by 25%. | 450 / 225 coins | Bittercold Isle, Enemy Drop | Snow Spike |
Heavyweight Wear |
Makes you stronger, but extremely heavy; making it harder to (counter)attack properly. | 480 / 240 coins | Cragnelburg (visit Mount Grumbledome) | N/A |
Lightweight Wear |
Makes you weaker, but extremely light; making it easier to (counter)attack properly. | 480 / 240 coins | Cragnelburg (visit Mount Grumbledome) | N/A |
Fireproof Wear |
Take 150% less damage from fire-based attacks and increases the chances of avoiding the Burn status by 25%. | N/A / 525 coins | Boss Drop | Draggadon |
Koopa Troop Wear |
-- | N/A / 500 coins | Boss Drop | Kamek (first and second battle) |
Extraterrestrial Wear |
-- | N/A / 845 coins | Boss Drop | Titan |
Beanscent Wear |
Increases the chance of landing "Lucky!" hits with solo attacks. | N/A / 1 coin | Complete the "50% of Beans Uncovered" record | N/A |
Smartypants Wear |
For very smart individuals. | N/A / 1 coin | Complete the Bestiary Log sidequest | N/A |
Jester Wear |
-- | N/A / 1 coin | Reach Wave 75 in Circus Battle Waves | N/A |
Ringmaster Wear |
-- | N/A / 1 coin | Reach Wave 100 in Circus Battle Waves | N/A |
Master Wear Professional Wear (PAL) |
Replenishes 2-20 BP each time you get hit. | N/A / 1 coin | Receive an S-Rank for each Bros. Attack in the Circus Skillathon | N/A |
Turtleneck Wear |
—- | N/A / 1 coin | Beat Koopa the Quick for the third time in a race | N/A |
Birthday Wear DoB Wear (PAL) |
Increases your DEF by 400% on the day of your birth. Happy birthday! | 1500 / 750 coins | Shroom Mall (Flower Shop) | N/A |
Hero Wear |
K.Os the wearer in 3 turns, but increases their striking power by 350% before this. | 2000 / 1000 coins | Shroom Mall (Flower Shop) | Ganymede Plains |
Superstar Wear |
-- | 4500 / 2250 coins | Shroom Mall (Star Shop) | N/A |
Platinum Wear |
May cause defeated enemies to drop Blue Coins. | -- | Expert Challenges (6400 points) | N/A |
| Gloves | Description | Buy / Sell Price | Location(s) | Drop(s) |
|---|---|---|---|---|
Soft Gloves |
-- | 20 / 12 coins | Starting equipment. | N/A |
Thick Gloves |
-- | 35 / 20 coins | N/A | N/A |
Warm Gloves |
-- | 175 / 95 coins | N/A | N/A |
Shell Gloves |
-- | 240 / 100 coins | N/A | N/A |
Stache Gloves |
Increases your STACHE by 10% | 275 / 125 coins | Boss Drop | Sandmaargh |
Scoundrel Gloves |
Increase the chance to gain rare items by 10%. | 350 / 175 coins | Enemy/Boss Drop | Bandit, Randal the Bandit |
Scoundrel Gloves DX |
Increase the chance to gain rare items by 25%. | 850 / 425 coins | N/A | TBA |
Mitten Gloves |
-- | 700 / 350 coins | Bittercold Isle, Enemy Drop | Snow Spike, Mr. Blizzard |
Koopa Troop Gloves Turtle Gloves (PAL) |
-- | N/A / 320 coins | Enemy Drop | Koopatrol |
Metal Gloves |
-- | N/A / 400 coins | Boss Drop | Mecha-Blooper |
Clawgrip Gloves |
Hold on to your hammer longer when performing solo hammer attacks. | N/A / 800 coins | Boss Drop | Crabot |
Juggler Gloves |
-- | N/A / 1 coin | Reach Wave 50 in Circus Battle Waves | N/A |
Sprint Gloves |
-- | N/A / 1 coin | Beat Koopa the Quick for the first time in a race | N/A |
Charge Gloves Filler Gloves (PAL) |
Increases the Badge Points you accumulate to fill the Badge Meter after attacks. | -- | Expert Challenges (400 points) | N/A |
Master Gloves Professional Gloves (PAL) |
Returns the BP used to the perform the wearer's Bros. Attacks if you get an "Excellent!". | -- | Expert Challenges (1600 points) | N/A |
| Accessory | Description | Buy / Sell Price | Location(s) | Drop(s) |
|---|---|---|---|---|
Health Scarf |
Increases max HP by 10%. | 420 / 210 coins | N/A | Huckit Crab |
Health Scarf DX |
Increases max HP by 20%. | N/A / 650 coins | N/A | N/A |
Special Scarf |
Increases max BP by 10%. | 450 / 225 coins | N/A | N/A |
Special Scarf DX |
Increases max BP by 20%. | N/A / 700 coins | N/A | N/A |
Power Scarf |
Increases POW by 10%. | N/A / 475 coins | N/A | N/A |
Power Scarf DX |
Increases POW by 20%. | N/A / 700 coins | N/A | N/A |
Defense Scarf |
Increases POW by 10%. | N/A / 475 coins | N/A | N/A |
Defense Scarf DX |
Increases POW by 20%. | N/A / 670 coins | N/A | N/A |
Speed Scarf |
Increases Speed by 10%. | N/A / 475 coins | N/A | N/A |
Speed Scarf DX |
Increases Speed by 20%. | N/A / 925 coins | N/A | Corporal Paraplonk, beat Koopa the Quick for the second time in a race |
Stache Scarf |
Increases Stache by 10%. | 840 / 420 coins | N/A | N/A |
Stache Scarf DX |
Increases Stache by 10%. | 1250 / 625 coins | Shroom Mall (Flower Shop) | N/A |
Ghost Gown |
Turn invisible at the start of a battle. | N/A / 975 coins | Boss Drop | King Boo |
Junior Shell |
Avoid taking damage for two turns. | N/A / 1250 coins | Boss Drop | Bowser Jr. |
Giant Shell |
Avoid taking damage for four turns. | N/A / 1425 coins | Boss Drop | Bowser?, Bowser |
Eclipse Pendant |
-- | N/A / 1200 coins | Boss Drop | Callisto |
Risky Excellence |
Gain strength but receive damage for any rating other than "Excellent"! | N/A / 1 coin | Complete the "1200 Excellent Ratings" record | N/A |
Beanmaster Ring |
Let everyone know that you are the master at finding beans! | N/A / 1 coin | Complete the "100% of Beans Uncovered" record | N/A |
Speedy Collector |
Earn more items for winning battles quickly. | N/A / 1 coin | Complete the "75% of Blocks Found" record | N/A |
Blockbuster Brooch |
Let everyone know that you are the master at striking blocks! | N/A / 1 coin | Complete the "100% of Blocks Found" record | N/A |
Turtle Shell |
Avoid taking damage for one turn! | N/A / 1 coin | Beat Koopa the Quick for the fourth time in a race | N/A |
Birthday Ring DoB Ring (PAL) |
Increases the chances of Lucky Hits on your day of birth. Happy birthday! | 1750 / 875 coins | Shroom Mall (Flower Shop) | N/A |
Quickitem Token |
Allows the wearer to act immediately after using an item. | 1850 / 925 coins | Shroom Mall (Flower Shop) | N/A |
Quickswitch Token |
Allows the wearer to act immediately after calling in an Ally. | 1900 / 950 coins | Shroom Mall (Flower Shop) | N/A |
Cobalt Necktie |
Double your STACHE points! | 2400 / 1200 coins | Shroom Mall (Flower Shop) | N/A |
Bros. Ring |
Reduces BP consumption by 50%. | 2900 / 1450 coins | Shroom Mall (Star Shop) | N/A |
Shiny Ring |
Randomly gives enemies a shiny aesthetic, making them slightly stronger and drop more coins. | -- | Expert Challenges (1600 points) | N/A |
Bold Heart |
Automatcally blocks every attack that wasn't dodged. | -- | Expert Challenges (3200 points) | N/A |
Duplex Crown |
Lets you move twice in a single turn. | -- | Expert Challenges (10000 points) | N/A |
| Weapons | ||||
|---|---|---|---|---|
| Weapon | Description | Buy / Sell Price | Location(s) | Drop(s) |
| no image Run-Down Cutlass |
A cutlass Rhea carries. | N/A / 15 coins | Starting equipment. | N/A |
| no image So-So Cutlass |
-- | 45 / 22 coins | Shroom Mall, Rabbit Village, Cragnelburg | N/A |
| no image Picnic Cutlass |
-- | 180 / 90 coins | Shroom Mall, Rabbit Village, Treeway Woods Cragnelburg | N/A |
| no image Glass Cutlass |
May break during use. | 290 / 145 coins | Shroom Mall (visit Plumdrop Rainforest), Cragnelburg (visit Plumdrop Rainforest), Plumdrop Rainforest | N/A |
| no image Draining Cutlass |
Recover HP based on how much the damage was dealt to the enemy. | N/A / 245 coins | Shroom Mall (visit Bittercold Isle), Cragnelburg (visit Bittercold Isle), Bittercold Isle | N/A |
| no image Oystearl Pearl |
Quahoyster had this in his mouth for quite some time. | 100 / 45 coins | Starting equipment, Shroom Mall, Cragnelburg | N/A |
| no image Shiny Pearl |
A very shiny pearl. | 150 / 75 coins | Shroom Mall, Cragnelburg | N/A |
| no image Corkshot Gun |
A simple pop-gun Randal carries. | 250 / 125 coins | Starting equipment, Shroom Mall, Cragnelburg | N/A |
| no image Billblaster Gun |
Designed after a Bill Blaster; fires Bullet Bills. | 350 / 175 coins | Shroom Mall, Cragnelburg, Bittercold Isle | N/A |
| no image Laserblast Gun |
A simple laser blaster. | 420 / 210 coins | Shroom Mall, Cragnelburg, Bittercold Isle | N/A |
| no image Pew-Pew Gun |
Causes Randal to shoot twice when he yields an "Excellent!". | 600 / 300 coins | Shroom Mall, Cragnelburg, Bittercold Isle | N/A |
| no image Laserblast Visor |
Tethys's visor equipped with lasers. | N/A / 150 coins | Starting equipment. | N/A |
| no image Ultraviolet Visor |
Tethys's visor equipped with heat lasers that can inflict Burn on enemies. | 450 / 225 coins | Shroom Mall (visit Umbriel Village), Cragnelburg (visit Umbriel Village), Bittercold Isle (visit Umbriel Village), Resistance Moonshelter | N/A |
| no image Moon Fangs |
Moon Chomp's own fangs. | N/A / 210 coins | Starting equipment. | N/A |
| no image Bony Fangs |
Strong, bony fangs. Great for biting monsters. | 490 / 245 coins | Resistance Moonshelter | N/A |
| no image Crusher Fangs |
Great for crushing enemies. | 550 / 275 coins | Resistance Moonshelter | N/A |
| no image Grinder Fangs |
Great for grinding enemies. | 680 / 340 coins | Resistance Moonshelter | N/A |
| no image Intruder Fangs |
Allows you to chomp twice during your Strike. | 900 / 450 coins | Resistance Moonshelter | N/A |
| Armor | ||||
|---|---|---|---|---|
| Armor | Description | Buy / Sell Price | Location(s) | Drop(s) |
| no image Moonar Clothes |
Rhea's clothes she wore when she was migrating to the Mushroom Kingdom. | 20 / 10 coins | Starting equipment, Shroom Mall, Rabbit Village | N/A |
| no image So-So Clothes |
-- | 45 / 22 coins | Shroom Mall, Rabbit Village, Treeway Woods, Cragnelburg | N/A |
| no image Picnic Clothes Sandwich Clothes (PAL) |
-- | 90 / 45 coins | Shroom Mall, Rabbit Village, Cragnelburg | N/A |
| no image Cozy Clothes |
-- | 110 / 55 coins | Shroom Mall, Cragnelburg | N/A |
| no image Patchy Clothes |
-- | 145 / 72 coins | Shroom Mall, Cragnelburg | N/A |
| no image Moonar Scarf |
A special scarf for Moonars. | 165 / 82 coins | Shroom Mall, Cragnelburg | N/A |
| no image Clammy Shell |
Just a regular clam-shell. | 70 / 35 coins | Starting equipment, Shroom Mall, Cragnelburg | N/A |
| no image Larcenous Robes |
Great clothing for thieves, scoundrels, rogues and larcenists, like Randal. | N/A / 60 coins | Starting equipment. | N/A |
| no image Moonar Coat |
Tethys's coat he wore when he was migrating to the Mushroom Kingdom. | N/A / 80 coins | Starting equipment. | N/A |
| no image Moonstone Body |
Moon Chomp's own body. | N/A / 105 coins | Starting equipment. | N/A |
Bros. Attacks[]
A list of Bros. Attacks that Mario and Luigi obtain during their adventure by collecting ten Attack Pieces in a single area, either by hitting Attack Piece Blocks or completing certain tasks. There are ten Bros. Attacks, five of which are shared between each bro. Two Bros. Attacks from Mario & Luigi: Paper Jam return in this game; the Drill Shell Bros. Attack and the Mega Thwonk Bros. Attack.
| Attack | Description |
|---|---|
3D Red Shell 3 BP 10 Briskbreeze Fields Attack Pieces |
Targets the selected enemy. |
| Mario and Luigi run into the foreground, where Mario will take out a Red Shell and kick it at the selected enemy. Luigi will kick the Red Shell back at the enemy after it rebounds off of them towards him, and Mario will do the same once again. Each time the shell rebounds from an enemy and returns to a bro, the player must press | |
Drill Shell 12 BP 10 Sapphire Shore Attack Pieces |
Targets the selected enemy. |
| Mario gets out a cone-shaped, clay-red shell and puts it on his head and jumps on Luigi. When Luigi jumps toward to the enemy, the player must press | |
| no image Mirage Mirror 16 BP 10 Conundrum Manor Attack Pieces |
Targets all enemies. |
| Mario gets out a mirror and throws it in the air. Mario and Luigi jump into it before it disappears. Multiple mirrors that show reflections of Mario and Luigi (or both of them at once) faintly start appearing from thin air in random places, surrounding the enemies. One of the bros will jump from said mirror to stomp on the enemies. The player must press | |
Boulder Smash 20 BP 10 Grumbledome Crater Attack Pieces |
Targets all enemies. |
| Mario and Luigi start to head away from the enemies, where Mario gets out a Rock Mushroom and eats it to turn into Rock Mario. He starts culminating rocks, in which the player must mash | |
| no image Umbriel Cannon 28 BP Find and bring back the Moonanball for the cannon. |
Targets the selected enemy. |
| Mario gets out an Umbriel Cannon, and throws it on the ground. Luigi will load it with a Moonanball, and the bros will start to lift the cannon. The player must mash | |
| Attack | Description |
|---|---|
| no image Tennisbomb Rally 5 BP 10 Treeway Woods Attack Pieces |
Targets all enemies. |
| Mario and Luigi run into the foreground, where the two will take out tennis rackets. Luigi will then take out a bomb and toss it to Mario, who must hit it back at him using the | |
Fire Flower 8 BP 10 Craggy Desert Attack Pieces |
Targets all enemies. |
| Luigi pulls out a Fire Flower to turn him and Luigi into their fire forms, and the two will begin charging and hurling fireballs at the enemies erratically. The player must press | |
Kite Crash 12 BP 10 Plumdrop Rainforest Attack Pieces |
Targets the selected enemy. |
| Mario and Luigi will go into the foreground and Luigi gets out a kite and gives it to Mario before jumping on the kite. Mario will start to run towards the enemies, and as he does, mash | |
 Banzai Ride 16 BP 10 Bittercold Isle Attack Pieces |
Targets all enemies. |
| Mario and Luigi head away from the enemies, and Luigi gets out a miniature, reddish brown-colored Banzai Bill Cannon that grows in size once he throws it on the ground. The bros get on the cannon, and after the count of three, a Banzai Bill fires out, and the player must hit | |
Mega Thwonk 24 BP 10 Bowser's Castle Attack Pieces |
Targets the selected enemy. |
| Mario and Luigi head away from the enemies, where Luigi takes out a Mega Mushroom and eats it to become Mega Luigi. Mario will hop on the hammerhead of Luigi's Hammer, and at this point, Luigi will start charging towards the enemy, and the player must press | |
Bestiary[]
A bestiary list of enemies and bosses Mario and Luigi can battle in Mario & Luigi: Sage Quest.
| Enemies | |||
|---|---|---|---|
| Enemy | Location(s) | Coins / EXP | Drops |
Goomba** Normal · LVL 2 · HP 8 · ATK 18 · DEF 14 · SPEED 24 Quote(s): "I'm tired of being squashed..." #1 |
Briskbreeze Fields | 3 Coins / 6 EXP |
|
Biddybud Normal/Stacked · LVL 3 · HP 7 · ATK 22 · DEF 13 · SPEED 27 Quote(s): "Biddybud stacking power!" #2 |
Briskbreeze Fields, Treeway Woods | 1 Coins / 2 EXP |
|
Para-Biddybud Flying · LVL 3 · HP 11 · ATK 26 · DEF 13 · SPEED 33 Quote(s): "We'll swoop ya!" ~ "My wings!" (when grounded) #2 |
Briskbreeze Fields, Treeway Woods | 1 Coins / 2 EXP |
|
| no image Needlorb Spiked · LVL 3 · HP 18 · ATK 29 · DEF 15 · SPEED 38 Quote(s): "Can't stomp on me!" ~ "Wh-what...?" (when stomped on) #3 |
BrBriskbreezeisk Fields, Treeway Woods | 7 Coins / 12 EXP |
|
| no image Buzzap Flying · LVL 4 · HP 24 · ATK 33 · DEF 20 · SPEED 43 Quote(s): "Bzzz!" #4 |
Treeway Woods | 9 Coins / 14 EXP |
|
Cheep Cheep Normal · LVL 5 · HP 46 · ATK 50 · DEF 27 · SPEED 54 Quote(s): N/A #5 |
Sapphire Shore | 12 Coins / 17 EXP |
|
Spiny Spiked/Shelled · LVL 7 · HP 49 · ATK 42 · DEF 21 · SPEED 46 Quote(s): "Lookin' sharp!" ~ "Ack!" (when flipped over) #6 |
Sapphire Shore, Craggy Desert, Trial Abyss (Floors 1-10) | 10 Coins / 15 EXP |
|
| no image Huckit Crab Normal · LVL 7 · HP 53 · ATK 47 · DEF 24 · SPEED 58 Quote(s): "Snappy!" #7 |
Sapphire Shore, Trial Abyss (Floors 1-10) | 14 Coins / 21 EXP |
|
| no image Cataquack Normal · LVL 9 · HP 74 · ATK 52/43 · DEF 24/42 · SPEED 63/81 Quote(s): "Quack, quack!"/"Quack...?" (Red Cataquack)/(Blue Cataquack) #8 |
Sapphire Shore, Trial Abyss (Floors 1-10) | 25/40 Coins / 37/54 EXP |
|
| no image Genie Guy* Normal · LVL 7 · HP 51 · ATK 47 · DEF 29 · SPEED 49 Quote(s): "I wish to travel without this lamp..." ~ "No wish granting here!" #9 |
Craggy Desert, Trial Abyss (Floors 11-20) | 19 Coins / 19 EXP |
|
Bandit** Normal · LVL 9 · HP 58 · ATK 49 · DEF 33 · SPEED 85 Quote(s): "Better watch your back!" ~ "I'm a kleptomaniac..." #10 |
Craggy Desert | 28 Coins / 35 EXP |
|
Pokey Spiked · LVL 8 · HP 58 · ATK 53 · DEF 31 · SPEED 48 Quote(s): "Pokey's the name, poking's my game." (yellow variant) ~ "Left my spikes at home..." (green variant) #11 |
Craggy Desert, Craggy Catacombs, Trial Abyss (Floors 11-20) | 17 Coins / 24 EXP |
|
 Sandmaargh Normal · LVL 7 · HP 45 · ATK 56 · DEF 24 · SPEED 52 Quote(s): "Look beneath your feet..." #12 |
Craggy Desert, Craggy Catacombs, Trial Abyss (Floors 11-20) | 14 Coins / 21 EXP |
|
Spike Shelled · LVL 8 · HP 64 · ATK 67 · DEF 47 · SPEED 43 Quote(s): "Lips are a little...chapped." ~ "Catch these spiked balls!" #13 |
Craggy Catacombs, Trial Abyss (Floors 11-20) | 16 Coins / 23 EXP |
|
| no image Phanto Flying · LVL 7 · HP 69 · ATK 74 · DEF 59 · SPEED 57 Quote(s): "I have this never-changing grin..." ~ "Intruder alert!" #14 |
Craggy Catacombs, Trial Abyss (Floors 11-20) | 18 Coins / 27 EXP |
|
| no image Slithervant Normal · LVL 9 · HP 74 · ATK 68 · DEF 42 · SPEED 59 Quote(s): N/A #15 |
Craggy Catacombs | 0 Coins / 0 EXP | N/A |
Gloomba Normal · LVL 10 · HP 62 · ATK 68 · DEF 32 · SPEED 65 Quote(s): "STILL tired of being squashed..." #16 |
Peach's Castle Cellar, Trial Abyss (Floors 11-20) | 15 Coins / 20 EXP |
|
| no image Piranha Pot Normal · LVL 11 · HP 79 · ATK 70 · DEF 40 · SPEED 64 Quote(s): N/A #17 |
Craggy Catacombs, Trial Abyss (Floors 11-20) | 20 Coins / 25 EXP |
|
| no image Sewer Cheep Normal · LVL 10 · HP 69 · ATK 64 · DEF 44 · SPEED 71 Quote(s): "Living in the sewers stinks..." #18 |
Peach's Castle Cellar, Trial Abyss (Floors 11-20) | 17 Coins / 23 EXP |
|
Poison Blooper Normal · LVL 12 · HP 81 · ATK 82 · DEF 98 · SPEED 75 Quote(s): "Bloop, bloo!" #19 |
Plumdrop Rainforest, Trial Abyss (Floors 21-30) | 24 Coins / 28 EXP |
|
Snifit Normal · LVL 12 · HP 87 · ATK 97 · DEF 76 · SPEED 62 Quote(s): "Pew-pew!" #20 |
Plumdrop Rainforest, Trial Abyss (Floors 21-30) | 29 Coins / 35 EXP |
|
| no image Scuttlebug* Normal · LVL 11 · HP 79 · ATK 69 · DEF 94 · SPEED 68 Quote(s): N/A #21 |
Plumdrop Rainforest, Trial Abyss (Floors 21-30) | 23 Coins / 32 EXP |
|
Fuzzy* Normal · LVL 6 · HP 79 · ATK 57 · DEF 35 · SPEED 63 Quote: "I'll drain you!" ~ "Hit us, we divide!" (when hit once) ~ "We are legion!" (Fuzzy Horde) #22 |
Plumdrop Rainforest, Trial Abyss (Floors 21-30) | 25 Coins / 34 EXP |
|
Spear Guy Normal · LVL 12 · HP 82 · ATK 74 · DEF 82 · SPEED 53 Quote(s): N/A #23 |
Plumdrop Rainforest, Trial Abyss (Floors 21-30) | 33 Coins / 39 EXP |
|
Dry Bones Shelled · LVL 13 · HP 31 · ATK 71 · DEF 103 · SPEED 47 Strong against Fire Quote(s): "Got a bone to pick with you." ~ "We never die!" (after reforming) #24 |
Bonedry Graveyard, Trial Abyss (Floors 31-40) | 37 Coins / 43 EXP |
|
| no image Parabones Flying/Shelled · LVL 13 · HP 35 · ATK 75 · DEF 94 · SPEED 67 Quote(s): "Ever seen bones flying?" ~ "I can reform those...right?" (when grounded) #25 |
Bonedry Graveyard, Trial Abyss (Floors 31-40) | 45 Coins / 44 EXP |
|
| no image Bony Beetle Shelled · LVL 13 · HP 28 · ATK 71 · DEF 129 · SPEED 54 Quote(s): "Being dead is great!" ~ "Need some acupuncture?" (when protuding spikes) ~ "C-clack!" (when flipped over) ~ "Right back up again!" (after reforming) #26 |
Bonedry Graveyard, Trial Abyss (Floors 31-40) | 48 Coins / 42 EXP |
|
| no image Chincho Normal · LVL 13 · HP 34 · ATK 71 · DEF 115 · SPEED 49 Quote(s): N/A #27 |
Bonedry Graveyard, Trial Abyss (Floors 31-40) | 52 Coins / 44 EXP |
|
Boo** Ghost · LVL 14 · HP 56 · ATK 73 · DEF 168 · SPEED 125 Quote(s): "Quit staring!" ~ "Mind turning around?" ~ "Boo...yeah!" ~ "Ghosts don't die...but you probably knew that already." ~ "YACK!" (when hit by Flash Bomb) #28 |
Conundrum Manor, Trial Abyss (Floors 41-49) | 40 Coins / 45 EXP |
|
 Broozer Ghost · LVL 16 · HP 97 · ATK 87 · DEF 107 · SPEED 84 Quote(s): "Get ready for the Dreamland Express." ~ "Release the bro-gus!" ~ "Rrr...!" (when hit) ~ "Yikes!" (when hit by Flash Bomb) #29 |
Conundrum Manor, Trial Abyss (Floors 41-49) | 49 Coins / 39 EXP |
|
| no image Boo Guy Ghost · LVL 14 · HP 91 · ATK 82 · DEF 123 · SPEED 79 Quote(s): "Wooo..." ~ "Spooked yet?" ~ "[Command Block] is off limits!" (when taking a Command Block) ~ "ACK!" (when hit by Flash Bomb) #30 |
Conundrum Manor, Trial Abyss (Floors 41-49) | 39 Coins / 49 EXP |
|
| no image Snufit Ghost · LVL 15 · HP 95 · ATK 88 · DEF 115 · SPEED 67 Quote(s): "Wish I could see my living cousins..." ~ "Pew-pew...still got it." ~ "YOWZERS!" (when hit by Flash Bomb) #31 |
Conundrum Manor, Trial Abyss (Floors 41-49) | 46 Coins / 51 EXP |
|
(Horned) Ant Trooper* (Spiny) Normal · LVL 17 · HP 108 · ATK 91 · DEF 152 · SPEED 84 Quote(s): N/A #32 |
Fort Fossil, Trial Abyss (Floors 51-60) | 48 Coins / 57 EXP |
|
Hammer Bro. Shelled · LVL 18 · HP 102 · ATK 98 · DEF 142 · SPEED 75 Quote(s): "Hammer time!" ~ "Bring down the hammer!" #33 |
Fort Fossil, Trial Abyss (Floors 51-60) | 52 Coins / 60 EXP |
|
Boomerang Bro. Shelled · LVL 18 · HP 104 · ATK 98 · DEF 145 · SPEED 77 Quote(s): "Wanna get hit by my boomerang?" ~ "Boom-'er-rang!" #34 |
Fort Fossil, Trial Abyss (Floors 51-60) | 54 Coins / 62 EXP |
|
 Chargin' Chuck Shelled · LVL 19 · HP 135 · ATK 117 · DEF 149 · SPEED 84 Quote(s): "Hut!" ~ "Chargin' onward!" #35 |
Fort Fossil, Trial Abyss (Floors 51-60) | 55 Coins / 64 EXP |
|
Sergeant Guy Cannon Normal · LVL 19 · HP 1 · ATK 189 · DEF 1 · SPEED 67 Strong against Fire/Ice Quote(s): N/A |
Fort Fossil | 0 Coins / 0 EXP | N/A |
Spiny Cheep Cheep Spiked/Flying · LVL 21 · HP 95 · ATK 98 · DEF 89 · SPEED 81 Weak to Fire Quote(s): "Ditched the mohawk for these spines!" ~ "Can't possibly throw fire underwater...right?" #36 |
Sapphire Oceanbed, Trial Abyss (Floors 61-70) | 52 Coins / 67 EXP |
|
 Urchin Spiked · LVL 22 · HP 129 · ATK 87 · DEF 142 · SPEED 98 Weak to Fire Quote(s): N/A #37 |
Sapphire Oceanbed, Trial Abyss (Floors 61-70) | 60 Coins / 76 EXP |
|
Goomdiver Normal · LVL 20 · HP 108 · ATK 84 · DEF 113 · SPEED 93 Quote(s): "You guys don't need helmets?" ~ "I wonder how you breathe underwater..." #38 |
Sapphire Oceanbed, Trial Abyss (Floors 61-70) | 44 Coins / 59 EXP |
|
| no image Snow Spike Shelled · LVL 22 · HP 109 · ATK 105 · DEF 138 · SPEED 100 Weak to Fire Quote(s): "Taste snowballs!" ~ "Lips are feeling cold out here..." #39 |
Bittercold Isle, Trial Abyss (Floors 71-80) | 47 Coins / 61 EXP |
|
Ice Snifit Normal · LVL 22 · HP 114 · ATK 97 · DEF 101 · SPEED 95 Weak to Fire Quote(s): "Shivering in your boots?" #40 |
Bittercold Isle, Trial Abyss (Floors 71-80) | 49 Coins / 62 EXP |
|
Ice Bro. Shelled · LVL 24 · HP 142 · ATK 126 · DEF 153 · SPEED 105 Weak to Fire Quote(s): "Cool it, bro!" ~ "Climate change!" #41 |
Bittercold Isle, Trial Abyss (Floors 71-80) | 50 Coins / 66 EXP |
|
| no image Mr. Blizzard* Normal · LVL 22 · HP 129 · ATK 117 · DEF 100 · SPEED 122 Made by Snow Spikes Weak to Fire Quote(s): "Brr...feel the weather?" ~ "Big fan of snowball fights!" #42 |
Bittercold Isle, Trial Abyss (Floors 71-80) | 14 Coins / 28 EXP |
|
Ninji Normal · LVL 23 · HP 121 · ATK 121 · DEF 93 · SPEED 128 Quote(s): "Lurking in the darkness..." ~ "Master of ninjitsu!" #43 |
Bittercold Isle, Trial Abyss (Floors 71-80) | 42 Coins / 60 EXP |
|
| no image Jester Guy Normal · LVL 23 · HP 136 · ATK 115 · DEF 87 · SPEED 94 Quote(s): N/A |
Bittercold Tent | 0 Coins / 0 EXP | N/A |
| no image Ringmaster Bro. Shelled · LVL 23 · HP 140 · ATK 127 · DEF 161 · SPEED 104 Quote(s): N/A |
Bittercold Tent | 0 Coins / 0 EXP | N/A |
| no image Lion Chomp Shelled · LVL 23 · HP 142 · ATK 136 · DEF 173 · SPEED 97 Quote(s): N/A |
Bittercold Tent | 0 Coins / 0 EXP | N/A |
| no image Pyro Guy Fire · LVL 23 · HP 154 · ATK 139 · DEF 88 · SPEED 122 Weak to Ice Quote(s): N/A #44 |
Mount Grumbledome, Grumbledome Crater, Trial Abyss (Floors 81-90) | 47 Coins / 64 EXP |
|
Tanoomba Normal · LVL 24 · HP 162 · ATK 129 · DEF 89 · SPEED 112 Quote(s): N/A #45 |
Mount Grumbledome, Trial Abyss (Floors 81-90) | 50 Coins / 68 EXP |
|
 Bully Normal · LVL 26 · HP 196 · ATK 142 · DEF 115 · SPEED 97 Strong against Fire/Ice Quote(s): N/A #46 |
Mount Grumbledome, Grumbledome Crater, Trial Abyss (Floors 81-90) | 60 Coins / 80 EXP |
|
Stone Spike Normal · LVL 24 · HP 164 · ATK 135 · DEF 101 · SPEED 120 Quote(s): N/A #47 |
Mount Grumbledome, Trial Abyss (Floors 81-90) | 55 Coins / 72 EXP |
|
Monty Mole Normal · LVL 23 · HP 157 · ATK 129 · DEF 94 · SPEED 114 Quote(s): N/A #48 |
Mount Grumbledome, Trial Abyss (Floors 81-90) | 52 Coins / 67 EXP |
|
Rex* Normal · LVL 24 · HP 182 · ATK 147 · DEF 106 · SPEED 103 Quote(s): N/A #49 |
Mount Grumbledome, Trial Abyss (Floors 81-90) | 58 Coins / 76 EXP |
|
Fire Bro. Shelled · LVL 25 · HP 204 · ATK 161 · DEF 162 · SPEED 123 Quote(s): N/A #50 |
Grumbledome Crater, Trial Abyss (Floors 81-90) | 65 Coins / 79 EXP |
|
| no image Splorch Fire · LVL 25 · HP 242 · ATK 166 · DEF 100 · SPEED 98 Quote(s): N/A #51 |
Koopa Reef, Trial Abyss (Floors 91-99) | 45 Coins / 57 EXP |
|
| no image Koopatrol Shelled/Spiked · LVL 26 · HP 267 · ATK 175 · DEF 210 · SPEED 142 Quote(s): N/A #52 |
Koopa Reef, Bowser's Castle, Trial Abyss (Floors 91-99) | 58 Coins / 64 EXP |
|
Shy Guy* Normal · LVL 24 · HP 121 · ATK 158 · DEF 101 · SPEED 142 Fought alongside Chain Chomp Quote(s): N/A #53 |
Koopa Reef, Bowser's Castle, Trial Abyss (Floors 91-99) | 25 Coins / 30 EXP |
|
 Chain Chomp* Normal · LVL 26 · HP 189 · ATK 184 · DEF 203 · SPEED 89 Fought alongside Shy Guy Quote(s): N/A #54 |
Koopa Reef, Bowser's Castle, Trial Abyss (Floors 91-99) | 32 Coins / 35 EXP |
|
 Shy Guy Airtub* Normal · LVL 30 · HP 194 · ATK 224 · DEF 145 · SPEED 174 Quote(s): N/A #55 |
Koopa Reef, Trial Abyss (Floors 91-99) | 105 Coins / 125 EXP |
|
 Mecha-Chomp* Normal · LVL 28 · HP 236 · ATK 181 · DEF 172 · SPEED 94 Quote(s): N/A #56 |
Koopa Reef, Bowser's Castle, Trial Abyss (Floors 91-99) | 67 Coins / 82 EXP |
|
Magikoopa Normal · LVL 30 · HP 255 · ATK 189 · DEF 134 · SPEED 112 Quote(s): N/A #57 |
Bowser's Castle, Trial Abyss (Floors 91-99) | 65 Coins / 77 EXP |
|
| no image Moondroid Normal · LVL 32 · HP 285 · ATK 218 · DEF 154 · SPEED 131 Strong against Fire/Ice Quote(s): N/A #58 |
Umbriel Village, Eclipsa Castle | 69 Coins / 83 EXP |
|
| no image Saturn IV Drione Flying · LVL 31 · HP 324 · ATK 236 · DEF 144 · SPEED 145 Strong against Fire/Ice Quote(s): N/A #59 |
Umbriel Village, Ganymede Plains, Pallene Outskirts, Eclipsa Castle | 65 Coins / 78 EXP |
|
| no image Moonba Flying · LVL 30 · HP 306 · ATK 220 · DEF 129 · SPEED 147 Quote(s): N/A #60 |
Ganymede Plains, Pallene Outskirts | 57 Coins / 69 EXP |
|
| no image Youefo Guy Flying · LVL 31 · HP 317 · ATK 237 · DEF 140 · SPEED 154 Quote(s): N/A #61 |
Ganymede Plains, Pallene Outskirts | 62 Coins / 74 EXP |
|
| no image Moonfly Flying · LVL 33 · HP 284 · ATK 178 · DEF 100 · SPEED 148 Weak to Hammer Quote(s): N/A #62 |
Eclipsa Castle Sewer | 50 Coins / 65 EXP |
|
| no image Sewer Rodent Normal · LVL 34 · HP 272 · ATK 163 · DEF 97 · SPEED 155 Weak to Jump Quote(s): N/A #63 |
Eclipsa Castle Sewer | 42 Coins / 59 EXP |
|
| no image Sewage Bubble Flying · LVL 35 · HP 287 · ATK 180 · DEF 103 · SPEED 137 Quote(s): N/A #64 |
Eclipsa Castle Sewer | 40 Coins / 60 EXP |
|
| no image Sewage Sludger Normal · LVL 35 · HP 287 · ATK 194 · DEF 103 · SPEED 125 Quote(s): N/A #64 |
Eclipsa Castle Sewer | 80 Coins / 120 EXP |
|
| no image Moon Clock Normal · LVL 99 · HP 1 · ATK 1 · DEF 999 · SPEED 1 |
Eclipsa Castle | 0 Coins / 0 EXP | N/A |
| Bosses | |||
|---|---|---|---|
| Boss | Location | Coins / EXP | Drops |
 Big Tail Goomba Normal · LVL 4 · HP 142 · ATK 49 · DEF 31 · SPEED 59 |
Briskbreeze Fields | 60 Coins / 90 EXP |
|
  Wiggler Normal · LVL 7 · HP 162 · ATK 62 · DEF 48 · SPEED 67 |
Treeway Woods | 85 Coins / 125 EXP |
|
| no image Randal the Bandit Normal · LVL 9 · HP 174 · ATK 79 · DEF 54 · SPEED 92 |
Craggy Desert | 120 Coins / 180 EXP |
|
| no image Hisstocrat Normal · LVL 11 · HP 374 · ATK 81 · DEF 67 · SPEED 85 |
Craggy Catacombs | 150 Coins / 240 EXP | TBA |
| no image Slanito Normal · LVL 13 · HP 521 · ATK 116 · DEF 72 · SPEED 143 |
Plumdrop Rainforest | 210 Coins / 250 EXP |
|
 Polluted Petey Piranha Normal · LVL 15 · HP 648 · ATK 131 · DEF 75 · SPEED 119 Weak to Fire/Jump (when flipped over) |
Plumdrop Rainforest | 345 Coins / 420 EXP |
|
 Jumb-Boo Ghost · LVL 16 · HP 725 · ATK 145 · DEF 148 · SPEED 98 |
Conundrum Manor | 400 Coins / 575 EXP |
|
 King Boo Ghost/Spiny · LVL 18 · HP 918 · ATK 186 · DEF 127 · SPEED 122 |
Conundrum Manor | 440 Coins / 650 EXP |
|
 Elite Trio Normal / Shelled/Flying / Normal · LVL 20 · HP 279 / 435 / 581 · ATK 189 / 196 / 209 · DEF 132 / 173 / 156 · SPEED 65 / 125 / 85 (Private Goomp) / (Corporal Paraplonk) / (Sergeant Guy) |
Fort Fossil | 220 Coins / 250 EXP (each) |
|
 Kamek Flying · LVL 21 · HP 1678 · ATK 215 · DEF 145 · SPEED 87 |
Fort Fossil | 670 Coins / 825 EXP |
|
| no image Queen Calamaria Normal · LVL 22 · HP 1457 · ATK 207 · DEF 136 · SPEED 113 |
Sapphire Docks | 720 Coins / 870 EXP |
|
| no image Draggadon Flying · LVL 24 · HP 1882 · ATK 230 · DEF 142 · SPEED 145 Weak to Jump/Ice |
Grumbledome Crater | 780 Coins / 930 EXP |
|
 Mecha-Blooper Normal · LVL 23 · HP 575 · ATK 242 · DEF 158 · SPEED 132 Strong against Fire/Ice |
Bowser's Castle | 150 Coins / 200 EXP |
|
| no image Tethys Flying · LVL 23 · HP 2225 · ATK 246 · DEF 123 · SPEED 164 |
Bowser's Castle | 745 Coins / 1000 EXP |
|
 Bowser Jr. & Kamek Flying/Shelled / Flying*** · LVL 25 · HP 1450 / 1450*** · ATK 246 / 252*** · DEF 173 / 154 · SPEED 152 / 135*** *** - (Bowser Jr.) / (Kamek) |
Bowser's Castle | 475 Coins / 700 EXP (each) |
|
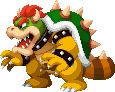 Bowser? Shelled · LVL 27 · HP 2475 · ATK 247 · DEF 172 · SPEED 144 |
Bowser's Castle | 1000 Coins / 1750 EXP |
|
 Bowser Shelled · LVL 30 · HP 2700 · ATK 254 · DEF 181 · SPEED 149 |
Pallene Outskirts | 1225 Coins / 1825 EXP |
|
| no image Titan Normal · LVL 33 · HP 3000 · ATK 264 · DEF 148 · SPEED 154 Strong against Fire/Ice |
Eclipsa Castle | 1400 Coins / 2000 EXP |
|
| no image Crabot Normal · LVL 35 · HP 3250 · ATK 269 · DEF 151 · SPEED 158 Strong against Fire/Ice |
Eclipsa Castle Sewers | 1450 Coins / 2050 EXP |
|
| no image Callisto Normal · LVL 37 · HP 3750 · ATK 274 · DEF 145 · SPEED 164 |
Eclipsa Castle | 1525 Coins / 2175 EXP |
|
| no image Eclipsa Normal · LVL 38 · HP 4500 · ATK 324 · DEF 152 · SPEED 185 |
Eclipsa Castle | 0 Coins / 0 EXP | N/A |
| no image Lunar Bowser Normal · LVL 40 · HP 5250 · ATK 332 · DEF 159 · SPEED 194 |
Eclipsa Castle | 0 Coins / 0 EXP | N/A |
| no image Shadow Bros. Note: Each bro has the same stats and level as the bros (ex. Shadow Mario has the same stats and level as Mario) |
Trial Abyss (Floor 50) | Same Coins and EXP as the bros currently have. | N/A |
| no image Skelletodactyl Flying · LVL 40 · HP 7200 · ATK 417 · DEF 178 · SPEED 225 Strong against Fire/Ice |
Trial Abyss (Floor 100) | 0 Coins / 0 EXP | N/A |
| no image Broodals Normal · LVL 40 · HP 425 · ATK 355 / 334 / 347 / 342 · DEF 161 · SPEED 215 (Topper) / (Hariet) / (Spewart) / (Rango) |
Boss Gauntlet | 0 Coins / 0 EXP | N/A |
| no image Madame Broode Normal · LVL 45 · HP 6000 · ATK 374 · DEF 167 · SPEED 230 |
Boss Gauntlet | 0 Coins / 0 EXP | N/A |
| no image Dry Bowser Shelled · LVL 47 · HP 6500 · ATK 402 · DEF 167 · SPEED 240 Strong against Fire/Ice |
Nostalgic Gauntlet | 0 Coins / 0 EXP | N/A |
* - Not seen in the overworld; only seen in battle.
** - Fought alongside a boss, most of the time they have lower stats.
Underline: Support enemy/object/part.
Expert Challenges[]
Expert Challenges are optional battle objectives that reappear in Mario & Luigi: Sage Quest, introduced in Mario & Luigi: Dream Team and seen again in Mario & Luigi: Paper Jam. If Mario and/or Luigi complete these challenges, they earn points, that if hit certain requirement totals, can result in various equipment rewards. It should be noted while participating in matches in Bittercold Tent, Expert Challenges are disabled.
Rewards[]
| Point Requirement | Reward | Reward | Point Requirement |
|---|---|---|---|
| 50 points | Expert Wear (PAL) |
Expert Boots (PAL) |
100 points |
| 200 points | Filler Gloves (PAL) |
400 points | |
| 800 points | Professional Gloves (PAL) |
1600 points | |
| 3200 points | 6400 points | ||
| ★10000 points★ | ★10000 points★ | ||
List of Expert Challenges[]
| Objective | Description | Description | Objective |
|---|---|---|---|
| Excellent Jump 5 points |
Finish a single battle using only Jump attacks that are Excellent. | Finish a single battle using only Hammer attacks that are Excellent. | Excellent Hammer 5 points |
| Excellent Strike 5 points |
Finish a single battle using only Strike attacks that are Excellent. | Finish a single battle using only counterattacks that are successful. | Excellent Counterattack 15 points |
| Excellent 3D Red Shell 5 points |
Get an Excellent with the 3D Red Shell Bros. Attack. | Get 5 Excellents in a row with the 3D Red Shell Bros. Attack. | Expert 3D Red Shell 15 points |
| Excellent Fire Flower 5 points |
Get an Excellent with the Fire Flower Bros. Attack. | Get 5 Excellents in a row with the Fire Flower Bros. Attack. | Expert Fire Flower 15 points |
| Excellent Mirage Mirror 5 points |
Get an Excellent with the Mirage Mirror Bros. Attack. | Get 5 Excellents in a row with the Mirage Mirror Bros. Attack. | Expert Mirage Mirror 15 points |
| Excellent Boulder Smash 5 points |
Get an Excellent with the Boulder Smash Bros. Attack. | Get 5 Excellents in a row with the Boulder Smash Bros. Attack. | Expert Boulder Smash 15 points |
| Excellent Umbriel Cannon 30 points |
Get an Excellent with the Umbriel Cannon Bros. Attack. | Get 5 Excellents in a row with the Umbriel Cannon Bros. Attack. | Expert Umbriel Cannon 90 points |
| Excellent Tennisbomb Rally 5 points |
Get an Excellent with the Tennisbomb Rally Bros. Attack. | Get 5 Excellents in a row with the Tennisbomb Rally Bros. Attack. | Expert Tennisbomb Rally 15 points |
| Excellent Drill Shell 5 points |
Get an Excellent with the Drill Shell Bros. Attack. | Get 5 Excellents in a row with the Drill Shell Bros. Attack. | Expert Drill Shell 15 points |
| Excellent Kite Crash 5 points |
Get an Excellent with the Kite Crash Bros. Attack. | Get 5 Excellents in a row with the Kite Crash Bros. Attack. | Expert Kite Crash 15 points |
| Excellent Banzai Ride 5 points |
Get an Excellent with the Banzai Ride Bros. Attack. | Get 5 Excellents in a row with the Banzai Ride Bros. Attack. | Expert Banzai Ride 15 points |
| Excellent Mega Thwonk 30 points |
Get an Excellent with the Mega Thwonk Bros. Attack. | Get 5 Excellents in a row with the Mega Thwonk Bros. Attack. | Expert Mega Thwonk 90 points |
| Excellent Bros. 100 points |
After all Bros. Attacks have been unlocked, get an Excellent with each at least once. | After all Bros. Attacks have been unlocked, get 2 Excellents with each at least once. | Expert Bros. 200 points |
| Excellent Rhea 5 points |
Get an Excellent with all of Rhea's Special Attacks. | Get 5 Excellents in a row with the Rhea's Special Attacks. | Expert Rhea 15 points |
| Excellent Quahoyster 5 points |
Get an Excellent with all of Quahoyster's Special Attacks. | Get 5 Excellents in a row with the Quahoyster's Special Attacks. | Expert Quahoyster 15 points |
| Excellent Randal 5 points |
Get an Excellent with all of Randal's Special Attacks. | Get 5 Excellents in a row with the Randal's Special Attacks. | Expert Randal 15 points |
| Excellent Tethys 5 points |
Get an Excellent with all of Tethys's Special Attacks. | Get 5 Excellents in a row with the Tethys's Special Attacks. | Expert Tethys 15 points |
| Excellent Moon Chomp 5 points |
Get an Excellent with all of Moon Chomp's Special Attacks. | Get 5 Excellents in a row with the Moon Chomp's Special Attacks. | Expert Moon Chomp 15 points |
| Excellent Allies 100 points |
After all Allies joined the party, get an Excellent with each of their Special Attacks at least once. | After all Allies joined the party, get 2 Excellents in a row with each of their Special Attacks at least once. | Expert Allies 200 points |
| Dodge Apprentice 5 points |
Dodge enemy attacks 50 times. | Dodge enemy attacks 100 times. | Dodge Enthusiast 10 points |
| Dodge Master 25 points |
Dodge enemy attacks 150 times. | Dodge enemy attacks 200 times. | Dodge Expert 50 points |
| Counterattack Apprentice 15 points |
Defeat 50 monsters with counterattacks. | Defeat 100 monsters with counterattacks. | Counterattack Enthusiast 40 points |
| Counterattack Master 70 points |
Defeat 150 monsters with counterattacks. | Defeat 200 monsters with counterattacks. | Counterattack Expert 140 points |
| Goomba Dodge 5 points |
Dodge 5 Goomba attacks in a row. | Dodge 5 Biddybud attacks in a row. | Biddybud Dodge 5 points |
| Para-Biddybud Dodge 5 points |
Dodge 5 Para-Biddybud attacks in a row. | Dodge 5 Needlorb attacks in a row. | Needlorb Dodge 5 points |
| Buzzap Dodge 5 points |
Dodge 5 Buzzap attacks in a row. | Dodge 5 Cheep Cheep attacks in a row. | Cheep Cheep Dodge 5 points |
| Spiny Dodge 5 points |
Dodge 5 Spiny attacks in a row. | Dodge 5 Huckit Crab attacks in a row. | Huckit Crab Dodge 5 points |
| Cataquack Dodge 5 points |
Dodge 5 Fuzzy attacks in a row. | Dodge 5 Genie Guy attacks in a row. | Genie Guy Dodge 5 points |
| Pokey Dodge 5 points |
Dodge 5 Pokey attacks in a row. | Dodge 5 Sandmaargh attacks in a row. | Sandmaargh Dodge 5 points |
| Spike Dodge 5 points |
Dodge 5 Spike attacks in a row. | Dodge 5 Phanto attacks in a row. | Phanto Dodge 5 points |
| Gloomba Dodge 5 points |
Dodge 5 Gloomba attacks in a row. | Dodge 5 Piranha Pot attacks in a row. | Piranha Pot Dodge 5 points |
| Sewer Cheep Dodge 5 points |
Dodge 5 Sewer Cheep attacks in a row. | Dodge 5 Poison Blooper attacks in a row. | Poison Blooper Dodge 5 points |
| Snifit Dodge 5 points |
Dodge 5 Snifit attacks in a row. | Dodge 5 Scuttlebug attacks in a row. | Scuttlebug Dodge 5 points |
| Fuzzy Dodge 5 points |
Dodge 5 Fuzzy attacks in a row. | Dodge 5 Spear Guy attacks in a row. | Spear Guy Dodge 5 points |
| Dry Bones Dodge 5 points |
Dodge 5 Dry Bones attacks in a row. | Dodge 5 Parabones attacks in a row. | Parabones Dodge 5 points |
| Bony Beetle Dodge 5 points |
Dodge 5 Bony Beetle attacks in a row. | Dodge 5 Chincho attacks in a row. | Chincho Dodge 5 points |
| Boo Dodge 5 points |
Dodge 5 Boo attacks in a row. | Dodge 5 Broozer attacks in a row. | Broozer Dodge 5 points |
| Boo Guy Dodge 5 points |
Dodge 5 Boo Guy attacks in a row. | Dodge 5 Snufit attacks in a row. | Snufit Dodge 5 points |
| (Horned) Ant Trooper Dodge 5 points |
Dodge 5 (Horned) Ant Trooper attacks in a row. | Dodge 5 Hammer Bro. attacks in a row. | Hammer Bro. Dodge 5 points |
| Boomerang Bro. Dodge 5 points |
Dodge 5 Boomerang Bro. attacks in a row. | Dodge 5 Chargin' Chuck attacks in a row. | Chargin' Chuck Dodge 5 points |
| Spiny Cheep Dodge 5 points |
Dodge 5 Spiny Cheep attacks in a row. | Dodge 5 Urchin attacks in a row. | Urchin Dodge 5 points |
| Snow Spike Dodge 5 points |
Dodge 5 Snow Spike attacks in a row. | Dodge 5 Ice Snifit attacks in a row. | Ice Snifit Dodge 5 points |
| Ice Bro. Dodge 5 points |
Dodge 5 Ice Bro. attacks in a row. | Dodge 5 Mr. Blizzard attacks in a row. | Mr. Blizzard Dodge 5 points |
| Ninji Dodge 5 points |
Dodge 5 Ninji attacks in a row. | Dodge 5 Pyro Guy attacks in a row. | Pyro Guy Dodge 5 points |
| Tanoomba Dodge 5 points |
Dodge 5 Tanoomba attacks in a row. | Dodge 5 Bully attacks in a row. | Bully Dodge 5 points |
| Stone Spike Dodge 5 points |
Dodge 5 Stone Spike attacks in a row. | Dodge 5 Monty Mole attacks in a row. | Monty Mole Dodge 5 points |
| Rex Dodge 5 points |
Dodge 5 Rex attacks in a row. | Dodge 5 Fire Bro. attacks in a row. | Fire Bro. Dodge 5 points |
| Splorch Dodge 5 points |
Dodge 5 Splorch attacks in a row. | Dodge 5 Koopatrol attacks in a row. | Koopatrol Dodge 5 points |
| Shy Guy Dodge 5 points |
Dodge 5 Shy Guy attacks in a row. | Dodge 5 Chain Chomp attacks in a row. | Chain Chomp Dodge 5 points |
| Shy Guy Airtub Dodge 15 points |
Dodge 5 Shy Guy Airtub attacks in a row. | Dodge 5 Mecha-Chomp attacks in a row. | Mecha-Chomp Dodge 5 points |
| Magikoopa Dodge 5 points |
Dodge 5 Magikoopa attacks in a row. | Dodge 5 Moondroid attacks in a row. | Moondroid Dodge 5 points |
| Saturn IV Drione Dodge 5 points |
Dodge 5 Rex attacks in a row. | Dodge 5 Craterover attacks in a row. | Craterover Dodge 5 points |
| Moonfly Dodge 5 points |
Dodge 5 Moonfly attacks in a row. | Dodge 5 Sewer Rodent attacks in a row. | Sewer Rodent Dodge 5 points |
| Sewage Bubble Dodge 5 points |
Dodge 5 Sewage Bubble (or Sewage Sludger) attacks in a row. | Defeat all enemies in one move as Mario. | Super Mario! 20 points |
| Super Luigi! 20 points |
Defeat all enemies in one move as Luigi. | Use Bros. Attacks 5 times. | Beginner Bros. 5 points |
| Modest Bros. 25 points |
Use Bros. Attacks 50 times. | Use Bros. Attacks 150 times. | Hardworking Bros. 70 points |
| Badge Beginner 5 points |
Use a Badge 5 times. | Use a Badge 20 times. | Badge Enthusiast 40 points |
| Lucky Star 5 points |
Get 30 Lucky Hits. | Get 70 Lucky Hits. | Lucky Superstar 20 points |
| Lucky Megastar 70 points |
Get 150 Lucky Hits. | Use all items in the game at least once. | Item Buffet 25 points |
| Coin Enthusiast 5 points |
Collect a total of 2,000 coins. | Collect a total of 12,000 coins. | Coin Collector 45 points |
| Coin King 240 points |
Collect a total of 30,000 coins. | Start 15 battles with First Stikes. | Fresh Start 5 points |
| Head Start 15 points |
Start 100 battles with First Stikes. | Start 200 battles with First Stikes. | Flying Start 120 points |
| No Help Here 15 points |
Beat a boss without using your Ally. | Beat a boss without using Badges. | Badge-Free Victory 15 points |
| Item-Free Victory 15 points |
Beat a boss without using items. | Beat a boss without using any wear. | Do It Yourself 15 points |
| Total Points: 2,720 points | |||
Boss Gauntlet[]
The Boss Gauntlet is an area found in the basement of Peach's Castle, which only accessible after they have learned the Spring Jump move. The Boss Gauntlet is similar to the Battle Ring in Mario & Luigi: Dream Team, where Mario and Luigi face off against tougher versions of already-fought bosses (with the exception of the Big Tail Goomba, Randal the Bandit, Slanito, Jumb-Boo, Kamek (first battle), Mecha-Blooper and Tethys, Bowser?, Bowser, Eclipsa and Lunar Bowser) in a set number of turns (displayed by a Time Bob-omb on the top right corner of the screen). Mario and Luigi are also given a set number of items during these battles, and are given two-three random Allies to help them out. After a Battle Class is beaten, another one is added. If Mario and Luigi do not fight any bosses that are in the gauntlet, they will be locked until they have defeated them.
- Gauntlet Class #1: Wiggler DX (6 turn limit, recommended level is 14, 100 coin fee, 600 coin reward)
- Gauntlet Class #2: Hisstocrat DX (8 turn limit, recommended level is 17, 150 coin fee, 900 coin reward)
- Gauntlet Class #3: Polluted Petey Piranha DX (13 turn limit, recommended level is 20, 200 coin fee, 1200 coin reward)
- Gauntlet Class #4: King Boo DX (16 turn limit, recommended level is 25, 250 coin fee, 1500 coin reward)
- Gauntlet Class #5: Elite Trio DX (14 turn limit, recommended level is 28, 300 coin fee, 1800 coin reward)
- Gauntlet Class #6: Queen Calamaria DX (18 turn limit, recommended level is 32, 350 coin fee, 2100 coin reward)
- Gauntlet Class #7: Draggadon DX (18 turn limit, recommended level is 38, 400 coins)
- Gauntlet Class #8: Bowser Jr. DX and Kamek DX (21 turn limit, recommended level is 42, 450 coin fee, 2400 coin reward)
- Gauntlet Class #9: Callisto DX (27 turn limit, recommended level is 47, 500 coin fee, 3000 coin reward)
- Gauntlet Medley: All previous classes plus the Broodals and Madame Broode (34 turn limit, recommended level is 50, 1000 coin fee, 10000 coin reward)
Nostalgic Gauntlet[]
The Nostalgic Gauntlet is a secondary Boss Gauntlet that is unlocked when the player beats the first Gauntlet Class of the Boss Gauntlet for the first time. The Nostalgic Gauntlet is the same as the Boss Gauntlet, though instead of fighting previously-fought bosses in the game again with stronger stats, Mario and Luigi must battle two bosses each that they have fought in previous Mario & Luigi games.
- Nostalgia Class #1: Trunkle (9 turn limit, recommended level is 18, 200 coin fee, 700 coin and "We Can't Lose! RMX" Tape Recording reward)
- Nostalgia Class #2: Popple (12 turn limit, recommended level is 21, 400 coin fee, 1000 coin and "The Marvelous Duo RMX" Tape Recording reward)
- Nostalgia Class #3: Sunnycide (16 turn limit, recommended level is 24, 600 coin fee, 1400 coin reward)
- Nostalgia Class #4: Ms. Thwomp (18 turn limit, recommended level is 29, 1000 coin fee, 1800 coin and "Boss Battle RMX" Tape Recording reward)
- Nostalgia Class #5: Bowser Memory ML (17 turn limit, recommended level is 32, 1200 coin fee, 2200 coin reward)
- Nostalgia Class #6: Dark Star (22 turn limit, recommended level is 38, 1400 coin fee, 2500 coin and "They're Pretty Tough, Should We be Careful!? RMX" Tape Recording reward)
- Nostalgia Class #7: Pi'illodum (24 turn limit, recommended level is 42, 1600 coin fee, 2700 coin and "Never Let Up! RMX" Tape Recording reward)
- Nostalgia Class #8: Antasma (27 turn limit, recommended level is 46, 2000 coin fee, 3000 coin and "The Final Antasma Battle RMX" Tape Recording reward)
- Nostalgia Class #9: King Bob-omb (3 real-time minute countdown, recommended level is 49, 2400 coin fee, 3500 coin reward)
- Nostalgia Class #10: Dry Bowser (34 turn limit, recommended level is 52, 3000 coin fee, 10000 coin and "Big Bang! RMX" Tape Recording reward)
Radio Player[]
The Radio Player option contained in the game allows the player to listen to the songs in the game by collecting Tape Recordings of the game's original soundtrack by striking certain ? Blocks scattered across the Mushroom Kingdom and Moonshade Kingdom, or by other methods. The music is played through Rhea's radio back in the Moonshade Kingdom, and Rhea and Tethys can be seen, and depending on what music is being played, their expression changes. Prior to completing the game, Jammin' Toad can be seen playing the music through his headphones. As in Mario & Luigi: Paper Jam and Mario & Luigi: Superstar Saga + Bowser's Minions, the music can be played through headphones even with the system closed. This option is locked until the player collects five different Tape Recordings.
- Note the only Tape Recording that does not need to be collected (and is unlocked by default) is the "3DS Banner" track.
| # | Tape | Description | Length |
|---|---|---|---|
| #01 | 3DS Banner | Jingle that plays on the 3DS Menu when selecting the game. | 0:05 |
| #02 | Press Start to Play | The title screen theme. | 0:56 |
| #03 | A New Quest Sparks | The file select theme. | 0:47 |
| #04 | Tranquil Intermission | Plays during peaceful scenes. | 0:47 |
| #05 | For Comedic Purposes | Plays during comedic scenes. | 0:52 |
| #06 | Trouble Afoot | Plays when trouble is happening. | 0:49 |
| #07 | King of Awesome | Plays during cutscenes involving Bowser. | 0:54 |
| #08 | The Elite Baddies | Plays during cutscenes involving the Elite Trio. | 0:49 |
| #09 | Kamek, the Evil Magikoopa | Plays during cutscenes involving Kamek. | 0:46 |
| #10 | Peach's Castle Theme | Plays in Peach's Castle. | 1:47 |
| #11 | Toad Town | Plays in Toad Town. | 1:36 |
| #12 | Sunrise Springbreeze | Plays in Briskbreeze Fields. | 1:42 |
| #13 | Mammal Village | Plays in Rabbit Village. | 1:24 |
| #14 | Stumpling Glade | Plays in Treeway Woods. | 1:27 |
| #15 | Relaxing Resort | Plays in Sapphire Shore. | 1:32 |
| #16 | Cactaceonian People | Plays in Cragnelburg. | 1:52 |
| #17 | Quicksand Flow | Plays in Craggy Desert. | 1:38 |
| #18 | Tomb Raiders | Plays in Craggy Catacombs. | 1:34 |
| #19 | Pit of 100 Floors | Plays in Trial Abyss. | 1:36 |
| #20 | Polluted Woodland | Plays in Plumdrop Rainforest. | 1:30 |
| #21 | A Bone to Pick | Plays in Bonedry Graveyard. | 1:38 |
| #22 | Enigmansion Interior | Plays in Conundrum Manor. | 1:45 |
| #23 | Devastated Town | Plays in a destroyed Toad Town. | 1:42 |
| #24 | Fossil Battleground | Plays in Fort Fossil. | 1:28 |
| #25 | Bloo-Ray Sea | Plays in Sapphire Oceanbed. | 1:32 |
| #26 | Shiverfreeze Island | Plays in Bittercold Isle. | 1:24 |
| #27 | Circustent Show | Plays in Bittercold Tent. | 1:32 |
| #28 | Grumbledome Hike | Plays in Mount Grumbledome. | 1:47 |
| #29 | Volcanic Grotto | Plays in Grumbledome Craters. | 1:36 |
| #30 | Scorching Road | Plays in Koopa Reef. | 1:32 |
| #31 | Koopa Troop Frontier | Plays in Bowser's Castle. | 1:44 |
| #32 | Village Remains | Plays in Umbriel Village. | 1:50 |
| #33 | Moonshade Outskirts | Plays in Ganymede Plains and Pallene Outskirts. | 1:35 |
| #34 | Meet the Resistance | Plays in Resistance Moonshelter. | 1:40 |
| #35 | Final Stretch | Plays in Eclipsa Castle. | 1:52 |
| #36 | Bros. Seminar | Plays during tutorials. | 0:53 |
| #37 | Having A Ball | Plays during minigames. | 0:45 |
| #38 | A Winner Is You! | Fanfare that plays after winning minigames. | 0:03 |
| #39 | Try Again! | Fanfare that plays after losing minigames. | 0:05 |
| #40 | Day At The Races | Fanfare that plays before Koopa the Quick's/Roving Racers's races. | 0:06 |
| #41 | Track n' Field | Plays during Koopa the Quick's/Racing Rovers's races. | 0:54 |
| #42 | New Item Acquired | Jingle that plays when the player obtains a new item. | 0:03 |
| #43 | Attack Piece Acquired | Jingle that plays when the player obtains a new Attack Piece. | 0:05 |
| #44 | New Skill Acquired | Jingle that plays when the player learns a new overworld move/Bros. Attack. | 0:07 |
| #45 | A New Recruit | Jingle that plays when a new Ally joins the party. | 0:05 |
| #46 | Here We Go! | The regular battle theme. | 1:13 |
| #47 | Square Up! | The boss battle theme. | 1:22 |
| #48 | King of the Koopas | The Bowser battle theme. | 1:25 |
| #49 | We Can't Lose! RMX | A cover of Mario & Luigi: Superstar Saga's boss battle theme. | 1:45 |
| #50 | The Marvelous Duo RMX | A cover of Popple's battle theme from Mario & Luigi: Superstar Saga. | 1:54 |
| #51 | Boss Battle RMX | A cover of Mario & Luigi: Partners in Time's boss battle theme. | 1:47 |
| #52 | They're Pretty Tough, Should We be Careful!? RMX | A cover of Mario & Luigi: Bowser's Inside Story's boss battle theme. | 1:25 |
| #53 | Never Let Up! RMX | A cover of Mario & Luigi: Dream Team's boss battle theme. | 1:34 |
| #54 | The Final Antasma Battle RMX | A cover of Antasma's battle theme from Mario & Luigi: Dream Team. | 1:46 |
| #55 | Big Bang! RMX | A cover of Mario & Luigi: Paper Jam's boss battle theme. | 1:15 |
| #56 | Lunar Eclipse | The Callisto and Eclipsa battle theme. | 1:17 |
| #57 | The Final Showdown | The final boss battle theme. | 1:45 |
| #58 | Victorious Bros. | The battle victory fanfare. | 0:37 |
| #59 | Game Over | Jingle that plays when the player receives a Game Over. | 0:07 |
| #60 | Our Farewells | The staff credits theme. | 5:45 |
| #61 | Thanks For Playing! | Plays over the Records screen after the credits. | 0:54 |
| #62 | You Are A Super Player! | Plays on the two-screened image after beating Hard Mode. | 0:47 |
Sound Test[]
In the Radio Player, there is a Sound Test. Unlike in the Radio Player, Rhea and Tethys are nowhere to be seen, and does not need Tape Recordings to unlock, as they are all unlocked from the beginning. The Sound Test plays voice clips of other characters like Mario and Luigi, and sounds like the text bubble speech and the attack rating sound effect.
Hard Mode[]
Hard Mode is an unlockable extra mode that is unlocked once the player completes the game on a save file at least once. Once the player resets that file and reopens it, after the introduction cutscene and after leaving Peach's Castle at the beginning of the game, a Toad will come up to Mario and Luigi, asking them if they want to wear "a pair of "something" that [he] found on the ground one time while [they] were on [their] previous adventure". If the bros choose to wear the item (though they are warned beforehand that "the consequences will be fatal" and "[they] will not be able to take it off after wearing it"), the Toad gives them the item, which activates the game's Hard Mode, though if they refuse, the Toad will leave, and they will not be able to get the item ever again on that file. After it is activated, the player cannot get out of this mode without resetting the file. In this mode, there are some notable changes:
- Enemies are more stronger; having slightly higher POW and DEF stats, though their others stats are left untouched.
- Mario and Luigi's solo Jump and Hammer and the Ally's solo attacks have stricter Action Command timing.
- The bros can only carry up to ten amounts of each item (twelve in the PAL and Japanese versions).
- Items and Clothing now cost slightly more coins in shops.
- Bros. and Special Attacks cost an extra one point of BP/SP.
- The recommended level for facing bosses in the Boss/Nostalgic Gauntlet have increased by five (three in the PAL and Japanese versions).
- The bros will have the Daredevil Pendant on their overalls.
- The minigames are harder; Koopa the Quick's races are slightly more trickier as he runs much faster (though the courses remain unchanged), and the Circus Dexterity Courses are always on their "Skilled" difficult layout (and as such, player cannot play this minigame without learning the Ball Bros. move beforehand).
- When the player receives a Game Over, they are immediately taken to the title screen, thus giving them no chance to retry the battle.
- Recovery Blocks are completely absent.
- The player cannot save manually, they can only save at Save Blocks.
Upon beating the final boss in Hard Mode, the player will receive dialogue from a mysterious voice, telling them that [they] are a "super player" (a reference to Super Mario Bros.: The Lost Levels), and telling them that [they] get to view a "special surprise"; a two-screened image featuring all the main characters and main bosses in the game, similar to Mario & Luigi: Dream Team. Also, they will be given the "You Are A Super Player!" Tape Recording afterwards.
New Game +[]
New Game + (also known as New Game Plus or shortened to NG+) is an unlockable extra mode that is unlocked once the player achieves 100% completion on a save file at least once, shown by five shiny stars (★) on their file. To achieve this, the player is required to complete the following criteria prior to fighting the final boss:
- ★ Find and dig out all groundhollows in the game.
- ★ Find and hit all Blocks in the game, including Hidden Blocks, not counting Recovery, Roulette and Save Blocks.
- ★ Complete every sidequest in the game.
- ★ Obtain all trophies from the Boss / Nostalgic Gauntlet.
- ★ Defeat Skelletodactyl in the Trial Abyss.
After completing one of these objectives listed, a shiny star (★) will appear on their save file, and once the player has five of these on their file and they beat the final boss, the player will be given the option to "START A NEW GAME +" on the Touch Screen of the file select, and selecting this will create a third save file (effectively giving them three save files unlike other Mario & Luigi games besides Mario & Luigi: Superstar Saga) different from the other two files (and being gold and shiny from others). Banktoad will even show up after the player leaves Peach's Castle at the beginning of the game, informing Mario and Luigi that the coins and items stored in the Toad Town Bank previously have been carried over to this file for them to collect (however, some items will fail to carry over; the only downside is that the player will not be able to collect them on that file), thus giving the player a starting advantage on that file.
Sidequests[]
- See also: Expert Challenges and the Boss Gauntlet / Nostalgic Gauntlet.
A list of sidequests Mario and Luigi can complete in the game. Though these quests are optional to beat the game, they are needed for 100% completion, which in turn unlocks the New Game + mode.
Toadette's Records[]
In Toad Town, Toadette can be found inside her own Toad House designed after her mushroom cap. Her role is similar to the Information Booth shopkeeper's role in Mario & Luigi: Superstar Saga + Bowser's Minions; while she does allows the player to scan compatible amiibo to fill out what she calls an "amiiboard", she also looks at the player's records, and awards items based on their progress with Blocks, Beans, the number of battles won, the number of enemies defeated, the number of Excellent attacks done and the number of battles fled from.
| Record Requirement | Reward | Reward | Record Requirement |
|---|---|---|---|
| 100 Battles Fought | 200 Battles Fought | ||
| 300 Battles Fought | 400 Battles Fought | ||
| 125 Enemies Defeated | 250 Enemies Defeated | ||
| 375 Enemies Defeated | Tape Recording (Here We Go!) | 500 Enemies Defeated | |
| 150 Excellent Ratings | 300 Excellent Ratings | ||
| 600 Excellent Ratings | Tape Recording (Square Up!) | 1200 Excellent Ratings | |
| 25 Battles Fled | 50 Battles Fled | ||
| 25% of Beans Uncovered | 50% of Beans Uncovered | ||
| 75% of Beans Uncovered | 100% of Beans Uncovered | ||
| 25% of Blocks Found | Tape Recording (Having A Ball) | 50% of Blocks Found | |
| 75% of Blocks Found | 100% of Blocks Found |
Bestiary Log[]
In Toad Town, a Toad named "Monstoad" can be found inside a Toad House, who has a project to do for Funguspore Elementary, doing some research on the creatures of the Mushroom Kingdom, but he does not want to go out in the open. He then asks the Mario Bros. if they will go out and help him, telling them they will reward the bros with items for them. This sidequest cannot be done early on in the game, though when the player acquires Tethys, they can use his visor to scan the enemies in the overworld or in battle to add them to the log. Here is a list of rewards that the player can receive for doing this sidequest:
- 10 enemies added to the log: 4 Health Beans
- 20 enemies added to the log: 4 Bros. Beans
- 30 enemies added to the log: 2 Power Beans and Defense Beans
- 40 enemies added to the log: 2 Speed Beans and Flex Beans
- 50 enemies added to the log: 6 Golden Beans
- 56 enemies added to the log: 4 Golden Mushrooms
- All 64 enemies added to the log: Smartypants Wear
If the player does not visit his house and scan all 64 enemies in the game before going inside, Monstoad's dialogue will change, which nearly results in him suffering from shroomshock, and he will give the rewards he would normally give from adding a certain number of enemies to the log. Note that all bosses, support enemies and the enemies in Bittercold Tent do not need to be scanned for the Log.
Wiggler Garden quest[]
After the Wiggler boss fight, Rhea promises Wiggler that Mario and Luigi will bring back some flowers for his garden. In a few locations of the game, a certain NPC owns a flower shop (Toad Town; a female Toad, Rabbit Village; a female rabbit wearing a straw bug-net hat, Cragnelburg; a Cactaceonian with a straw hat, and Bittercold Isle; a Beanish character wearing an eskimo parka. The former two locations have their flower shops closed until after the boss fight), selling flowers for 100 coins each. After buying flowers from all four locations and bringing back to Wiggler, he will reward them with the Bouquet Wear.
Bittercold Tent minigames[]
Circus Battle Wave[]
The Circus Battle Wave is the game's battle endurance mode, where Mario and Luigi face off an endless wave of Jester Guys, Ringmaster Bros. and Lion Chomps until they either forfeit, both faint from hitting zero HP, or all audience members leave. During these events, Expert Challenges cannot be completed. The audience, consisting of Ice Bros., Ice Snifits, Mr. Blizzards, Snow Spikes and Ninjis, can be seen in the background, and will either help or hinder the bros depending on how well they perform Action Commands for attacks. Later on, the enemies will get stronger and stronger. If both bros faint, forfeit at will, or all audience members leave, the mode ends, and Emcee Guy will give them coins depending on how far they went before going down. Once reaching a certain wave of enemies, Emcee Guy will give the bros a prize for the first time (after this, he will just give them 3 random kinds of Beans):
- Reaching Waves 1-24: 150
- Reaching Wave 25: Clown Boots
- Reaching Waves 26-49: 300
- Reaching Wave 50: Juggler Gloves
- Reaching Waves 51-74: 600
- Reaching Wave 75: Jester Wear
- Reaching Waves 76-99: 1200
- Reaching Wave 100: Ringmaster Wear
Circus Skillathon[]
The Circus Skillathon is the game's Bros. Attack endurance mode, which is similar to the Mad Skillathon from Mario & Luigi: Dream Team and the Attackathon from Mario & Luigi: Paper Jam. After hitting S rank scores for all Bros. Attacks, the bros will be rewarded with the Master Wear.
| Bros. Attack | Challenge Description | B-Rank Prize (250) | A-Rank Prize (500) | S-Rank Prize (1000) |
|---|---|---|---|---|
3D Red Shell |
Kick the Red Shell at enemies to score points! Use |
100 coins, 15 Expert Challenge Points | 150 coins, 30 Expert Challenge Points | 300 coins, 70 Expert Challenge Points |
| no image Tennisbomb Rally |
Keep the rally going by pressing |
100 coins, 15 Expert Challenge Points | 150 coins, 30 Expert Challenge Points | 300 coins, 70 Expert Challenge Points |
Kite Crash |
Mash |
100 coins, 15 Expert Challenge Points | 150 coins, 30 Expert Challenge Points | 300 coins, 70 Expert Challenge Points |
| no image Mirage Mirror |
Press |
200 coins, 30 Expert Challenge Points | 300 coins, 60 Expert Challenge Points | 600 coins, 140 Expert Challenge Points |
Mega Thwonk |
Press |
200 coins, 30 Expert Challenge Points | 300 coins, 60 Expert Challenge Points | 600 coins, 140 Expert Challenge Points |
| no image Umbriel Cannon |
Mash |
200 coins, 30 Expert Challenge Points | 300 coins, 60 Expert Challenge Points | 600 coins, 140 Expert Challenge Points |
Circus Dexterity Course[]
The Circus Dexterity Course is a timed obstacle course minigame that has three difficulty settings that can be chosen before starting the course; Cakewalk, Normal and Skilled, with the last two settings can only be chosen if the bros have learned the Bros. Ball technique. The bros much go through the course using the techniques they have learned to reach the end without touching the ground or running out of time, so they can move on to the next stage. Scattered around the course are + Clocks that will increase the time, with cyan clocks adding three seconds and green clocks adding five seconds. Depending on how far the bros reached in the minigame before the mode ends, they will earn a reward.
- Reaching Course 4: 100 (Cakewalk) / 150 (Normal) / 200 (Skilled)
- Reaching Course 6: 200 (Cakewalk) / 300 (Normal) / 400 (Skilled)
- Reaching Course 8: 250 (Cakewalk) / 500 (Normal) / 700 (Skilled)
- Reaching Course 10: 750 (Cakewalk) / 900 (Normal) / 1000 (Skilled)
Koopa the Quick footraces[]
In five locations of the game (Briskbreeze Fields, Craggy Desert, Plumdrop Rainforest, Sapphire Shore and Bittercold Isle), Mario and Luigi can find Koopa the Quick from Super Mario 64 and its DS remake (who sports a new design; having a red bandana scarf, red sneakers with white cuffs, and gloves, referencing Sonic the Hedgehog). By talking to him, he will ask the bros if they want to race him. If the bros accept the challenge, Koopa the Quick will race against the bros on foot. It is optimal to use the ability to dash using the Dash Socks to beat him. After beating him, Koopa the Quick will reward them with a Clothing, and will go to another location, faster than before.
After beating Koopa the Quick five times, he will reward the player with the Supasprint Boots. After this, if the player goes back to the places where they originally found Koopa the Quick in, the Roving Racers can instead by found, where they can be raced as normal (by talking to the green Roving Racer), though they will instead reward Mario and Luigi with coins depending on how fast they finish the race before the other racers.
- Beating Koopa the Quick for the first time: Sprint Gloves
- Beating Koopa the Quick for the second time: Speed Scarf DX
- Beating Koopa the Quick for the three time: Turtleneck Wear
- Beating Koopa the Quick for the fourth time: Turtle Shell
- Beating Koopa the Quick for the fifth time: Supasprint Boots
amiibo[]
Mario & Luigi: Sage Quest has amiibo compatibility, just like in Mario & Luigi: Paper Jam and Mario & Luigi: Superstar Saga + Bowser's Minions. Only Super Mario-related amiibo are compatible (meaning the Super Smash Bros. line Mario figure is compatible). In Toad Town, Toadette gives the bros the "amiiboard", which allows the player to scan amiibos to grant stamps, which can be redeemed for prizes, though only four amiibos can be scanned on the board at once, and they cannot redeem the same stamps twice in one day. Here is a list of compatible amiibos:
| amiibo Figurine | Prize | Prize | amiibo Figurine |
|---|---|---|---|
 Mario |
 Luigi | ||
 Peach |
Peachy Crown (PAL) |
 Bowser | |
 Toad |
 Bowser Jr. | ||
 Wario |
 Rosalina | ||
 Boo |
 Donkey Kong | ||
 Waluigi |
 Daisy |
* - Can only be acquired once first scanning the amiibo.
Similarities/Differences from other Mario & Luigi games[]
- The game still keeps the same graphics as the other Nintendo 3DS Mario & Luigi titles, though the visuals are similar to Mario & Luigi: Superstar Saga + Bowser's Minions / Bowser's Inside Story + Bowser Jr.'s Journey.
- The game features the Ally system, where certain Allies can help out the bros similar to Partners in the original Paper Mario and Paper Mario: The Thousand Year Door.
- The very first battle is not a boss battle, similar to Mario & Luigi: Paper Jam.
- Giant battles are completely absent from this game.
- Mario and Luigi can now switch from Jump and Hammer defense in battle by using and .
- The Battle Ring (now renamed the Boss Gauntlet) functions similarly to its appearance in Mario & Luigi: Dream Team, though the set amount of turns is displayed by a Time Bob-omb, which reappears from Mario & Luigi: Superstar Saga / Superstar Saga + Bowser's Minions.
- Badges return, replacing the Battle Cards from Mario & Luigi: Paper Jam. The badge mechanic is similar to Mario & Luigi: Dream Team's badge mechanic.
- Bonus points that are applied to stats upon leveling up return in this game, and as such Lakitu reprises his role from other Mario & Luigi games. A Fishin' Boo also appears, in place of Lakitu when the bros venture through Conundrum Manor.
- Some characters absent from Mario & Luigi: Paper Jam return in this game, notably Toadsworth and the Elite Trio (Private Goomp, Corporal Paraplonk and Sergeant Guy), though a few characters like the Koopalings never appear in the game.
- There are six ranks in this game, similar to Mario & Luigi: Bowser's Inside Story, and being one less rank than in Mario & Luigi: Paper Jam. The Boomerang Rank is the only removed rank from Paper Jam, and each rank is achieved when the player reaches a level number which is a multiple of 8.
- The Spin Jump returns in this game, and other out-of-battle moves from previous games return (ex. the Mole and Mini-Mario moves from Mario & Luigi: Dream Team, the High Jump (renamed Spring Jump) move from Mario & Luigi: Superstar Saga / Mario & Luigi: Superstar Saga + Bowser's Minions, and the Ball Bros. (renamed Bros. Ball) move from Mario & Luigi: Partners in Time, although it is reworked.
- Blocks in the overworld now use 2D sprites similar to Mario & Luigi: Superstar Saga + Bowser's Minions / Bowser's Inside Story + Bowser Jr.'s Journey. Command Blocks also retain their size from the two mentioned games.
- Special, rank-specific shops return from Mario & Luigi: Bowser's Inside Story / Dream Team.
- Bros. Attacks are now obtained through Attack Pieces.
- There is now a battle endurance and a survival mode, seen in Bittercold Tent, accompanied with a Bros. Attack endurance mode.
- The player now plays through two major locations (Mushroom Kingdom for the most part, and Moonshade Kingdom) in this game, unlike in Mario & Luigi: Dream Team, where the player only plays through Pi'illo Island, and in other games, where the player mainly plays through the Mushroom Kingdom only (a possible exception is Mario & Luigi: Partners in Time, where the player also visits the Mushroom Kingdom in the past).
- The player now loses coins when running from battles (with the exception of running from battles in the Bittercold Tent), and the Flee option can be cancelled with the , similar to other entries like Mario & Luigi: Partners in Time.
- The Golden Mushroom from Mario & Luigi: Superstar Saga / Superstar Saga + Bowser's Minions (which functions differently), the Peppers from the first two Mario & Luigi games, and the Secret Box from Mario & Luigi: Dream Team return in this game. The Flash Bomb may be an improved version of the Shock Bomb from Dream Team (in fact, its sprite can be found in the game's files). Also, the Cobalt Necktie reappears as an Accessory from the former mentioned game.
- The player can place pins on the zoomable map on the Touch Screen similar to Mario & Luigi: Superstar Saga + Bowser's Minions / Bowser's Inside Story + Bowser Jr.'s Journey. The player is given twenty pins for each area and can remove a pin by tapping on it twice.
- Scratch/Bonus Cards from Mario & Luigi: Bowser's Inside Story reappear (though Fawful's head is replaced with Bowser's symbol in the Mushroom Kingdom and Eclipsa's symbol in the Moonshade Kingdom).
- Hard Mode from Mario & Luigi: Dream Team reappears in this game.
- Most sound effects from Mario & Luigi: Superstar Saga + Bowser's Minions / Bowser's Inside Story + Bowser Jr.'s Journey are carried over to this game. Mario and Luigi also make sounds whenever they get hit, whenever they fail a solo Action Command (ex. a failed solo Jump command), and during some Bros. Attacks.
- A Sound Test is now added, which is now available in the Radio Player option on the file select screen after beating the game.
- Bosses turn/flash red (or different colors) when low on health and are given new attacks like in Paper Jam / Superstar Saga + Bowser's Minions / Bowser's Inside Story + Bowser Jr.'s Journey.
- Mario and Luigi can now stomp on spiked/fire enemies when counterattacking when they have the Iron Boots (DX)/Frost Boots (DX) equipped.
Pre-release and unused content[]
- Unused enemy/boss sprites and data for Stumplings, regular Bloopers, a large tree boss called Pentuproot in the files, Mechakoopas (only their data was not unused, which was later altered and used in Bowser Jr.'s battle with Kamek), Scaredy Rats, Spiny Cheep Cheeps, Spiky Snifits from Mario & Luigi: Superstar Saga (which has a minor sprite alteration) can be found in the game's files. Attempting to load them in a battle and will mostly cause the game to softlock when they try to attack (trying to load Pentuproot will freeze the game immediately), with the exception of the Bloopers, Scaredy Rats and Mechakoopas, and they can be defeated, though they will not yield any Coins or EXP. An unused sprite for the Spiny Cheep Cheep with their "mohawk" hair just like normal Cheep Cheeps can also be found, which possibly means they would act similar to how they did in Mario & Luigi: Superstar Saga + Bowser's Minions.
- Shy Guy Airtubs were formerly going to be background enemies, similar to how they were in Mario & Luigi: Dream Team. Also, originally defeating the Shy Guy Airtub would allow the Shy Guys piloting the mini-airship to be battled, though after defeating it the Shy Guys piloting the airship will be instantly defeated and its the airship which leaves behind Coins and Items.
- An unused Bros. Attack, called "Seesaw Stomp", can also be found in the game's files, and can be accessed via codes and used in-game (costing 8 BP). It involves Mario getting out a seesaw and placing it on the ground. Luigi will jump on one side of the seesaw and Mario jumps on the other side, launching Luigi at the selected enemy to stomp on them and leap back at the seesaw for Mario to do the same. Depending on what bro is going to stomp on the enemy, the player must press for Mario or for Luigi to continue the move, with the sequence gradually getting faster as it goes along. As the move shares the same BP usage as Mirage Mirror, it can be assumed that said Bros. Attack possibly replaced the Seesaw Stomp.
")
- The Shock Bomb from Mario & Luigi: Dream Team would have reappeared as an item, retaining its function from the aforementioned game. In the final game, however, the item is not obtainable, as it is replaced with the Flash Bomb, which functions similarly but it also instantly destroys Ghost enemies and deals set damage to Ghost bosses like Jumb-Boo and King Boo. Its sprite can be found in the game's files.
- The Spooky Speedster from Super Mario Galaxy would have made an appearance in the Conundrum Manor, where Mario and Luigi would have raced against him in a similar manner to Koopa the Quick to move on, featuring a much complex and challenging race course to continue trekking through the area, but this was scrapped in the final game. Sprites and dialogue for him can be found in the game's files. Here is a quote he would say when talked to:
- "Ehee hee hee! Well, if it isn't you! I may not remember your name, but I do remember the time we had to race for a Power Star in the cosmos! If you want to get pass me, you'll have to race against me! If you win, I'll let you through. Sounds fair?"
- Originally Mario and Luigi would obtain the Firebrand and Thunderhand techniques respectively, from Mario & Luigi: Superstar Saga, in this game. They never obtain this ability in the final game, though the Shadow Bros. use these abilities during their boss fight (including the Fire Bros. and Thunder Bros. Bros. Attacks). It is unknown where or how the bros would get these abilities.
References to other games[]
- Donkey Kong: One of the bros. upgrades upon leveling up to the higher ranks is known as "Jump Man", which could be a nod to this game as Mario's original name was Jumpman before being renamed.
- Super Mario Bros.: The Lost Levels: Upon beating the game in Hard Mode, a mysterious voice calls the player a "super player", and the track "You Are A Super Player" can be heard on the two-screened image the player sees after the Records Screen (and is obtained after beating Hard Mode). These are a reference to the message that comes from this game once the player receives a Game Over in World 9, which reads "YOU'RE A SUPER PLAYER! WE HOPE WE'LL SEE YOU AGAIN. MARIO AND STAFF".
- Super Mario Bros. 3: One of the attacks from the Poison Blooper references the Blooper Babies that debut in this game. Stretch portraits can be seen in the Conundrum Manor, and one of the attacks from Jumb-Boo references the Stretches.
- Super Mario World: Bony Beetles and Fishin' Boos make their series debut in this game. An Eerie and Circling Boo Buddies portraits can be seen in Conundrum Manor, the latter being referenced in one of Jumb-Boo's attacks. Also, a portion of the "Enigmansion Interior" and "Koopa Troop Frontier" track is taken from the Ghost House and Castle theme in this game respectively.
- Super Mario World 2: Yoshi's Island: Pyro Guys make their series debut in this game.
- Super Mario RPG: Legend of the Seven Stars: Queen Calamaria is possibly a reference to King Calamari, a boss in the game, fought in Sunken Ship, and Sergeant P. Beetle and his Para-Beetle troops is a reference to Sergeant Flutter and his Sky Troopa troops. The late-game support enemy Moon Clock acts similar to Count Down, a late-game boss fought in the Factory from this game. Also, the inns debut in the series from this game.
- Super Mario 64 / Super Mario 64 DS: Koopa the Quick, Snufits, Mr. Blizzards and Scuttlebugs make their series debut in this game. The track "Day At The Races" is a cover of the fanfare that plays before you race against Koopa the Quick and the Big Penguin from this game.
- Mario Party 2: The name of the "Day At The Races" track is named after the minigame of the same name from this game.
- Paper Mario: Tweesters, Gloombas and Koopatrols make their series debut in this game. The "Ally" system is similar to the Partner system from the game, and different colored Magikoopas act similar to how they did from the game as well. Lastly, a Lady Bow portrait can be found in the Conundrum Manor.
- Luigi's Mansion: King Boo laments the time how he trapped Mario in a painting, and Luigi had to defeat him with "a vacuum" when the bros first encounter him in the game. The main theme of Luigi's Mansion can also be heard in Conundrum Manor's theme. A Boolossus portrait can also be seen in the Conundrum Manor, along with the other Luigi's Mansion' Ghosts and Boos.
- Super Mario Sunshine: Cataquacks make their series debut in this game.
- Paper Mario: The Thousand Year Door: The Trial Abyss location and the Shroom Coupon item is similar to the Pit of 100 Trials location and the Inn Coupon item respectively. The optional boss, Skelletodactyl, may be a reference to Bonetail considering they both are undead dragons residing in some sort of pit, having died of old age without eating anything for centuries (said boss even has Bonetail's Dangerous Breath attack which inflicts a status effect based on what color the breath is), and the Jumb-Boo boss may be a refernce to the Atomic Boo boss in Creepy Steeple.
- Mario & Luigi: Superstar Saga: The High Jump move (renamed Spring Jump), the Golden Mushroom item, the Cobalt Necktie equipment (now listed as an Accessory), some Block types, the Heavy G and Light G effect (seen when the player wears the Heavyweight Wear and Lightweight Wear), the Red and Green Pepper items, and the Mecha-Chomp, Goomdiver, Mecha-Blooper and Ice Snifit enemies reappear in this game. Wiggler's boss battle is somewhat similar to his battle in this game, and the Shroombeans Cafe is a callback to the Starbeans Cafe (which references the Starbucks Cafe, and the Beaniespresso's name is based off of the Espresso coffee drink). Trunkpleasant's speech is similar to Fawful's speech sans the several food metaphors and references (he makes tree and plant references instead), and their names are similar as they both come from derogatory words ("unpleasant" and "awful"). Also, the Hammer defense in Hard Mode is similar to this game's own (holding down the button for too long will cause the Hammer's hammerhead to fall off), the Nostalgic Gauntlet houses the Trunkle and Popple boss battles (specifically the latter's third battle) from this game (in which the game's boss battle theme can be heard in), and the Time Bob-omb reappears in the Battle/Nostalgic Gauntlet as well.
- Mario & Luigi: Partners in Time: The Rexes's attacks are similar to the Shroob Rexes from the game. The Bros. Ball. move (renamed Ball Bros. and reworked) and the Blue Pepper item from this game return, and the final battle takes place on a platform in the sky similar to Elder Princess Shroob's battle from the same game. Also, the Nostalgic Gauntlet houses the Sunnycide and Ms. Thwomp boss battles from this game (in which the game's boss battle theme can be heard in).
- Super Mario Galaxy: A portrait of a Boo that looks similar to the Spooky Speedster (though it is much smaller and has a different colored helmet and visor) and a portrait of three Bomb Boos can be seen in the Conundrum Manor.
- New Super Mario Bros.: Snow Spikes make their series debut in this game. A Balloon Boo portrait can be seen in Conundrum Manor, and the Game Over jingle can also be heard when the player receives a Game Over.
- Mario & Luigi: Bowser's Inside Story: The Scratch Cards mechanic, and the Sick status ailment reappear in this game. During Tethys's and Skelletodactyl's boss battle, Starlow appears and the bros can grab onto her once they take sufficient damage. The track "Bros. Seminar" is a cover of the tutorial theme from this game. Also, the Nostalgic Gauntlet houses the Bowser Memory ML and Dark Star boss battles from this game (in which the game's boss battle theme can be heard in).
- New Super Mario Bros. Wii: Kamek was about to disguise himself as Princess Peach again, and Stone Spikes and Stone Coasters make their series debut in this game.
- Super Mario 3D Land: Fake Bowser (Bowser?)'s design is similar to its design in this game. A Peepa portrait can be found in the Conundrum Manor.
- New Super Mario Bros. 2: A portrait of Boohemoth can be seen in the Conundrum Manor.
- Paper Mario: Sticker Star: Poison Bloopers make their series debut in this game. Also, the track "Enigmansion Interior", which plays in the Conundrum Manor, is named after the level of the same name from this game.
- New Super Mario Bros. U: Nabbit makes a cameo late in the game, and a portion of the snow overworld theme from this game is played in Bittercold Isle.
- Luigi's Mansion: Dark Moon: King Boo sends Mario and Luigi to the Paranormal Dimension for his boss battle, a nod to his boss fight in the mission, "A Nightmare to Remember". The segment where King Boo sends the bros into a mansion hallway where they must run away from him is similar to a part of the mission as well. Portraits of Luigi's Mansion: Dark Moon's Ghosts and Boos can be seen.
- Mario & Luigi: Dream Team: The game runs on the same engine used in this game. The graphics, Attack Piece Block design and the Elite Trio's/Kamek's battle are similar, all of Mario and Luigi's battle animations are reused, the Badge system and the game's Hard Mode returns, and some Rank-Up Bonuses, the Secret Box item and the Shy Guy Airtub reappear in this game as well. Lastly, the Nostalgic Gauntlet houses the Pi'illodum and Antasma boss battles (in which the game's boss battle theme can be heard in).
- Super Mario 3D World: The Bullies reuse their design from this game (though they are recolored to have black bodies). Parabones and Hisstocrat make their series debut in this game as well. Also, a portion of the Ghost House theme from this game can be heard in the "Enigmansion Interior" track.
- Captain Toad: Treasure Tracker: Draggadon makes its series debut in this game.
- Mario & Luigi: Paper Jam: The fancy spin Mario and Luigi perform after stomping on an enemy once, the Drill Shell and Mega Thwonk Bros. Attacks, some of (Polluted) Petey Piranha's, King Boo's, Bowser Jr.'s and Kamek's moves, and some Expert Challenges are reused from this game. Also, Toadette references the events of this game (and even has the Papercrafts from this game as well), and the Nostalgic Gauntlet houses the King Bob-omb and Dry Bowser boss battles (in which the game's boss battle theme can be heard in).
- Paper Mario: Color Splash: Most enemies now speak during battles similar to this game (in fact, some enemies use the exact same quotes said from this game), though this option can be turned off.
- Mario & Luigi: Superstar Saga + Bowser's Minions: Some sprites are directly ripped from the game (some of the Command Block sprites and the Spear Guy sprite are ripped). The same goes for some of the sound effects (like the attack rating sound effect) and voice clips (like Mario and Luigi's voice clips).
- Super Mario Odyssey: The Tostarenans, Chinchos, the Broodals, Madame Broode, and the Roving Racers make their series debut in this game. Toadette also references her time as the Toad Brigade's archivist when talked to in-game.
Gallery[]
")
")
")
")
")
")
")
")
")
")
Trivia[]
- The game was released on Mario & Luigi: Dream Team's eighth anniversary in Japan.
- Many, if not all characters from and areas of the Moonshade Kingdom are named after natural satellites in the Solar System (with the exception of Eclipsa, who is named after an astronomical event that occurs when an astronomical object is temporarily obscured).
- The creator of this article is also aware that there is another character named "Eclipsa".
- The S.S. Boletus's name comes from "Boletus"; a genus of mushroom-producing fungi.
- Lunar Bowser is the third final boss to not use a 2D sprite, instead being a 3D model, the first being Shiny RoboBowser from Mario & Luigi: Paper Jam and Cackletta's spirit form from Mario & Luigi: Superstar Saga + Bowser's Minions.
- Titan also uses a 3D model, making it the first boss to do this.
- This is the fourth Nintendo 3DS Mario title to receive a patch, the first being Mario Kart 7, Mario & Luigi: Dream Team and Mario & Luigi: Bowser's Inside Story + Bowser Jr.'s Journey. The patch fixes some freezing/crashing glitches, any known out-of-bounds glitches and glitches involving the Ball Dash, and was released during the month of September.
- The name of the "A Winner Is You!" track possibly references the popular NES game Pro Wrestling.
- Broozers reference Mr. Sandman and Super Macho Man from the Punch-Out!! series with their quotes.
- Credit goes to PMF11 (t∣b∣c) for the Seesaw Stomp and Boulder Smash icons (which were slightly edited by yours truly (t∣b∣c)), and to ShyGuyXXL for the Mecha-Chomp sprite.
| OwtheEdgehog's Projects | ||||
|---|---|---|---|---|
s denotes a sysop approved project. | ||||
|